Kia Rio: Sunroof / Sunroof Assembly
Components and components location
| Components |
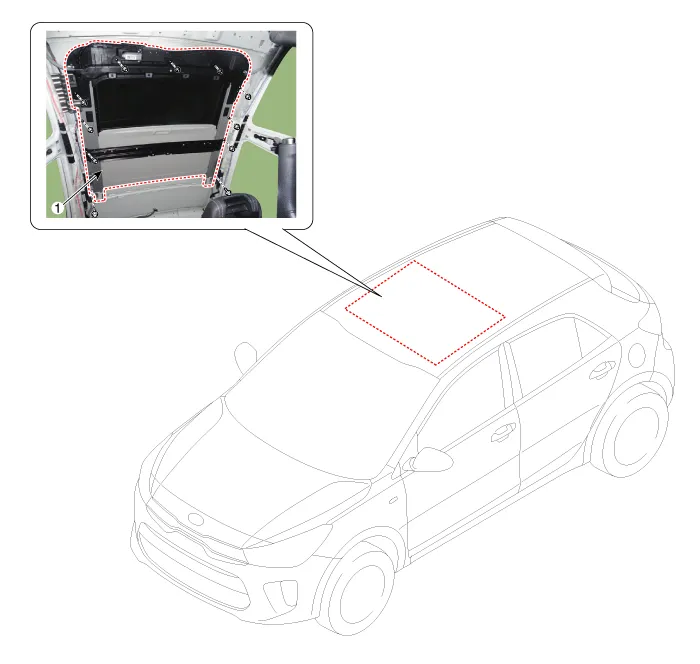
| 1. Sunroof assembly |
Repair procedures
| Replacement |
|

| 1. |
Remove the roof trim. (Refer to Roof Trim - "Roof Trim Assembly") |
| 2. |
Remove the sunroof glass. (Refer to Sunroof - "Sunroof Glass") |
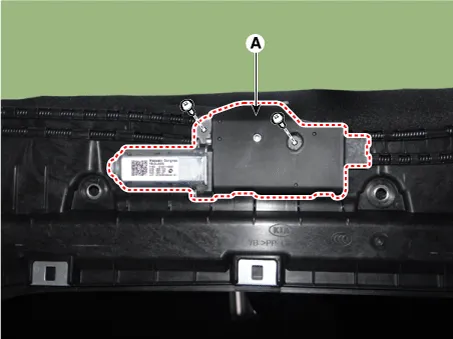
| 3. |
Loosen the mounting screws and remove the sunroof motor (A).
|
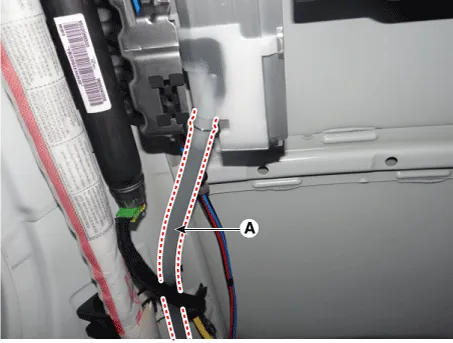
| 4. |
Remove the drain hose (A).
|
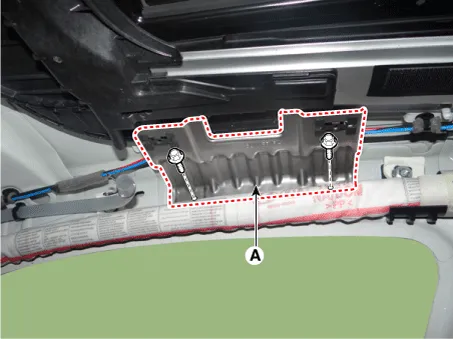
| 5. |
Remove the front assist handle bracket (A) after loosening the mounting bolts.
|
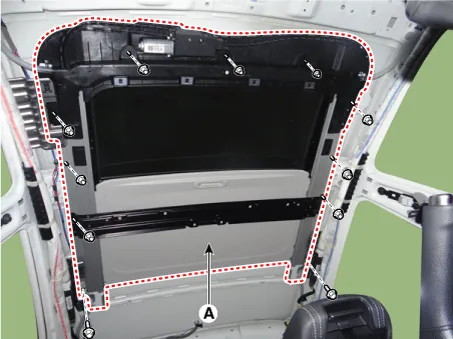
| 6. |
Remove the sunroof assembly (A) after loosening the nuts and bolts.
|
| 7. |
Install in the reverse order of removal.
|
Repair procedures Replacement 1. Open the glass fully. 2. Remove the mounting pins (B), and then remove the deflector (A).
Repair procedures Replacement 1. Remove the sunroof assembly. (Refer to Sunroof - "Sunroof Assembly") 2.
Other information:
Kia Rio 2017-2023 YB Service Manual: PTC Heater
Description and operation Description The PTC (Positive Temperature Coefficient) heater is installed at the exit or the backside of heater core. The PTC heater is an electric heater using a PTC element as an auxiliary heating device that supplements deficiency of interior heat source in highly effective diesel engine.
Kia Rio 2017-2023 YB Service Manual: Heater & A/C Control Unit (FATC)
Components and components location Components Connector Pin Function No. Connector A Connector B 1 Battery ⁻ 2 ISG battery (+) ⁻ 3 Illumination (+) ⁻
Categories
- Manuals Home
- Kia Rio Owners Manual
- Kia Rio Service Manual
- Steering System
- Body (Interior and Exterior)
- Maintenance
- New on site
- Most important about car
