Kia Rio: Rear Seat / Rear Seat Back Cover
Components and components location
| Component Location |
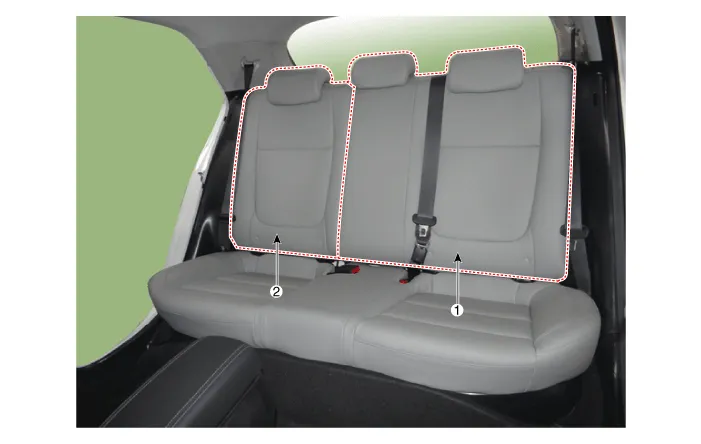
| 1. Rear seat back cover [LH]
|
2. Rear seat back cover [RH]
|
Repair procedures
| Replacement |
Put on gloves to protect your hands. |

|

[LH]
| 1. |
Remove the rear seat assembly. (Refer to Rear Seat - "Rear Seat Assembly") |
| 2. |
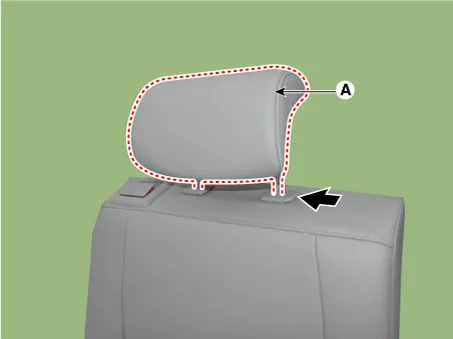
Push the lock pin and remove the rear seat headrest (A).
|

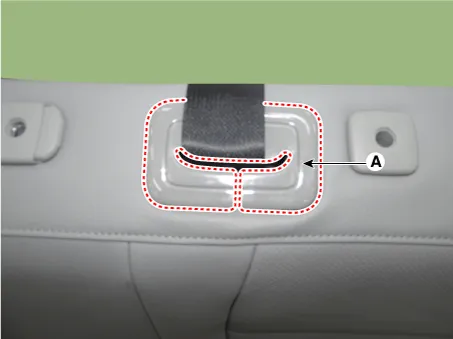
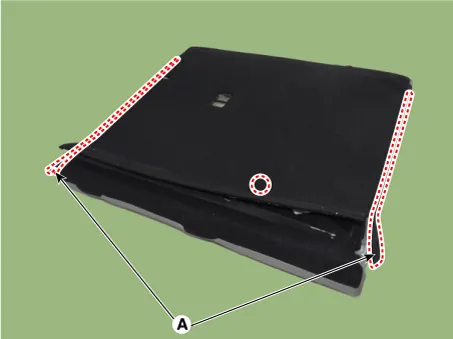
| 3. |
Remove the rear seat back webbing guide (A) by using a remover.
|
| 4. |
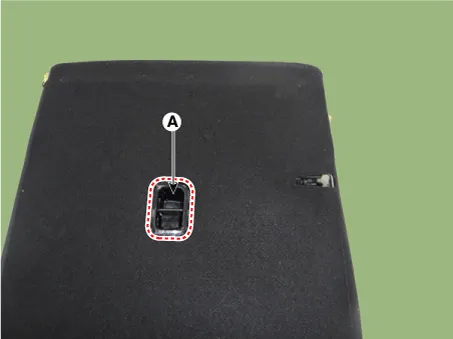
Remove the bezel upper cover (A) by using a remover.
|
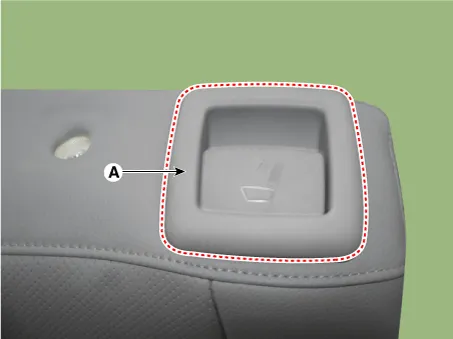
| 5. |
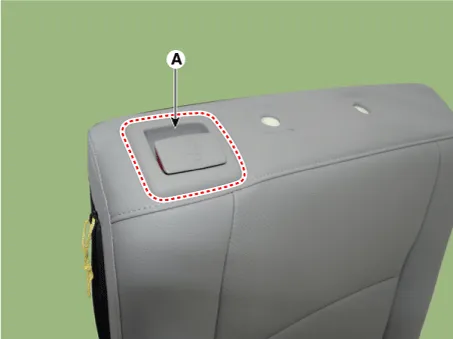
Remove the child anchor cover (A) by using a remover.
|

| 6. |
Disconnect the rear seat back dust cover (A).
|
| 7. |
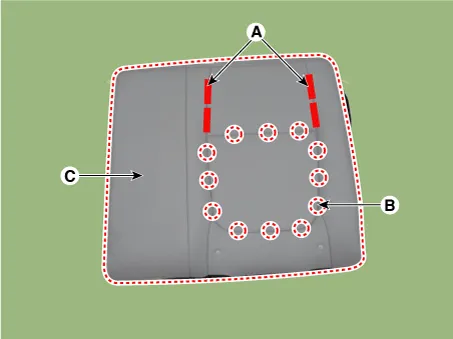
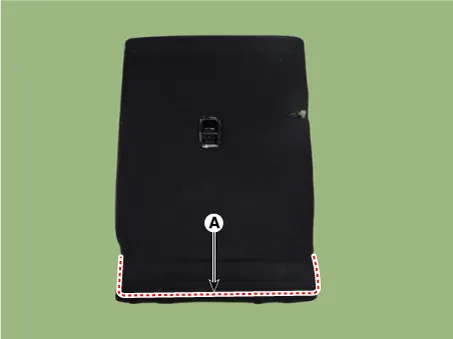
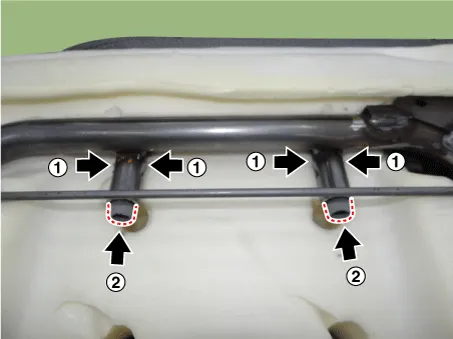
Remove the hog-ring clips (A).
|

| 8. |
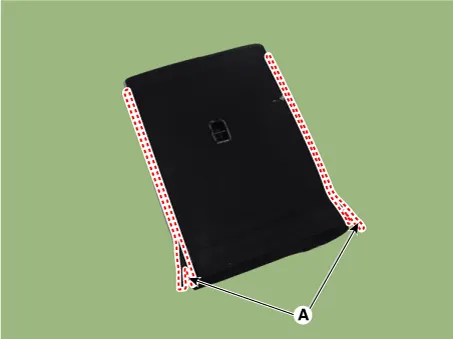
Open the seat back side zipper (A).
|
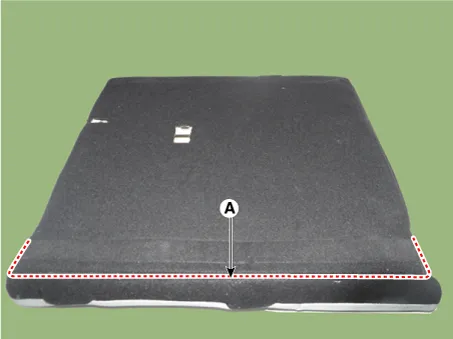
| 9. |
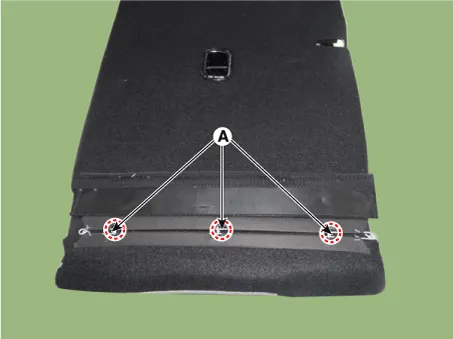
Remove the back board (A) after removing the hog-ring clips.
|
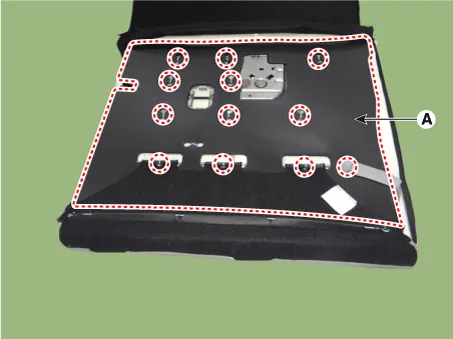
| 10. |
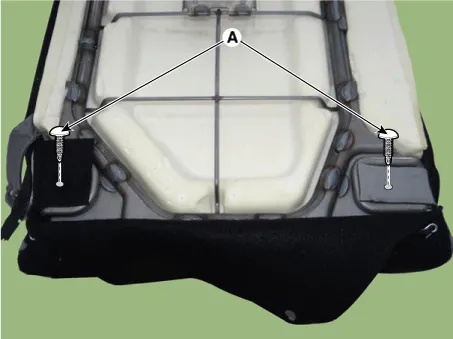
Remove the back cover mounting clips (A).
|
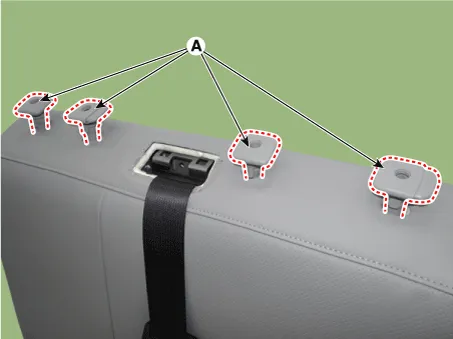
| 11. |
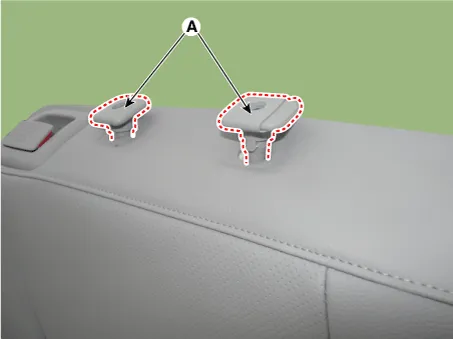
Push the rear seat headrest guides (A) while pinching both sides of the lower part of the guides, and remove them.
|

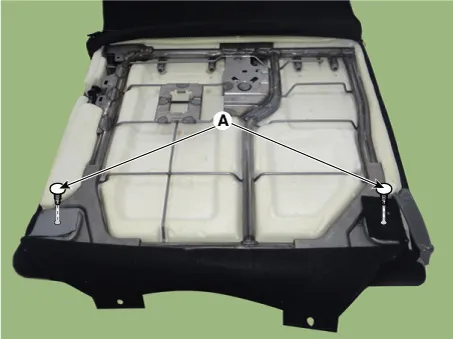
| 12. |
Remove the rear seat back cover from the frame. |
| 13. |
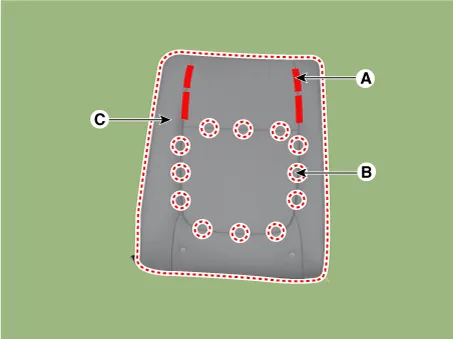
Remove the front seat back covering (C) after removing the velcro tape (A) and hog-ring clip (B).
|
| 14. |
Install in the reverse order of removal.
|

[RH]
| 1. |
Remove the rear seat assembly. (Refer to Rear Seat - "Rear Seat Assembly") |
| 2. |
Push the lock pin and remove the rear seat headrest (A).
|
| 3. |
Remove the bezel upper cover (A) by using a remover.
|
| 4. |
Remove the child anchor cover (A) by using a remover.
|
| 5. |
Disconnect the rear seat back dust cover (A).
|
| 6. |
Remove the hog-ring clips (A).
|
| 7. |
Open the seat back side zipper (A).
|
| 8. |
Remove the back board (A) after removing the hog-ring clips.
|

| 9. |
Remove the back cover mounting clips (A).
|
| 10. |
Push the rear seat headrest guides (A) while pinching both sides of the lower part of the guides, and remove them.
|
| 11. |
Remove the rear seat back cover from the frame. |
| 12. |
Remove the front seat back covering (C) after removing the velcro tape (A) and hog-ring clip (B).
|
| 13. |
Install in the reverse order of removal.
|
Components and components location Component Location 1. Rear seat cushion assembly 2. Rear seat back assembly Repair procedures Replacement 1.
Components and components location Component Location 1. Rear seat cushion cover Repair procedures Replacement Put on gloves to protect your hands.
Other information:
Kia Rio 2017-2023 YB Service Manual: Power Door Mirror Actuator
Components and components location Components 1. Side repeater lamp Repair procedures Inspection 1. Disconnect the negative (-) battery terminal. 2. Remove the front door quadrant inner cover (A).
Kia Rio 2017-2023 YB Service Manual: Smart Key
Repair procedures Smart Key Smart Key Code Saving 1. Connect the DLC cable of KDS/GDS to the data link connector (16 pins) in driver side crash pad lower panel, turn the power on KDS/GDS. 2. Select the vehicle model and then do "Smart key code saving".
Categories
- Manuals Home
- Kia Rio Owners Manual
- Kia Rio Service Manual
- Maintenance
- Features of your vehicle
- Steering System
- New on site
- Most important about car
