
Kia Rio: Floor Console / Rear Console Cover
Components and components location
| Component Location |
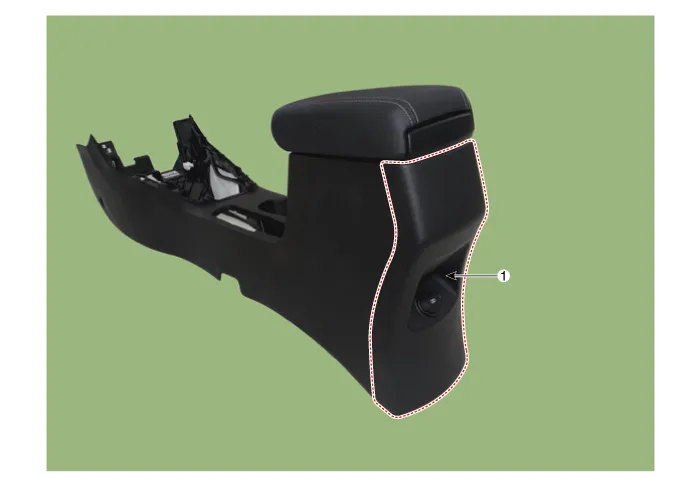
| 1. Rear console cover |
Repair procedures
| Replacement |
Put on gloves to protect your hands. |

|

| 1. |
Remove the floor console assembly. (Refer to Floor Console - "Floor Console Assembly") |
| 2. |
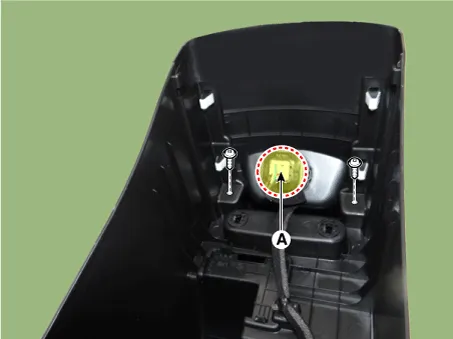
Flip over the console and disconnect the rear console connector (A) after loosening the screws.
|
| 3. |
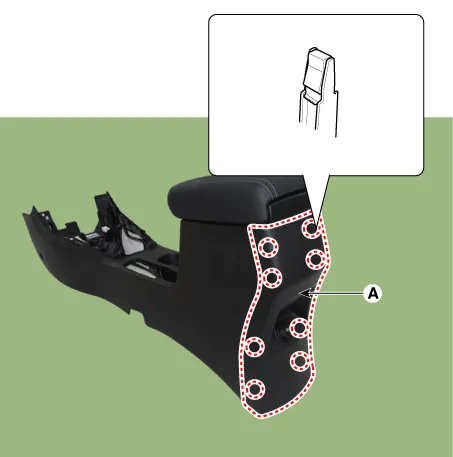
Using a remover, remove the rear console cover (A).
|
| 4. |
Install in the reverse order of removal.
|
Components and components location Component Location 1. Floor console assembly Repair procedures Replacement Put on gloves to protect your hands.
Components and components location Component Location 1. Console armrest Repair procedures Replacement Put on gloves to protect your hands.
Other information:
Kia Rio 2017-2023 YB Service Manual: Instrument Cluster
Components and components location Components [Standard Type ("3.5")] [Supervision Type ("3.5")] Connector Pin Information Connector A No.
Kia Rio 2017-2023 YB Service Manual: Air Conditioning System
General safety information and caution Instructions When Handling Refrigerant 1. R-134a liquid refrigerant is highly volatile. A drop on the skin of your hand could result in localized frostbite. When handling the refrigerant, be sure to wear gloves.
Categories
- Manuals Home
- Kia Rio Owners Manual
- Kia Rio Service Manual
- Body Electrical System
- Suspension System
- Engine Control / Fuel System
- New on site
- Most important about car
