Kia Rio: Fuel Delivery System / Fuel Tank
Repair procedures
| Removal |
| 1. |
Release the residual pressure in fuel line. (Refer to Delivery System - "Release Residual Pressure in Fuel Line”) |
| 2. |
Turn the ignition switch OFF and disconnect the battery negative (-) terminal. |
| 3. |
Remove the rear seat cushion. (Refer to Body - "Rear Seat Assembly") |
| 4. |
Remove the service cover (A).
|

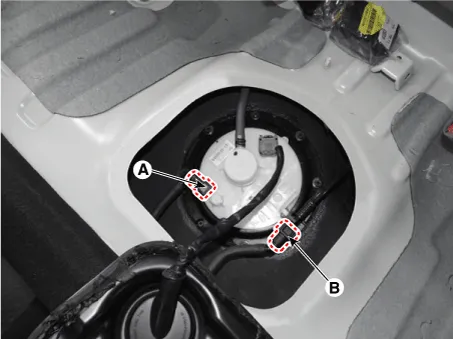
| 5. |
Disconnect the fuel pump connector (A).
|

| 6. |
Disconnect the fuel feed quick-connector (A) and the vapor tube quick-connector (B).
|
| 7. |
Lift the vehicle and support the fuel tank with a jack. |
| 8. |
Remove the center muffler assembly. (Refer to Engine Mechanical System - "Muffler") |
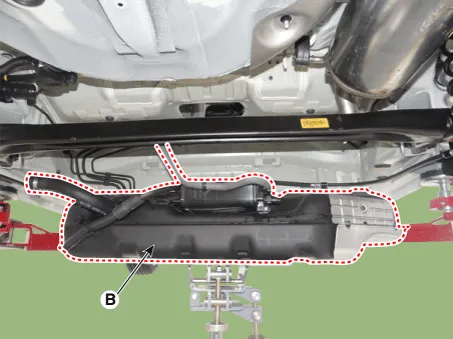
| 9. |
Disconnect the fuel filler hose (A), the leveling hose (B) and the vapor hose (C).
|

| 10. |
Remove the fuel tank mounting nuts (A), and then remove the fuel tank (B).
|

| Installation |
| 1. |
Installation is reverse of removal. |
Components and components location Components Location Fuel Tank & Filler-Neck Assembly 1. Fuel Tank 2.
Repair procedures Inspection [Fuel pump] 1. Turn ignition switch OFF and disconnect the negative (-)battery cable. 2.
Other information:
Kia Rio 2017-2023 YB Service Manual: Overhead Console Lamp
Repair procedures Inspection 1. Remove the overhead console lamp assembly then check for continuity between terminals. If the continuity is not as specified, replace the map lamp switch. Removal 1.
Kia Rio 2017-2023 YB Service Manual: Sunroof Motor
Repair procedures Inspection 1. Disconnect the negative (-) battery terminal. 2. Remove the roof trim assembly. (Refer to Body - "Roof Trim Assembly") 3. Remove the glass motor (A) after loosening the mounting screws.
Categories
- Manuals Home
- Kia Rio Owners Manual
- Kia Rio Service Manual
- Maintenance
- Coolant
- Maintenance
- New on site
- Most important about car
