Kia Rio: Crash Pad / Steering Column Shroud Panel
Components and components location
| Component Location |
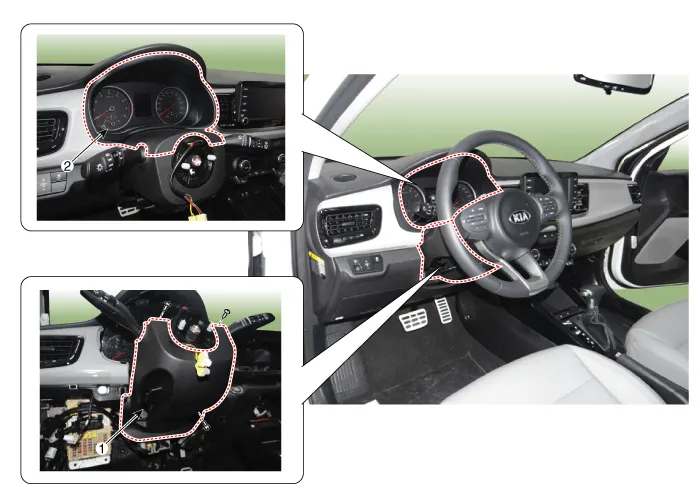
| 1. Steering column shroud lower
panel |
2. Steering column shroud upper
panel |
Repair procedures
| Replacement |
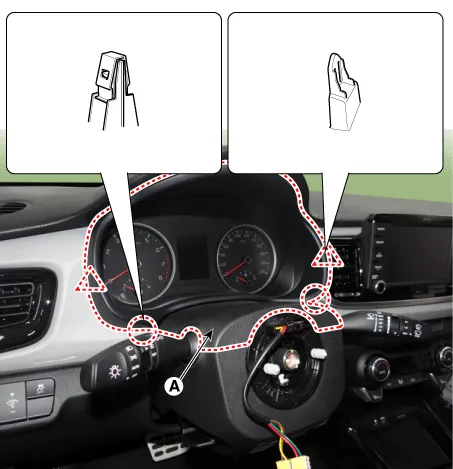
[Steering column shroud upper panel]
Put on gloves to protect your hands. |

|

| 1. |
Remove the steering column shroud upper panel (A) by using a remover.
|
| 2. |
Install in the reverse order of removal.
|
[Steering column shroud lower panel]
| 1. |
Remove the Steering column shroud upper panel. |
| 2. |
Remove the crash pad lower panel. (Refer to Crash Pad - "Crash Pad Lower Panel") |
| 3. |
Remove the steering column shroud lower panel (A) after loosening the mounting screws.
|
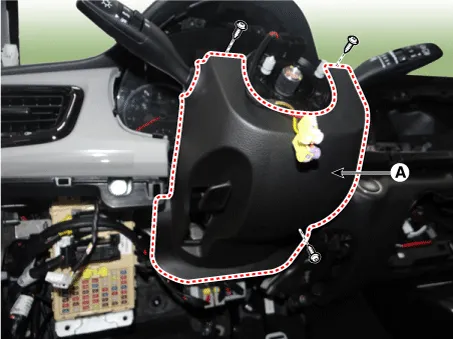
| 4. |
Install in the reverse order of removal.
|
Components and components location Component Location 1. Glove box housing assembly Repair procedures Replacement Put on gloves to protect your hands.
Components and components location Component Location 1. Crash pad center lower panel Repair procedures Replacement Put on gloves to protect your hands.
Other information:
Kia Rio 2017-2023 YB Service Manual: Sunroof Motor
Repair procedures Inspection 1. Disconnect the negative (-) battery terminal. 2. Remove the roof trim assembly. (Refer to Body - "Roof Trim Assembly") 3. Remove the glass motor (A) after loosening the mounting screws.
Kia Rio 2017-2023 YB Service Manual: Rain Sensor
Components and components location Components Schematic diagrams Circuit Diagram Description and operation Description Integrated Rain Sensor Integrated rain sensor (A) controls three systems: front wiper, auto-light, and central air conditioner.
Categories
- Manuals Home
- Kia Rio Owners Manual
- Kia Rio Service Manual
- Emission Control System
- Steering System
- Engine Mechanical System
- New on site
- Most important about car
