Kia Rio: Crash Pad / Crach Pad Center Panel
Components and components location
| Component Location |
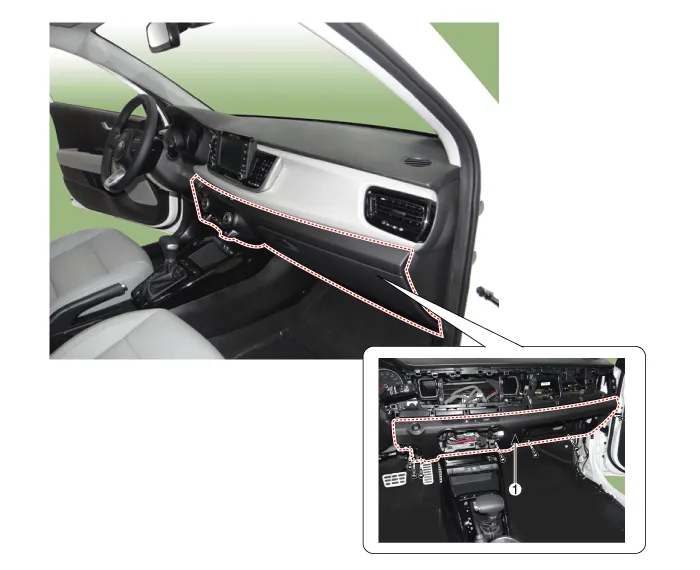
| 1. Crash pad center lower panel
|
Repair procedures
| Replacement |
Put on gloves to protect your hands. |

|

| 1. |
Disconnect the negative (-) battery terminal. |
| 2. |
Remove the floor console assembly. (Refer to Floor Console - "Floor Console Assembly") |
| 3. |
Remove the cluster fascia panel. (Refer to Crash Pad - "Cluster Fascia Panel ") |
| 4. |
Remove the crash pad lower panel [LH]. (Refer to Crash Pad - "Crash Pad Lower Panel") |
| 5. |
Remove the center fascia panel. (Refer to Crash Pad - "Center Fascia Panel") |
| 6. |
Remove the heater control unit. (Refer to Heating,Ventilation And Air Conditioning - "Heater & A/C Control Unit (FATC)") |
| 7. |
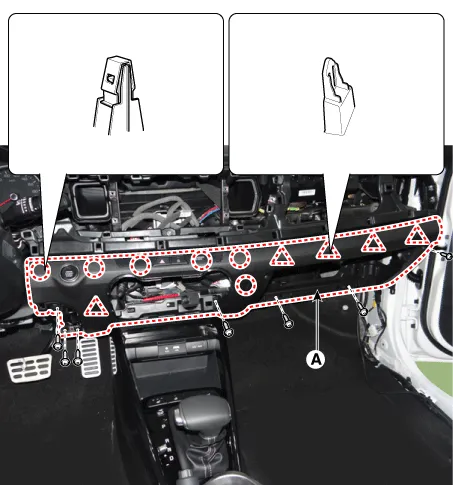
Remove the crash pad center lower panel (A) after loosening the screws.
|
| 8. |
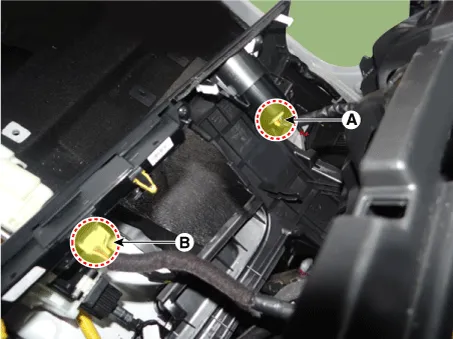
Disconnect the start/stop button connector (A) and hazard switch connector (B).
|
| 9. |
Install in the reverse order of removal.
|
Components and components location Component Location 1. Steering column shroud lower panel 2. Steering column shroud upper panel Repair procedures Replacement [Steering column shroud upper panel] Put on gloves to protect your hands.
Components and components location Component Location 1. Main crash pad assembly Repair procedures Replacement Put on gloves to protect your hands.
Other information:
Kia Rio 2017-2023 YB Service Manual: High Mounted Stop Lamp
Repair procedures Removal 1. Disconnect the negative (-) battery terminal. 2. Open the tailgate. 3. Remove the high mounted stop lamp (A) after loosening the mounting nuts.
Kia Rio 2017-2023 YB Service Manual: Photo Sensor (FATC only)
Description and operation Description The photo sensor is located at the center of defrost nozzles. The photo sensor contains a photovoltaic (sensitive to sunlight) diode. The solar radiation received by its light receiving portion, generates an electromotive force in proportion to the amount of radiation received which is tran
Categories
- Manuals Home
- Kia Rio Owners Manual
- Kia Rio Service Manual
- Timing Chain
- Body Electrical System
- General Information
- New on site
- Most important about car
