Kia Rio: Air Conditioning System / Condenser
Repair procedures
| Inspection |
| 1. |
Check the condenser fins for clogging and damage. If clogged, clean them with water, and blow them with compressed air. If bent, gently bend them using a screwdriver or pliers. |
| 2. |
Check the condenser connections for leakage, and repair or replace it, if required. |
| Replacement |
| 1. |
Recover the refrigerant with a recovery/recycling/charging station. |
| 2. |
Disconnect the negative (-) battery terminal. |
| 3. |
Remove the front bumper. (Refer to Body - "Front Bumper Assembly") |
| 4. |
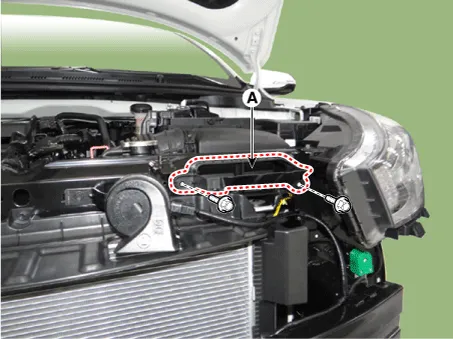
Remove the air intake shield (A) after loosening the bolts.
|
| 5. |
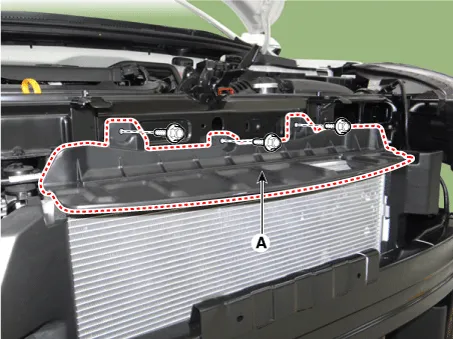
Remove the air upper guard (A) after loosening the bolts.
|
| 6. |
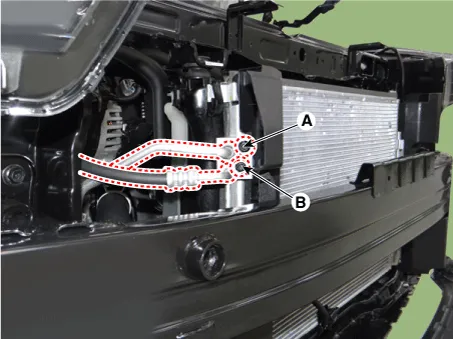
Remove the discharge line (A) and liquid line (B) after loosening the nuts.
|
| 7. |
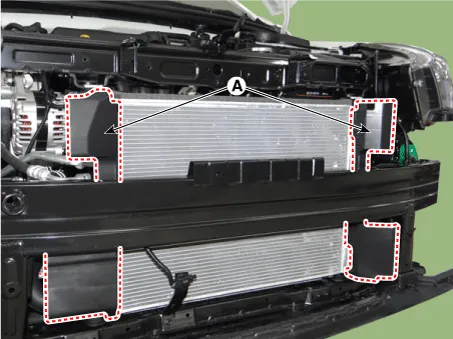
Loosen the mounting pin - type retainers and bolts, remove the side air guard (A).
|
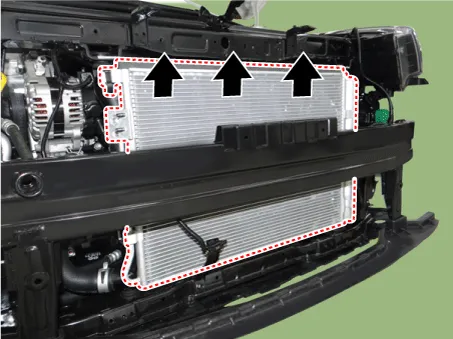
| 8. |
Remove the condenser.
|
| 9. |
Installation is the reverse order of removal.
|

Description and operation Description The compressor is the power unit of the A/C system. It is located on the side of engine block and driven by a V-belt of engine.
Repair procedures Replacement 1. Remove the condenser. 2. Remove the cap (B) on the bottom of the condenser with L wrench (A).
Other information:
Kia Rio 2017-2023 YB Service Manual: Heating,Ventilation, Air Conditioning
Specifications Specification Air Conditioner Item Specification Compressor Type DVE12 Oil type & Capacity PAG 30, 120 ± 10 g Displacement 122 cc/rev Expansion valve Type
Kia Rio 2017-2023 YB Service Manual: PTC Heater
Description and operation Description The PTC (Positive Temperature Coefficient) heater is installed at the exit or the backside of heater core. The PTC heater is an electric heater using a PTC element as an auxiliary heating device that supplements deficiency of interior heat source in highly effective diesel engine.
Categories
- Manuals Home
- Kia Rio Owners Manual
- Kia Rio Service Manual
- Maintenance
- Suspension System
- Body Electrical System
- New on site
- Most important about car
