Kia Rio: Intake And Exhaust System / Muffler
Repair procedures
| Removal and Installation |
Front Muffler
| 1. |
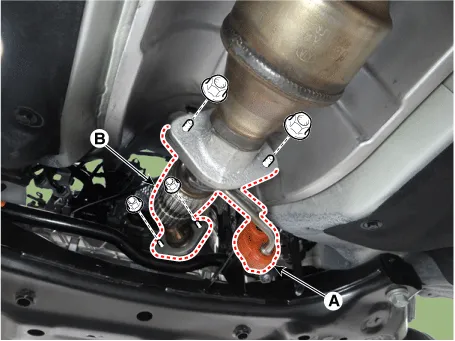
Disconnect the rear oxygen sensor (A).
|

| 2. |
Remove the hanger (A). |
| 3. |
Remove the front muffler (B).
|
| 4. |
Install in the reverse order of removal.
|

Catalytic converter & Center Muffler
| 1. |
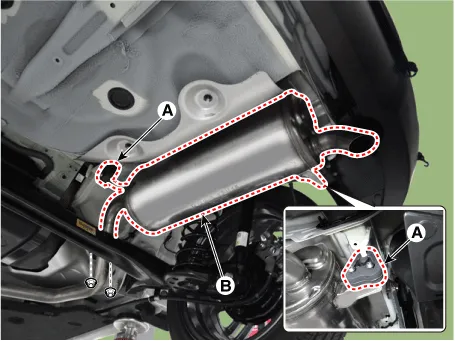
Remove the rubber hanger (A) |
| 2. |
Remove the catalytic converter & center muffler (B).
|

| 3. |
Install in the revere order of removal.
|
Rear Muffler
| 1. |
Remove the rubber hanger (A). |
| 2. |
Remove the rear muffler (B).
|
| 3. |
Install in the revere order of removal.
|
Replacement procedure of center muffler using clamp
Under warranty : Replace the center muffler assembly.
Out of warranty : It is available to replace the center muffler as the procedure below.
| 1. |
Check that the clamping part of the center muffler assembly is damaged or deformed. If the muffler is too corroded to clamp, replace the center muffler assembly.
|

| 2. |
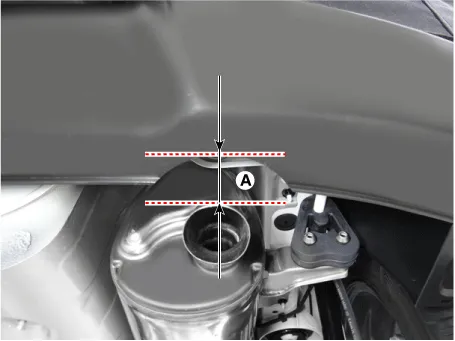
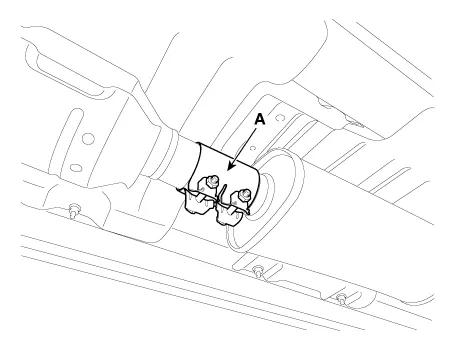
Record the gap (A) between the tail pipe (or tail trim) and the rear bumper.
|
| 3. |
Remove the rubber hanger (A) from the center muffler. |
| 4. |
Remove the catalytic converter & center muffler (B).
|
| 5. |
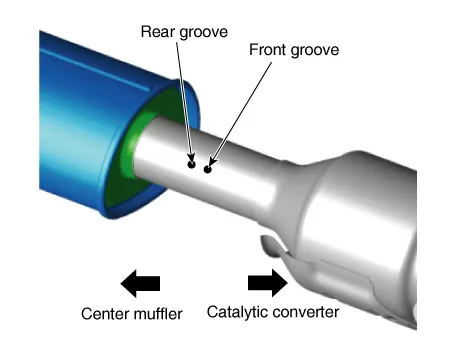
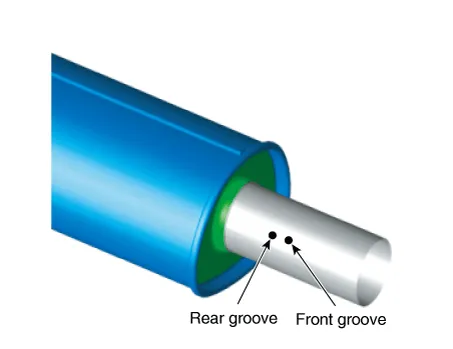
Cut the center muffler as the instruction below. - Cut the front groove of the muffler.
[Replacement muffler] -Cut the rear groove of the replacement muffler.
|


| 6. |
Install the center muffler.
|

Components and components location Components 1. Exhaust manifold gasket 2. Exhaust manifold 3. Exhaust manifold stay 4.
Other information:
Kia Rio 2017-2023 YB Service Manual: License Lamps
Repair procedures Removal 1. Disconnect the negative (-) battery terminal. 2. Remove the license lamp assembly (A) after pressing the locking pin. 3. Disconnect the license lamp connector (A).
Kia Rio 2017-2023 YB Service Manual: Ambient Temperature Sensor
Description and operation Description The ambient temperature sensor is located at the front of the condenser and detects ambient air temperature. It is a negative type thermistor; resistance will increase with lower temperature, and decrease with higher temperature.
Categories
- Manuals Home
- Kia Rio Owners Manual
- Kia Rio Service Manual
- Heating,Ventilation, Air Conditioning
- General Information
- Steering System
- New on site
- Most important about car
