Symptoms
|
Possible Causes
|
Remedy
|
Coolant leakage
|
| • |
From the thermostat gasket
|
|
Check the mounting bolts
|
| • |
Check the torque of the mounting bolts
|
|
| • |
Retighten the bolts and check leakage again.
|
|
Check the gasket for damage
|
| • |
Check gasket or seal for damage
|
|
| • |
Replace gaskets and reuse the thermostat.
|
|
Cooled excessively
|
| • |
Low heater performance (cool air blowed-out)
|
| • |
Thermogauge indicates 'LOW'
|
|
Visually check after removing the radiator cap.
|
| • |
Insufficient coolant or leakage.
|
|
| • |
After refilling coolant, recheck.
|
|
GDS check&Starting engine
|
| • |
Check connection of the fan clutch or the fan motor.
|
※ If the fan clutch is always connected, there will be a noise at idle.
|
| • |
Check the engine coolant sensor, wiring and connectors.
|
| • |
Replace the componants.
|
|
Remove the thermostat and inspect
|
| • |
Check if there are dusts or chips in the thermostat valve.
|
| • |
Check adherence of the thermostat.
|
|
| • |
Clean the thermostat valve and reuse the thermostat.
|
| • |
Replace the thermostat, if it doesn't work properly.
|
|
Heated excessively
|
| • |
Thermogauge indicates 'HI'
|
|
Visually check after removing the radiator cap.
|
| • |
Insufficient coolant or leakage.
※ Be careful when removing a radiator cap of the overheated vehicle.
|
| • |
Check air in cooling system.
|
|
| • |
After refilling coolant, recheck.
|
| • |
Check the cylinder head gaskets for damage and the tightening
torque of the mounting bolts.
|
|
GDS check&Starting engine
|
| • |
Check the fan motor performance as temperature varies.
|
| • |
Check if the fan clutch slips.
|
| • |
Check the water pump adherence or impeller damaged.
|
|
| • |
Check the engine coolant sensor, wiring and connectors.
|
| • |
Check the fan motor, the relay and the connector.
|
| • |
Replace the fan clutch, if it doesn't work properly.
|
| • |
Replace the water pump, if it doesn't work properly.
|
|
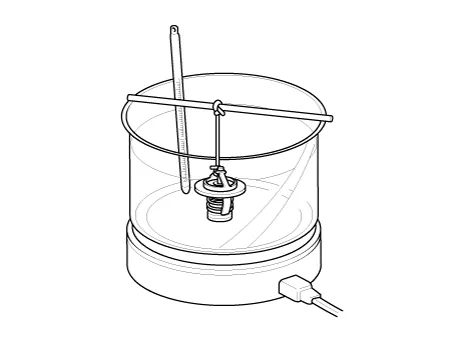
Immerse the thermostat in boiling water and inspection.
|
| • |
After removing the thermostat, check it works properly.
|
※ Check the thermostat opens at the valve opening temperature.
|
| • |
Replace the thermostat, if it doesn't work properly.
|
|
Other information:
Specifications
Specification
Item
Specification
Ultrasonic sensor
Voltage rating
DC 12V
Detecting range
11.8 - 47.2 in (30 - 120 cm)
Operation voltage
DC 9 - 16 V
Operation current
Description and operation
Description
The climate control air filter is located in the bower unit. It eliminates foreign
materials and odor. The particle filter performs a role as an odor filter as well
as a conventional dust filter to ensure comfortable interior environment.