Kia Rio: Hydraulic System / Oil Filter
Repair procedures
| Removal |
| 1. |
Remove the under cover. (Refer to Engine Mechanical System - "Engine Room Under Cover"). |
| 2. |
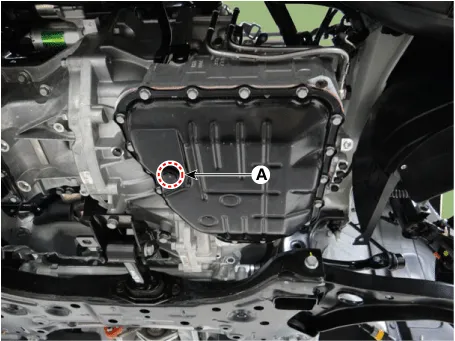
Remove the ATF drain plug (A), allow the fluid to drain out and then reinstall the drain plug.
|
| 3. |
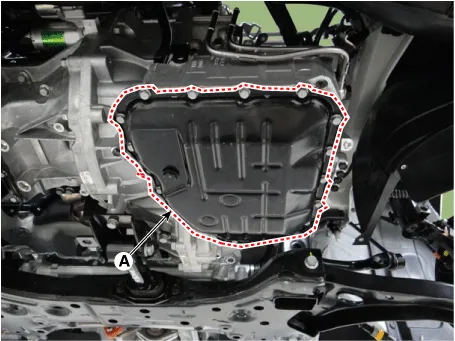
Remove the valve body cover (A) using the SST (09215-3C000) after loosening the bolts.
|
| 4. |
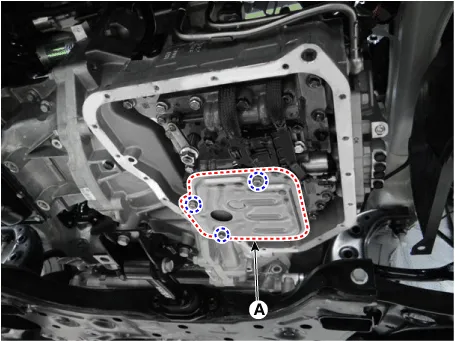
Remove the oil filter (A) after loosening the bolts.
|
| Installation |
| 1. |
Install the oil filter (A).
|
| 2. |
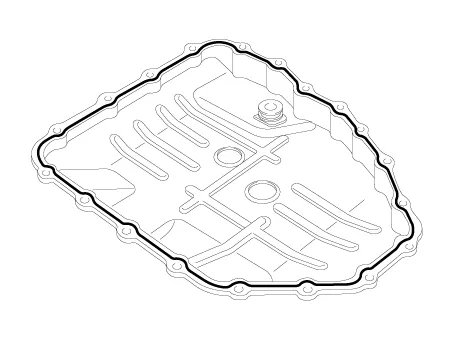
Apply liquid gasket with 0.10 2in (2.6 mm) thickness without a pause as shown in the illustration.
|
| 3. |
Install the valve body cover (A).
|
| 4. |
Refill the automatic transaxle with fluid. (Refer to Hydraulic System - "Fluid") |
| 5. |
Install the under cover. (Refer to Engine Mechanical System - "Engine Room Under Cover"). |
Repair procedures Inspection Automatic Transaxle Fluid (ATF) Level Check 1. Place the vehicle on a level ground. 2.
Description and operation Discription Rotation of the pump builds the hydraulic pressure needed for the lubrication of the various parts of the transaxle and operation of the clutch and brakes.
Other information:
Kia Rio 2017-2023 YB Service Manual: Ignition Switch
Repair procedures Inspection 1. Disconnect the key warning switch connector (A) and ignition switch connector (B) from the steering column. 2. Check for continuity between the terminals.
Kia Rio 2017-2023 YB Service Manual: Vanity Lamp
Repair procedures Removal 1. Disconnect the negative (-) battery terminal. 2. Detach the vanity lamp (A) using a flat-tip screwdriver. 3. Disconnect the vanity lamp connector (A).
Categories
- Manuals Home
- Kia Rio Owners Manual
- Kia Rio Service Manual
- Heating,Ventilation, Air Conditioning
- Normal Condition
- Maintenance
- New on site
- Most important about car
