Kia Rio: Body Side Molding / Delta Garnish
Repair procedures
| Replacement |
Put on gloves to protect your hands. |

|

| 1. |
Using a remover, remove the delta garnish (A).
|
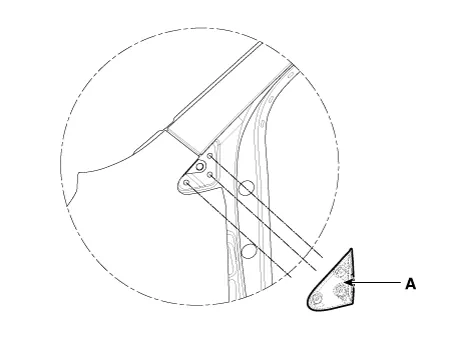
| 2. |
Install in the reverse order of removal.
|
Repair procedures Replacement Put on gloves to protect your hands. • Use a plastic panel removal tool to remove interior trim pieces without marring the surface.
Repair procedures Replacement Put on gloves to protect your hands. • Use a plastic panel removal tool to remove interior trim pieces without marring the surface.
Other information:
Kia Rio 2017-2023 YB Service Manual: Power Window Motor
Components and components location Components [Standard window motor] [Safety window motor] Repair procedures Inspection • When removing with a flat-tip screwdriver or remover, wrap protective
Kia Rio 2017-2023 YB Service Manual: Smart Key System
Specifications Specifications Smart Key Unit Items Specification Rated voltage DC 12 V Operating voltage DC 9 - 16 V Operating temperature -31 - 167°F (-35 - 75°C) Load Max.
Categories
- Manuals Home
- Kia Rio Owners Manual
- Kia Rio Service Manual
- Brake System
- Cooling System
- Clutch System
- New on site
- Most important about car
