Kia Rio: Hood / Hood Latch
Components and components location
| Component Location |
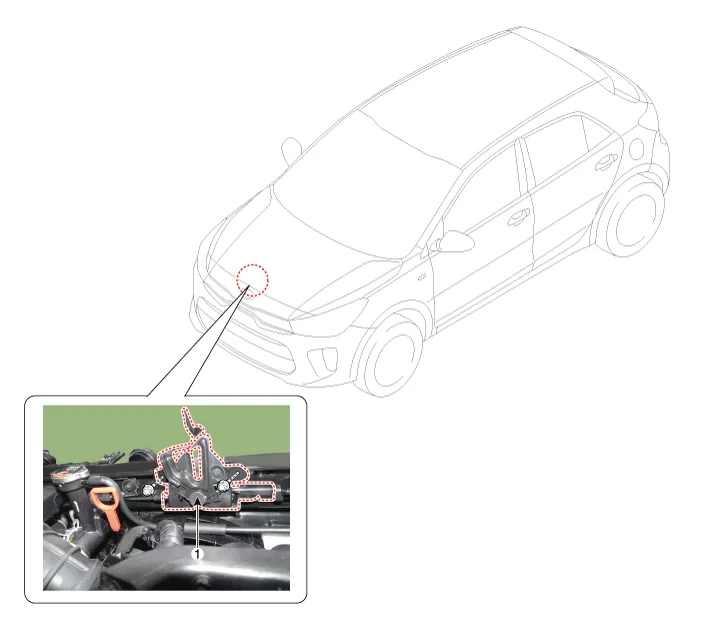
| 1. Hood lower latch assembly
|
Repair procedures
| Replacement |
| 1. |
Remove the front bumper cover. (Refer to Front Bumper - "Front Bumper Assembly") |
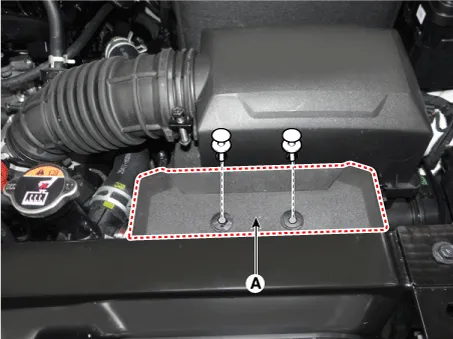
| 2. |
Remove the air duct (A).
|
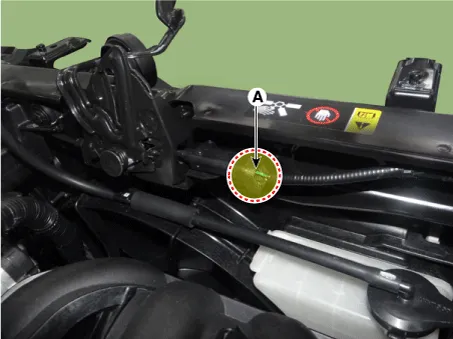
| 3. |
Disconnect the hood latch cable (A).
|

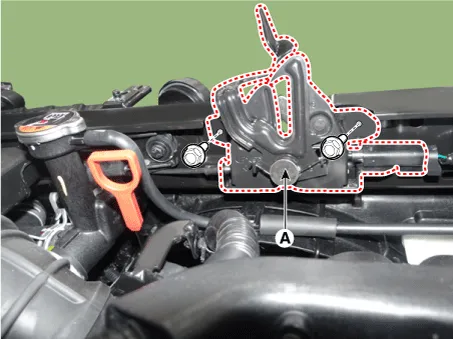
| 4. |
Disconnect the hood latch connector (A).
|
| 5. |
Remove the hood lower latch assembly (A) after loosening the bolts.
|
| 6. |
Install in the reverse order of removal.
|

Components and components location Component Location 1. Hood latch release handle Repair procedures Replacement • Put on gloves to protect your hands.
Components and components location Components 1. Front pillar trim assembly 2. Front door scuff trim assembly 3. Center pillar upper trim assembly 4.
Other information:
Kia Rio 2017-2023 YB Service Manual: Keyless Entry And Burglar Alarm
Specifications Specification Item Specification Power source 3 V Operating temperature -22 - 176°F (-30 - 80°C) RF Modulation FSK LF Modulation ASK RF frequency
Kia Rio 2017-2023 YB Service Manual: Refrigerant line
Repair procedures Replacement 1. Discharge refrigerant from refrigeration system. 2. Replace faulty tube or hose. Cap the open fittings immediately to keep moisture or dirt out of the system.
Categories
- Manuals Home
- Kia Rio Owners Manual
- Kia Rio Service Manual
- Emission Control System
- Motor Driven Power Steering
- Maintenance
- New on site
- Most important about car
