Kia Rio: Floor Console / Floor Console Assembly
Components and components location
| Component Location |

| 1. Floor console assembly |
Repair procedures
| Replacement |
Put on gloves to protect your hands. |

|

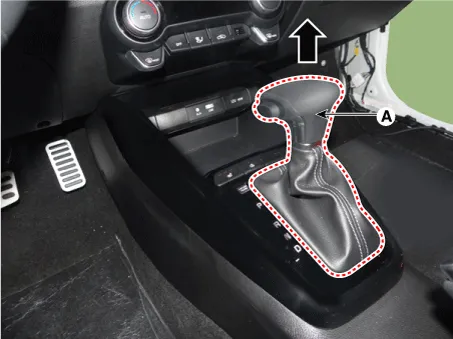
| 1. |
To remove the gear knob & gear boots (A) pull both of it up.
|
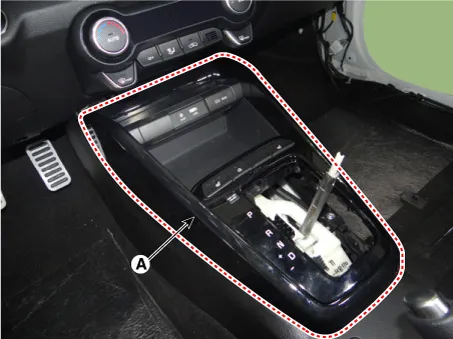
| 2. |
Using a remover, remove the floor console upper cover (A).
|
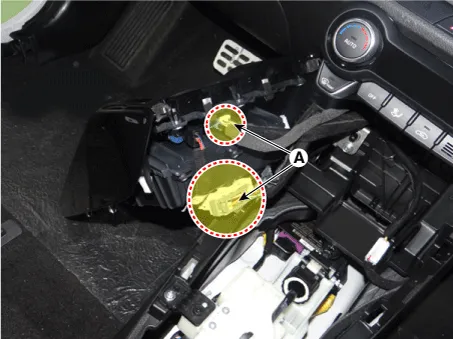
| 3. |
Disconnect the connectors (A) from the floor console upper cover.
|
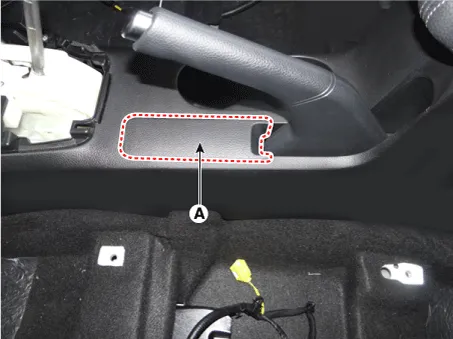
| 4. |
Remove the parking brake cover (A).
|
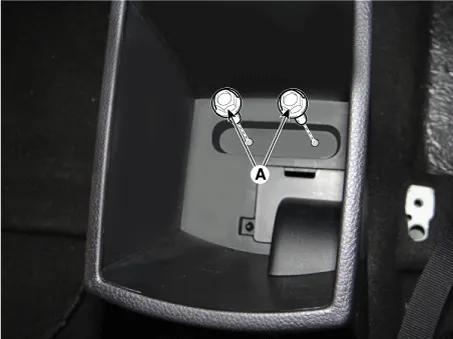
| 5. |
Remove the console bracket (A) after loosening the screws.
|
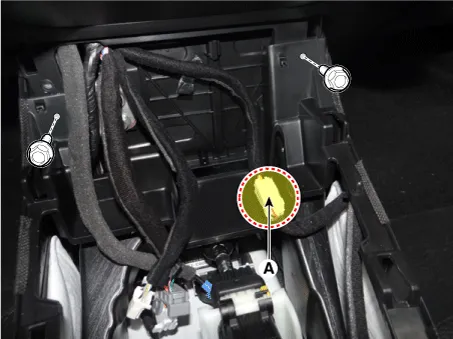
| 6. |
Disconnect the console connector (A) and loosen the mounting bolt.
|
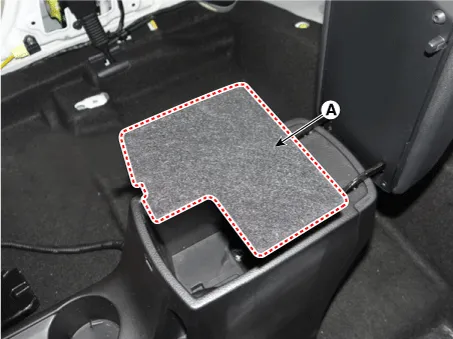
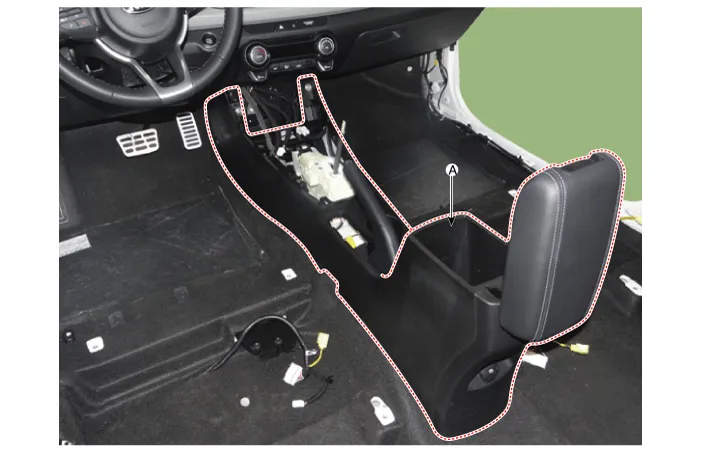
| 7. |
Remove the console armrest mat (A).
|
| 8. |
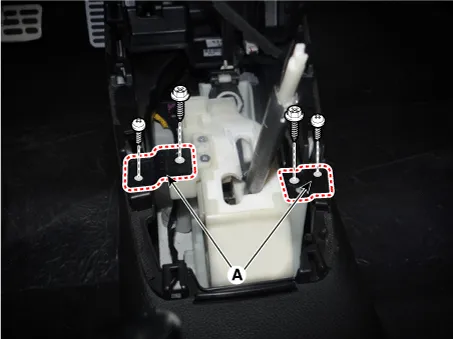
Loosen the console upper mounting bolts (A).
|
| 9. |
Loosen the console both side front mounting screw (A).
|
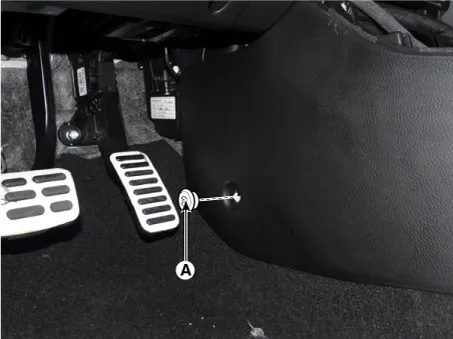
| 10. |
Remove the console complete (A).
|
| 11. |
Install in the reverse order of removal.
|
Components and components location Components [DLX] 1. Floor console assembly 2. Rear console cover 3. Console armrest 4.
Components and components location Component Location 1. Rear console cover Repair procedures Replacement Put on gloves to protect your hands.
Other information:
Kia Rio 2017-2023 YB Service Manual: Antenna Coil
Repair procedures Removal 1. Disconnect the negative (-) battery terminal. 2. Remove the crash pad lower panel. (Refer to Body - "Crash Pad Lower Panel") 3. Remove the steering column upper and lower shroud panel.
Kia Rio 2017-2023 YB Service Manual: Cluster Ionizer (FATC only)
Description and operation Description The cluster ionizer helps to clean up odors in the vehicle or from the air-conditioner system. When the ignition switch ON, the inoizer runs a "CLEAN" mode and then a "ION" mode, switching every about 15 minutes.
Categories
- Manuals Home
- Kia Rio Owners Manual
- Kia Rio Service Manual
- Body (Interior and Exterior)
- Engine Electrical System
- Heating,Ventilation, Air Conditioning
- New on site
- Most important about car
