Kia Rio: Body (Interior and Exterior) / Cowl Top Cover
Components and components location
| Component Location |
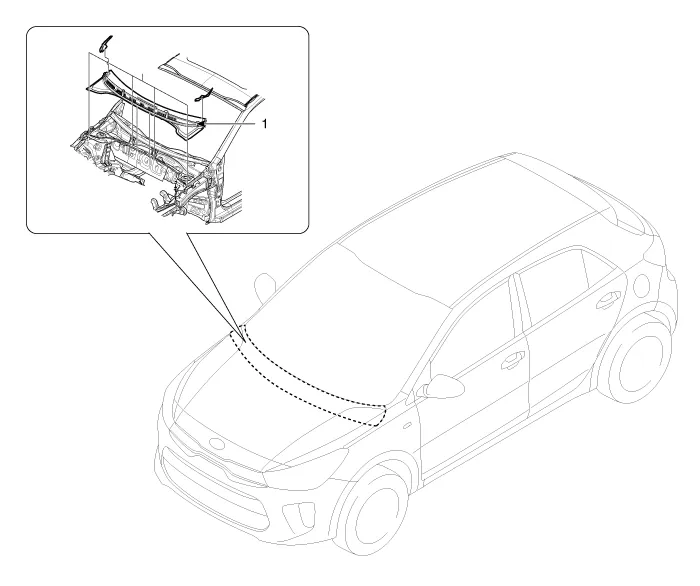
| 1. Cowl top cover |
Repair procedures
| Replacement |
Put on gloves to protect your hands. |

|

| 1. |
Remove the cap (A) and the nuts, and then remove the wiper arm (B).
|

| 2. |
Disconnect the nozzle hose (A).
|

| 3. |
Detach the clips, then remove the cowl top cover (A).
|

| 4. |
Install in the reverse order of removal.
|
Repair procedures Replacement Put on gloves to protect your hands. • Use a plastic panel removal tool to remove interior trim pieces without marring the surface.
Components and components location Components 1. Cowl cross bar assembly 2. Main wiring harness 3. Main crash pad assembly 4.
Other information:
Kia Rio 2017-2023 YB Service Manual: Immobilizer Control Unit
Repair procedures Removal 1. Disconnect the negative (-) battery terminal. 2. Remove the main crash pad assembly. (Refer to Body - "Main Crash Pad Assembly") 3. Disconnect the connector of the immobilizer unit and then remove the immobilizer unit (A) after
Kia Rio 2017-2023 YB Service Manual: Temperature Control Actuator
Description and operation Description The heater unit includes mode control actuator and temperature control actuator. The temperature control actuator is located at the heater unit. It regulates the temperature by the procedure as follows.
Categories
- Manuals Home
- Kia Rio Owners Manual
- Kia Rio Service Manual
- Engine Oil and Filter
- Heating,Ventilation, Air Conditioning
- Engine Mechanical System
- New on site
- Most important about car
