Kia Rio: Interior Trim / Center Pillar Trim
Components and components location
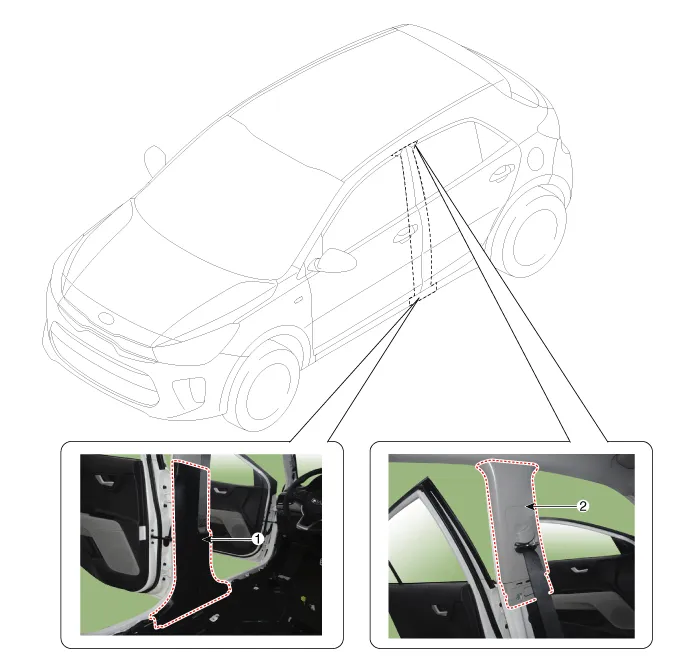
1. Center pillar lower trim
|
2. Center pillar upper trim
|
Repair procedures
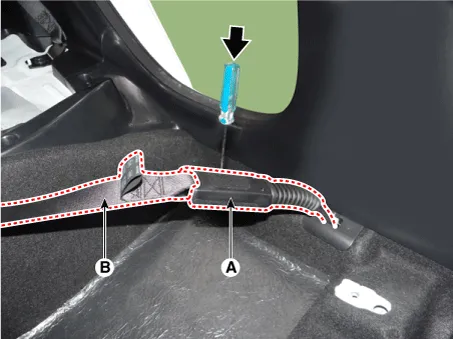
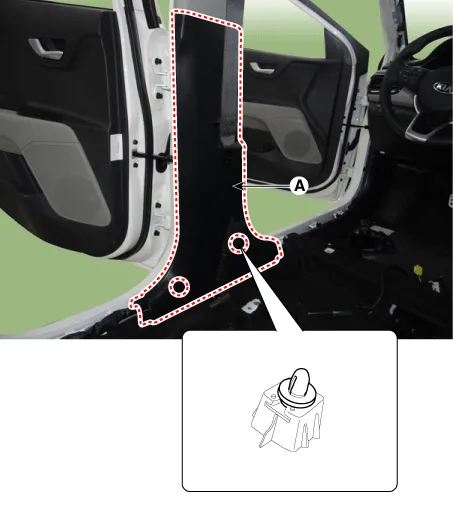
[Center pillar lower
trim]
|
Put on gloves to protect your hands.
|
| • |
Use a plastic panel removal tool to remove interior trim pieces
without marring the surface.
|
| • |
Take care not to bend or scratch the trim and panels.
|
|
| 1. |
Remove the door scuff trim.
(Refer to Interior Trim - "Door Scuff Trim")
|
| 2. |
Carefully remove the front door body side weatherstrip.
|
| 3. |
Remove the seat belt (B) from the EFD system by using the SST (0K888-D4200).
|
| 4. |
Using a remover, remove the center pillar lower trim (A).
|
| 5. |
Install in the reverse order of removal.
| •
|
Make sure that the connector is plugged in properly.
|
| •
|
Replace any damaged clips.
|
|
|
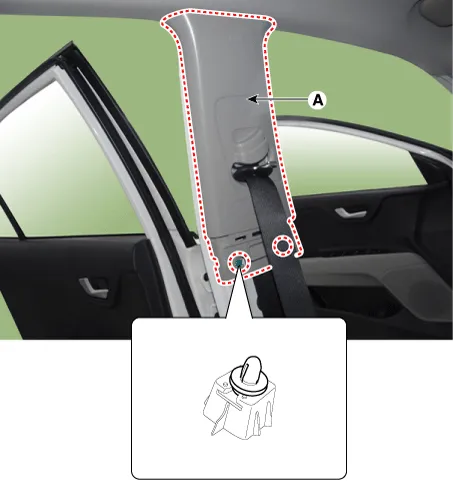
[Center pillar upper
trim]
|
Put on gloves to protect your hands.
|
| • |
Use a plastic panel removal tool to remove interior trim pieces
without marring the surface.
|
| • |
Take care not to bend or scratch the trim and panels.
|
|
| 1. |
Remove the center poller lower trim.
|
| 2. |
Remove the center pillar upper trim (A) after loosening the bolt.
|
| 3. |
Install in the reverse order of removal.
|
Make sure that the connector is plugged in properly.
|
|
Components and components location
Component Location
1. Front pillar trim
Repair procedures
Replacement
Put on gloves to protect your hands.
Components and components location
Component Location
1. Rear transverse trim
Repair procedures
Replacement
Put on gloves to protect your hands.
Other information:
Repair procedures
Replacement
1.
Discharge refrigerant from refrigeration system.
2.
Replace faulty tube or hose.
Cap the open fittings immediately to keep moisture or dirt out
of the system.
Description and operation
Description
The Auto Defogging Sensor is installed on front windshild glass. The Auto Defogging
Sensor senses moisture on the windshild. The air conditioner control module receives
the signal from the sensor and eliminate the fog by controlling the intake actuator,
A/C, auto defogging actuator, blower m


