Kia Rio: Air Conditioning System / Receiver-Drier
Repair procedures
| Replacement |
| 1. |
Remove the condenser. |
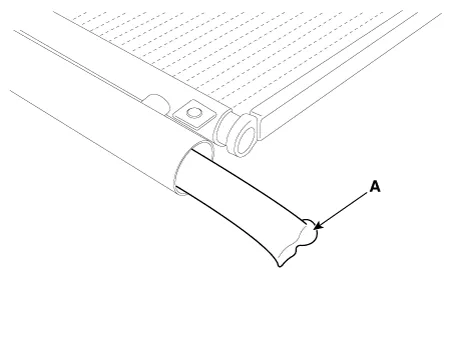
| 2. |
Remove the cap (B) on the bottom of the condenser with L wrench (A).
|

| 3. |
Remove the desiccant (A) from condenser using a long nose plier. Check for crumbled desiccant and clogged bottom cap filter.
|
| 4. |
Apply air conditioning compressor oil along the O-rings and threads of the new bottom cap. |
| 5. |
Insert the new desiccant into the receiver drier tank. The desiccant must be sealed in vacuum before it is exposed to air for use. |
| 6. |
Install the new bottom cap to the condenser.
|

Repair procedures Inspection 1. Check the condenser fins for clogging and damage. If clogged, clean them with water, and blow them with compressed air.
Description and operation Description The A/C Pressure Transducer (APT) convert the pressure value of high pressure line into voltage value after measure it.
Other information:
Kia Rio 2017-2023 YB Service Manual: Heater Unit
Components and components location Component Location Components 1. Heater pipe cover 2. Heater core 3. Mode control actuator 4. Mode control actuator bracket 5. Mode control main lever 6.
Kia Rio 2017-2023 YB Service Manual: Climate Control Air Filtar
Description and operation Description The climate control air filter is located in the bower unit. It eliminates foreign materials and odor. The particle filter performs a role as an odor filter as well as a conventional dust filter to ensure comfortable interior environment.
Categories
- Manuals Home
- Kia Rio Owners Manual
- Kia Rio Service Manual
- Heating,Ventilation, Air Conditioning
- General Information
- Engine Oil and Filter
- New on site
- Most important about car
