Kia Rio: Rear Seat Belt / Rear Center Seat Belt Retractor
Components and components location
| Component Location |
| [5 Door] |
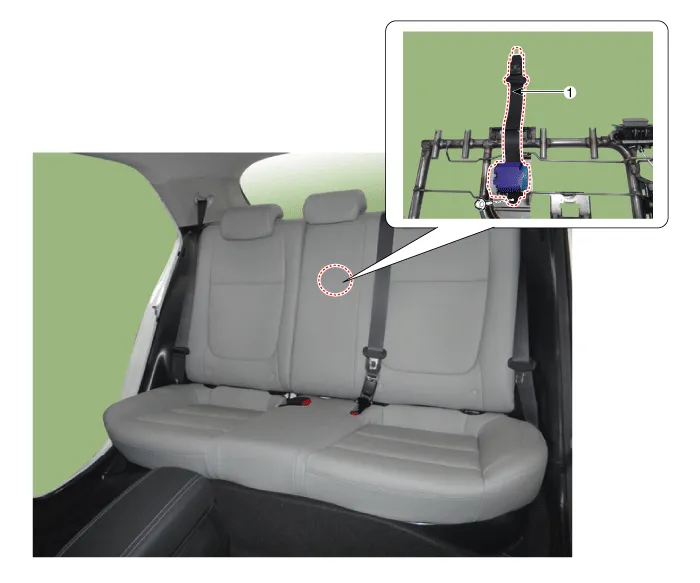
| 1. Rear center seat belt retractor
|
| [4 Door] |
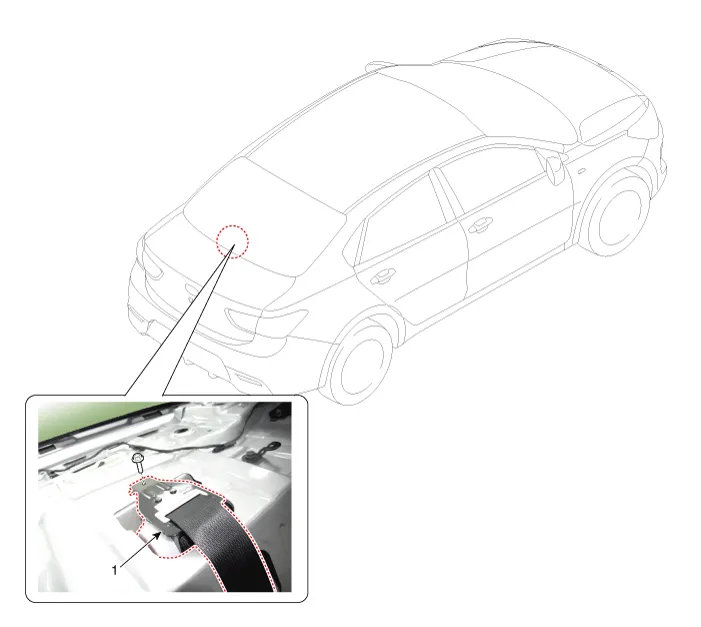
| 1. Rear center seat belt retractor
|
Repair procedures
| Replacement |
[5 Door]
Put on gloves to protect your hands. |

|

| 1. |
Remove the rear seat back cover. (Refer to Rear Seat - "Rear Seat Back Cover") |
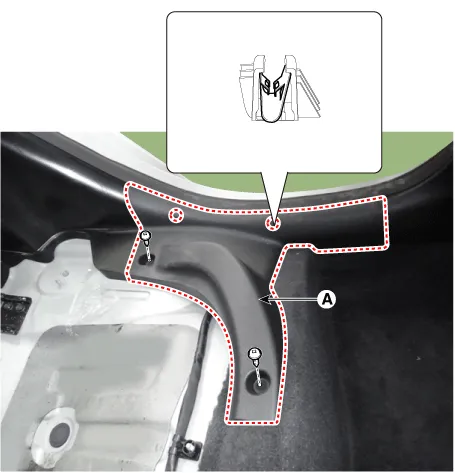
| 2. |
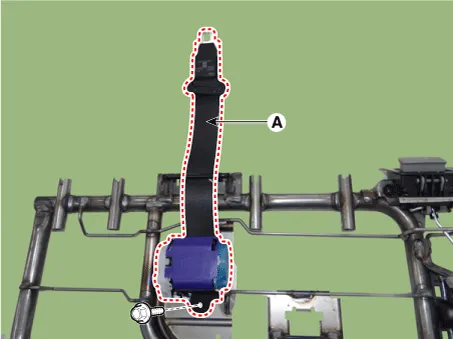
Remove the rear center seat belt retractor (A) after loosening the mounting bolt.
|
| 3. |
Install in the reverse order of removal.
|
[4 Door]
Put on gloves to protect your hands. |
|
| 1. |
Remove the rear seat assembly. (Refer to Rear Seat - "Rear Seat Assembly") |
| 2. |
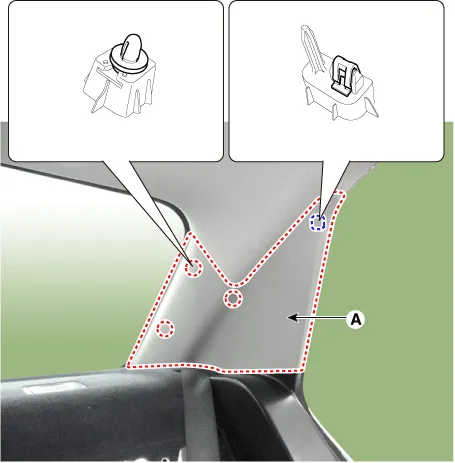
Remove the rear pillar trim (A) by using a remover.
|
| 3. |
Remove the rear door scuff trim.
|
| 4. |
Remove the rear partition trim (A) after looseing the mountin screw.
|
| 5. |
Remove the rear wheel house trim (A) after looseing the mountin screw.
|
| 6. |
Remove the rear center seat belt cover (A).
|
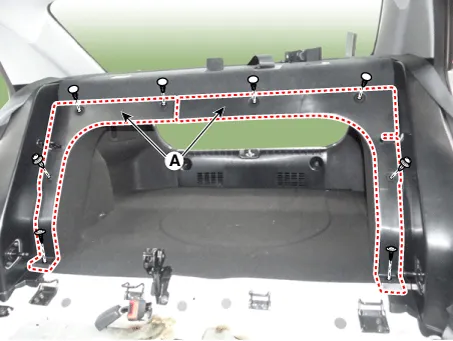
| 7. |
Remove the rear package tray trim (A).
|

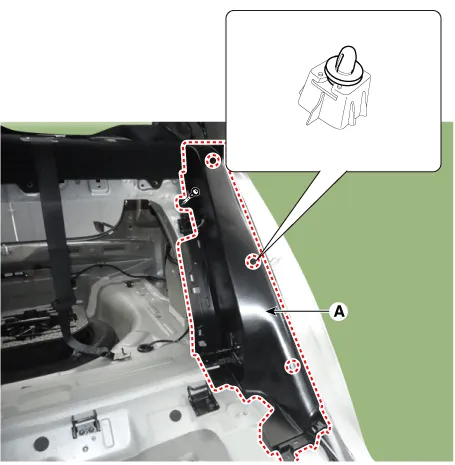
| 8. |
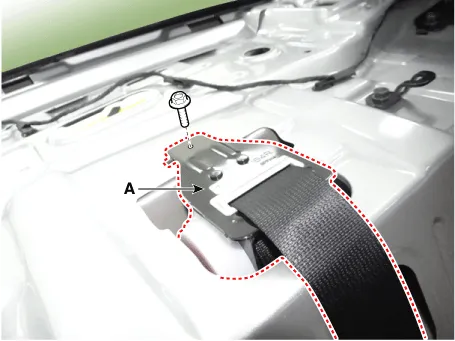
Remove the rear center seat belt retractor (A) after loosening the mounting bolt.
|
| 9. |
Install in the reverse order of removal.
|
Components and components location Component Location [5 Door] 1. Rear seat belt retractor [4 Door] 1.
Components and components location Component Location 1. Rear seat belt buckle [RH] 2. Rear seat belt buckle [LH] Repair procedures Replacement When installing the belt, be careful not to damage the retractor.
Other information:
Kia Rio 2017-2023 YB Service Manual: Headlamps
Description and operation Description BI-FUNCTION 1. Definition – A headlamp with integrated functions of high and low beam – The light is controlled by rotating the shield inserted to the lens.
Kia Rio 2017-2023 YB Service Manual: Ambient Temperature Sensor
Description and operation Description The ambient temperature sensor is located at the front of the condenser and detects ambient air temperature. It is a negative type thermistor; resistance will increase with lower temperature, and decrease with higher temperature.
Categories
- Manuals Home
- Kia Rio Owners Manual
- Kia Rio Service Manual
- Emission Control System
- Clutch System
- Suspension System
- New on site
- Most important about car
