Kia Rio: Interior Trim / Luggage Side Trim
Components and components location
| Component Location |

| 1. Luggage side trim |
Repair procedures
| Replacement |
Put on gloves to protect your hands. |

|

| 1. |
Remove the rear seat assembly. (Refer to Rear Seat - "Rear Seat Assembly") |
| 2. |
Remove the rear door scuff trim. (Refer to Interior Trim - "Door Scuff Trim") |
| 3. |
Remove the rear transverse trim. (Refer to Interior Trim - "Rear Transverse Trim") |
| 4. |
Carefully remove the rear door fbody side weatherstrip. |
| 5. |
Separate the rear seat belt lower anchor (A) after loosening the mounting bolt.
|
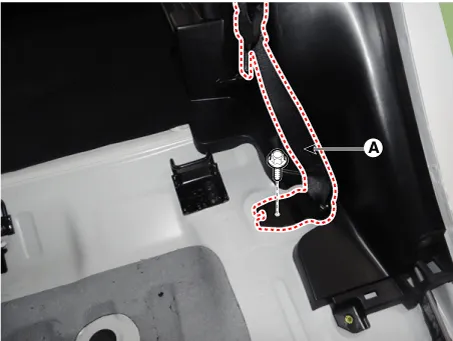
| 6. |
Remove the luggage side trim (A) after loosening the mounting screws.
|

| 7. |
Install in the reverse order of removal.
|
Components and components location Component Location 1. Rear transverse trim Repair procedures Replacement Put on gloves to protect your hands.
Components and components location Component Location [5 Door] 1. Rear pillar trim [4 Door] 1.
Other information:
Kia Rio 2017-2023 YB Service Manual: Front Fog Lamps
Repair procedures Removal 1. Disconnect the negative (-) battery terminal. 2. Remove the front bumper assembly. (Refer to Body - "Front Bumper Assembly") 3. Remove the front fog lamp assembly (A) after loosening the mounting screws.
Kia Rio 2017-2023 YB Service Manual: Power Door Lock Module
Components and components location Components 1. Door lock/unlock knob cable 2. Door latch assembly Repair procedures Inspection • When removing with a flat-tip screwdriver or remover, wrap
Categories
- Manuals Home
- Kia Rio Owners Manual
- Kia Rio Service Manual
- Maintenance Schedule
- Coolant
- Heating,Ventilation, Air Conditioning
- New on site
- Most important about car
