Kia Rio: Interior Trim / Door Scuff Trim
Components and components location
| Component Location |
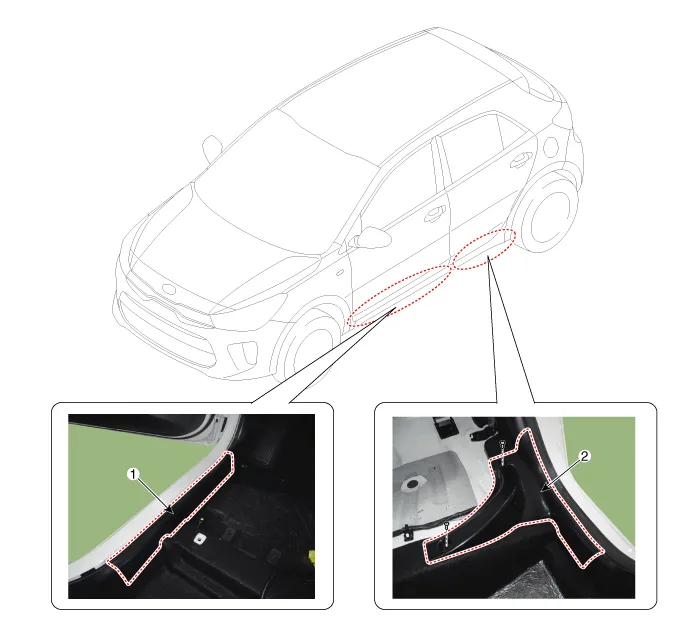
| 1. Front door scuff trim |
2. Rear door scuff trim |
Repair procedures
| Replacement |
Put on gloves to protect your hands. |

|

| 1. |
Using a remover, remove the front door scuff tirm (A). [Front]
[Rear]
|
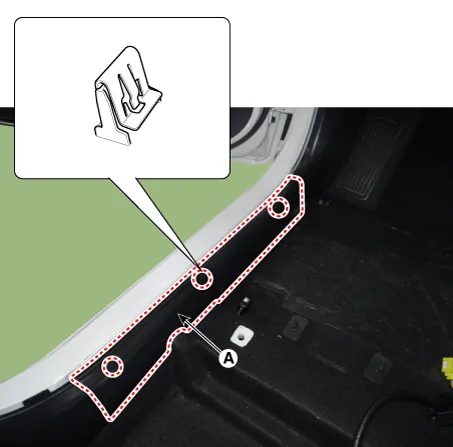
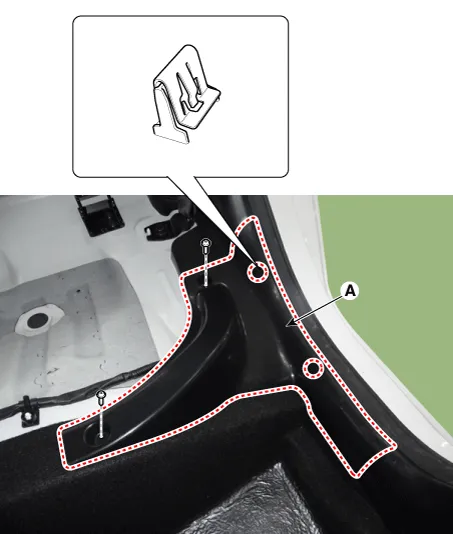
| 2. |
Install in the reverse order of removal.
|
Components and components location Components 1. Front pillar trim assembly 2. Front door scuff trim assembly 3. Center pillar upper trim assembly 4.
Components and components location Component Location 1. Cowl side trim Repair procedures Replacement Put on gloves to protect your hands.
Other information:
Kia Rio 2017-2023 YB Service Manual: Immobilizer System
Schematic diagrams Circuit Diaram Description and operation Description The immobilizer system will disable the vehicle unless the proper ignition key is used, in addition to the currently available anti-theft systems such as car alarms, the immobilizer system aims to drastically reduce the rate of auto theft.
Kia Rio 2017-2023 YB Service Manual: Rear Glass Defogger Switch
Repair procedures Inspection 1. In the body electrical system, failure can be quickly diagnosed by using the vehicle diagnostic system (KDS/GDS). The diagnostic system (KDS/GDS) provides the following information. (1) Self diagnosis : Checking failure and code number (DTC)
Categories
- Manuals Home
- Kia Rio Owners Manual
- Kia Rio Service Manual
- Clutch System
- Brake System
- Maintenance Schedule
- New on site
- Most important about car
