
Kia Rio: Fuel Delivery System / Delivery Pipe
Repair procedures
| Removal |
| 1. |
Release the residual pressure in fuel line. (Refer to Fuel Delivery System - "Release Residual Pressure in Fuel Line")
|

| 2. |
Turn the ignition switch OFF and disconnect the battery negative (-) terminal. |
| 3. |
Remove the engine cover. (Refer to Engine And Transaxle Assembly - "Engine Cover") |
| 4. |
Disconnect the injector connector (A).
|
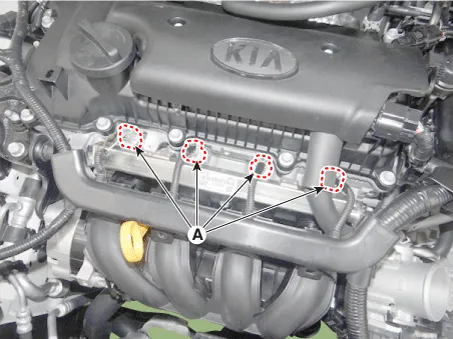
| 5. |
Remove the PCV hose (A).
|
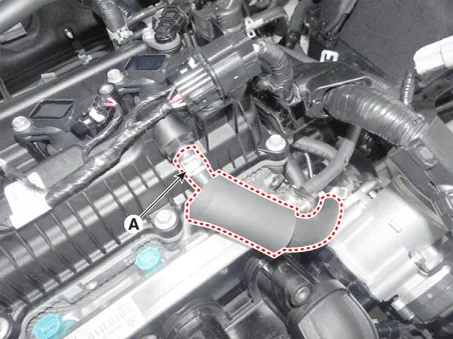
| 6. |
Remove the wiring harness bracket installation bolt. |
| 7. |
Remove the installation nuts (B), and then disconnect the fuel feed tube (A).
|
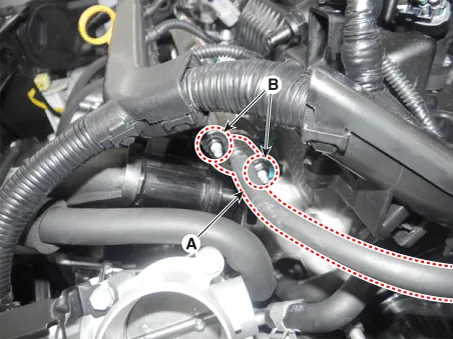
| 8. |
Remove the installation bolts (B), and then remove the delivery pipe & injector assembly (A) from the engine.
|
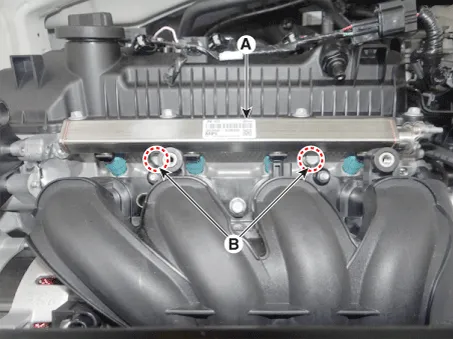
| 9. |
Remove the fixing clip (A), and then separate the injector from the delivery pipe.
|
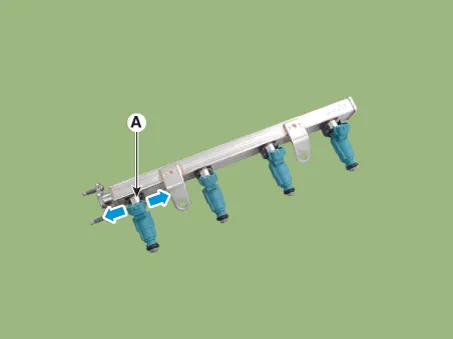

| Installation |
|

| 1. |
Installation is reverse of removal. |
Repair procedures Removal 1. Release the residual pressure in fuel line. (Reter to Fuel Delivery System - "Release Residual Pressure in Fuel Line") 2.
Specifications Specifications Items Specifications Clutch operation method Hydraulic type Clutch cover Type Diaphragm spring strap Clutch disc Type Type Single dry with diaphragm Facing diameter (Outer × inner) Gasoline 1.
Other information:
Kia Rio 2017-2023 YB Service Manual: Immobilizer System
Schematic diagrams Circuit Diaram Description and operation Description The immobilizer system will disable the vehicle unless the proper ignition key is used, in addition to the currently available anti-theft systems such as car alarms, the immobilizer system aims to drastically reduce the rate of auto theft.
Kia Rio 2017-2023 YB Service Manual: Ambient Temperature Sensor
Description and operation Description The ambient temperature sensor is located at the front of the condenser and detects ambient air temperature. It is a negative type thermistor; resistance will increase with lower temperature, and decrease with higher temperature.
Categories
- Manuals Home
- Kia Rio Owners Manual
- Kia Rio Service Manual
- Timing Chain
- Maintenance
- Engine Control / Fuel System
- New on site
- Most important about car
