Kia Rio: Crash Pad / Crash Pad Garnish [RH]
Components and components location
| Component Location |
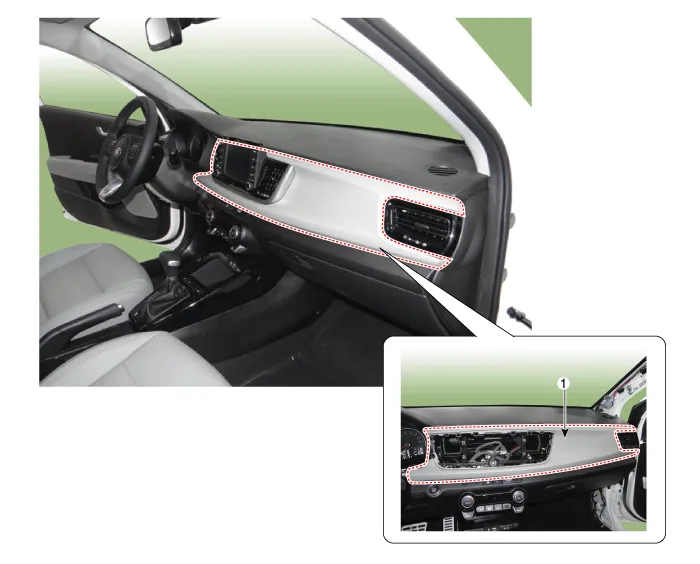
| 1. Crash pad passenger side panel
assembly |
Repair procedures
| Replacement |
Put on gloves to protect your hands. |

|

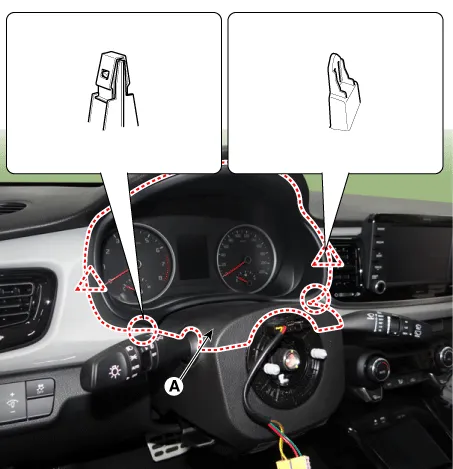
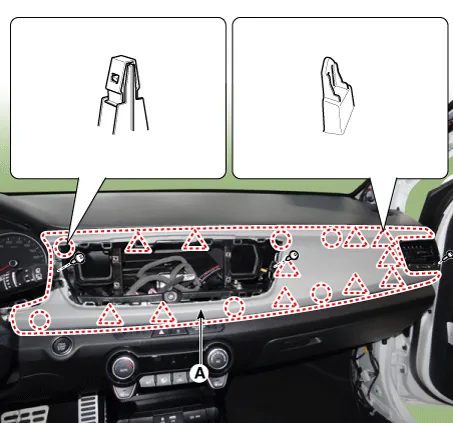
| 1. |
Remove the cluster fascia panel (A) by using a remover.
|
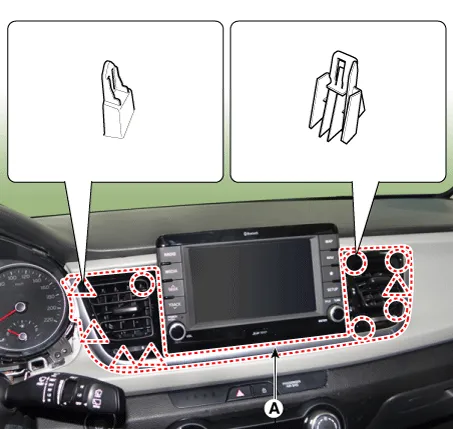
| 2. |
Remove the center fascia panel (A) by using a remover.
|
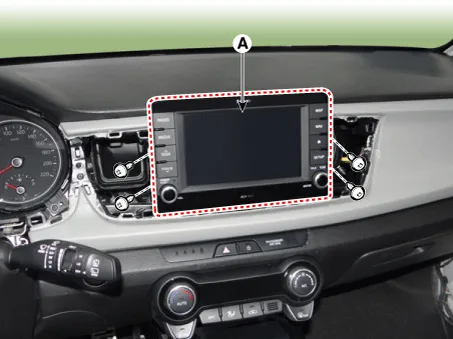
| 3. |
Remove the audio (A) after loosening the mounting screws.
|
| 4. |
Remove the crash pad side cover [RH] (A) by using a remover.
|
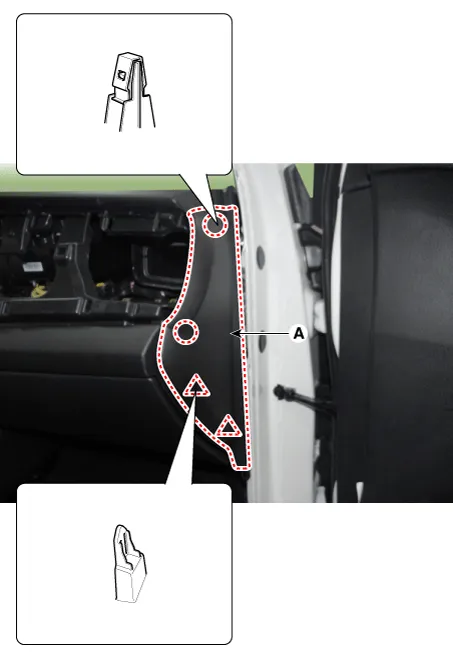
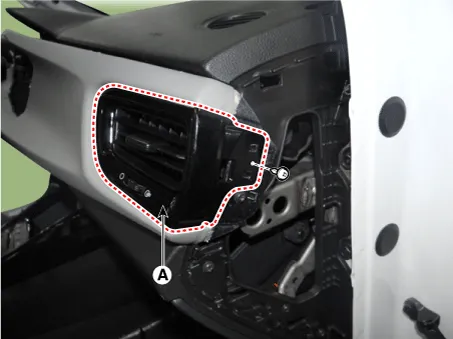
| 5. |
Remove the side air vent duct [RH] (A) after loosening the mounting screws.
|
| 6. |
Remove the crash pad passenger side panel (A) after loosening the mounting screws.
|
| 7. |
Install in the reverse order of removal.
|
Components and components location Component Location 1. Center fascia panel assembly Repair procedures Replacement Put on gloves to protect your hands.
Components and components location Component Location 1. Crash pad lower panel Repair procedures Replacement Put on gloves to protect your hands.
Other information:
Kia Rio 2017-2023 YB Service Manual: Front Fog Lamps
Repair procedures Removal 1. Disconnect the negative (-) battery terminal. 2. Remove the front bumper assembly. (Refer to Body - "Front Bumper Assembly") 3. Remove the front fog lamp assembly (A) after loosening the mounting screws.
Kia Rio 2017-2023 YB Service Manual: Power Windows
Components and components location Component Location 1. Driver power window switch 2. Assist power window switch 3. Rear power window switch 4. Front window motor 5. Rear window motor Description and operation Safety Function of Power Window When driver door power win
Categories
- Manuals Home
- Kia Rio Owners Manual
- Kia Rio Service Manual
- Heating,Ventilation, Air Conditioning
- Maintenance
- General Information
- New on site
- Most important about car
