Kia Rio: Cooling System / Cooling Fan
Components and components location
| Components |
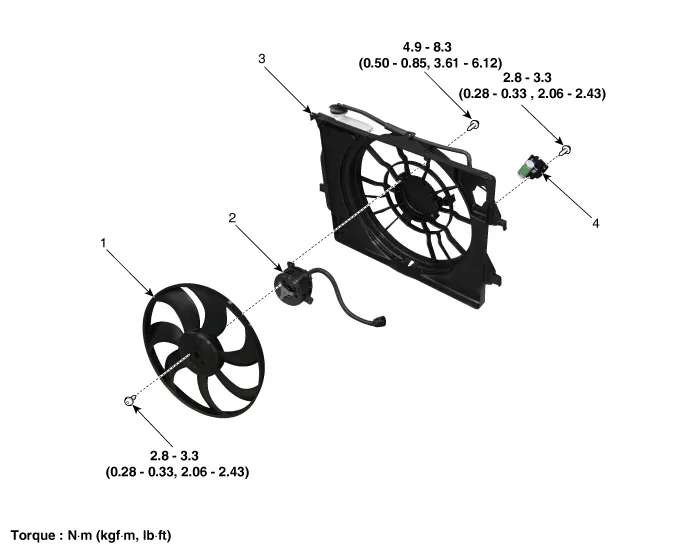
| 1. Cooling fan 3. Cooling fan shroud |
2. Fan motor 4. Radiator |
Specifications
| Specifications |
|
Item |
Specification |
||
|
120W |
160W |
180W |
|
|
Fan type |
Puller |
Puller |
Puller |
|
Fan speed control |
Resistor |
Resistor |
Resistor |
|
Air flow rate [㎥/h] |
1,700 - 8% min. |
1,950 - 8% min. |
1,900 - 8% min. |
|
Fan speed (rpm) |
1,600 ± 8% |
1,800 ± 8% |
1,850 ± 8% |
|
Current (A) |
10.0 + 10% max. |
13.3 + 10% max. |
15.0 + 10% max. |
Description and operation
| Dscription |
[Air conditioning type]
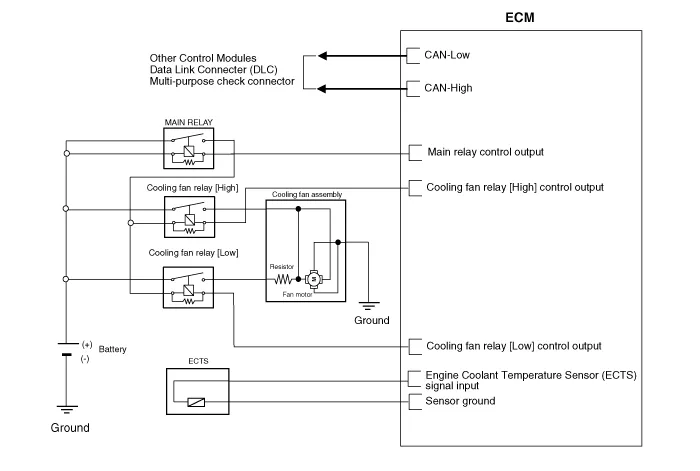
The cooling fan operates in 2 stages (HIGH/LOW). The engine control module (ECM) controls the cooling fan according to the coolant temperature, vehicle speed and A/C operation.
[Non-Air conditioning type]
The cooling fan operates in 1 stage (HIGH). The engine control module (ECM) controls the cooling fan according to the coolant temperature, vehicle speed and A/C operation.
Schematic diagrams
| Circuit Diagram |
Repair procedures
| Removal and installation |
Cooling Fan
| 1. |
Disconnect the battery negative terminal. |
| 2. |
Remove the air duct. (Refer to Intake and Exhaust System - "Air Cleaner") |
| 3. |
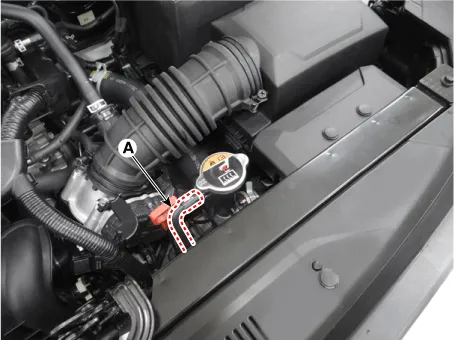
Disconnect the resistor connector (A).
|

| 4. |
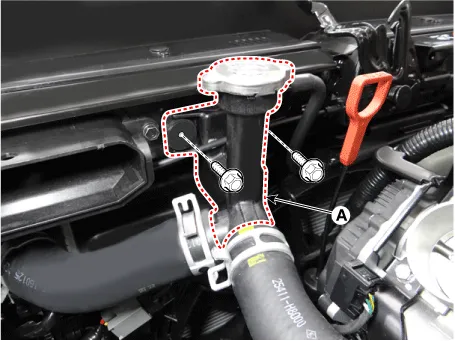
Separate the filler neck assembly (A).
|
| 5. |
Remove the engine room under cover. (Refer to Engine and Transaxle Assembly - "Engine Room Under Cover") |
| 6. |
Disconnect the over flow hose (A).
|
| 7. |
Remover the front bumper assembly. (Refer to Body (Interior and Exterior) - "Front Bumper Assembly") |
| 8. |
Remove the horn. (Refer to Body Electrical System - "Horn") |
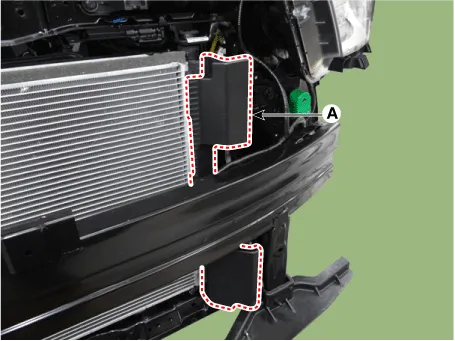
| 9. |
Remove the upper air guard (A).
|
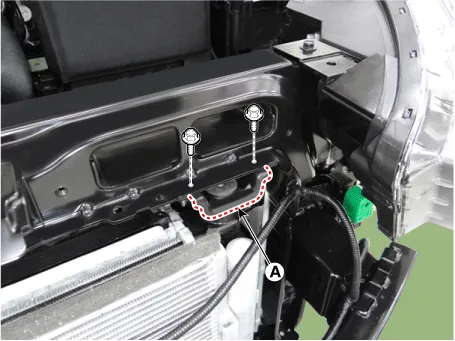
| 10. |
Remove the air guard (A). [LH]
[RH]
|

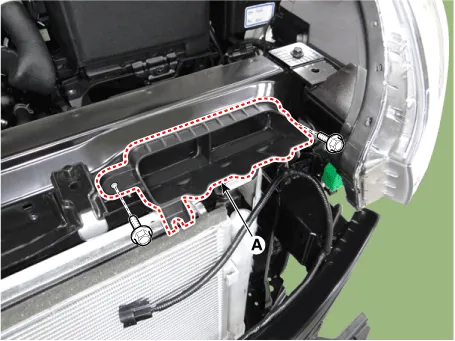
| 11. |
Remove the air intake shield (A).
|
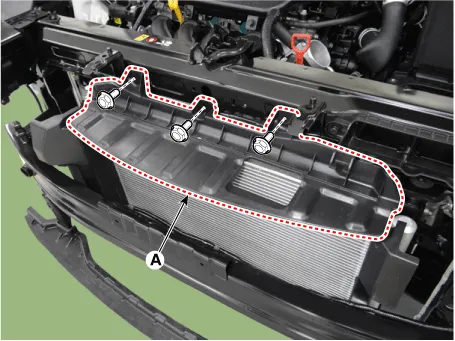
| 12. |
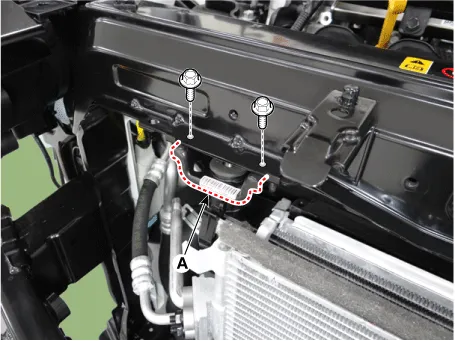
Remove the radiator upper mounting bracket (A).
[LH]
[RH]
|
| 13. |
Remove the cooling fan assembly (A).
|

| 14. |
Install in the reverse order of removal. |
Resistor
| 1. |
Remove the air duct. (Refer to Intake and Exhaust System - "Air Cleaner") |
| 2. |
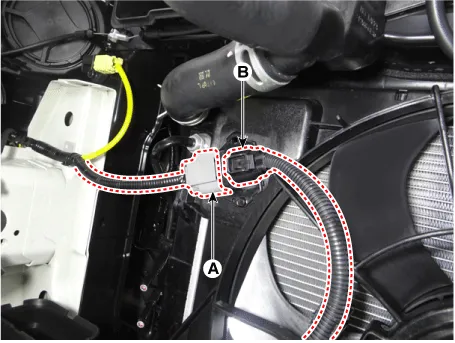
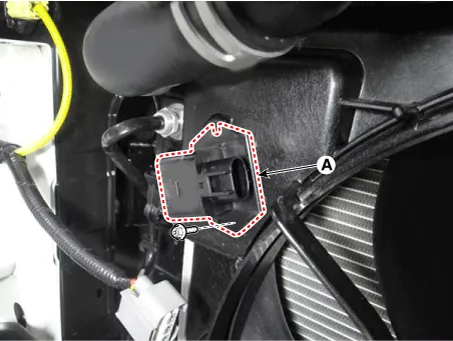
Disconnect the wire harness connector (A) and fan motor connector (B).
|
| 3. |
Remove the resistor (A) from fan shroud.
|
| 4. |
Install in the reverse order of removal. |
| Disassembly |
| 1. |
Remove the cooling fan (A) from the cooling fan assembly.
|

| 2. |
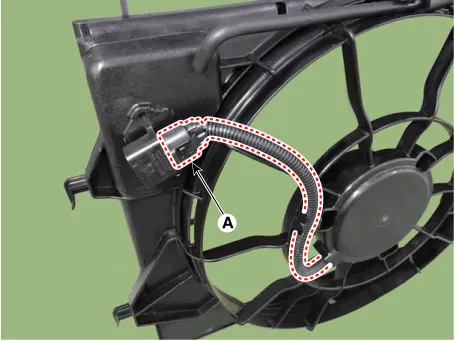
Disconnect the fan motor connector (A) from the resistor.
|
| 3. |
Remove the fan motor (A) from the cooling fan shroud.
|
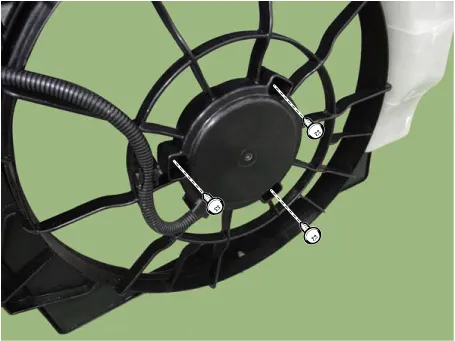
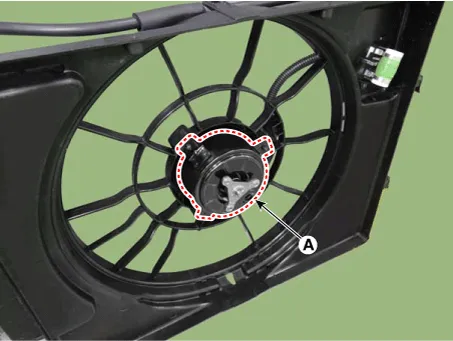
| 4. |
Assemble in the reverse order of disassembly. |
| Inspection |
Fan motor
| 1. |
Disconnect the fan motor connector from the resistor. |
| 2. |
Connect the battery voltage to the "+" terminal and ground to "-" terminal. |
| 3. |
Check the cooling fan motor operates well. |
Repair procedures Replacement and air bleeding Never remove the radiator cap when the engine is hot.
Components and components location Components 1. Radiator 2. Radiator upper hose 3. Radiator lower hose 4. Filler neck assembly 5.
Other information:
Kia Rio 2017-2023 YB Service Manual: Power Window Motor
Components and components location Components [Standard window motor] [Safety window motor] Repair procedures Inspection • When removing with a flat-tip screwdriver or remover, wrap protective
Kia Rio 2017-2023 YB Service Manual: Intake Actuator
Description and operation Description The intake actuator is located at the blower unit. It regulates the intake door by signal from control unit. Pressing the intake selection switch will shift between recirculation and fresh air modes.
Categories
- Manuals Home
- Kia Rio Owners Manual
- Kia Rio Service Manual
- Motor Driven Power Steering
- Battery
- Body Electrical System
- New on site
- Most important about car
