
Kia Rio: Cylinder Block / Water Jacket Insert
Repair procedures
| Remove and Installation |
| 1. |
Remove the cylinder head assembly. (Refer to Cylinder Head Assembly - "Cylinder Head") |
| 2. |
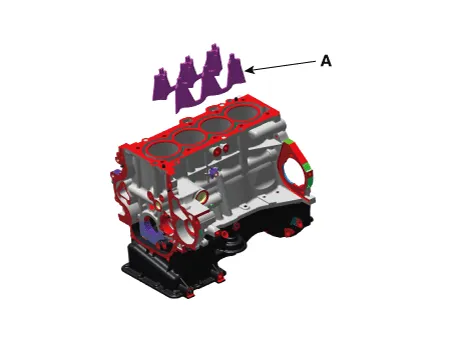
Remove the water jacket insert (A).
|

| 3. |
Install in the reverse order of removal. |
Components and components location Components 1. Piston ring 2. Piston 3. Piston pin 4. Connecting rod 5. Connecting rod upper bearing 6.
Repair procedures Remove and Installation 1. Remove the automatic transaxle . (Refer to Automatic Transaxle System - "Automatic Transaxle") 2.
Other information:
Kia Rio 2017-2023 YB Service Manual: Compressor Oil
Repair procedures Oil Specification 1. The HFC-134a system requires synthetic compressor oil (PAG) whereas the R-12 system requires mineral compressor oil. The two oils must never be mixed. 2. Compressor oil (PAG) varies according to compressor model.
Kia Rio 2017-2023 YB Service Manual: Refrigerant line
Repair procedures Replacement 1. Discharge refrigerant from refrigeration system. 2. Replace faulty tube or hose. Cap the open fittings immediately to keep moisture or dirt out of the system.
Categories
- Manuals Home
- Kia Rio Owners Manual
- Kia Rio Service Manual
- Engine Oil and Filter
- Heating,Ventilation, Air Conditioning
- Fuse/relay panel description
- New on site
- Most important about car
