Kia Rio: Driveshaft Assembly / TJ Joint
Components and components location
| Components |
| [RH] |
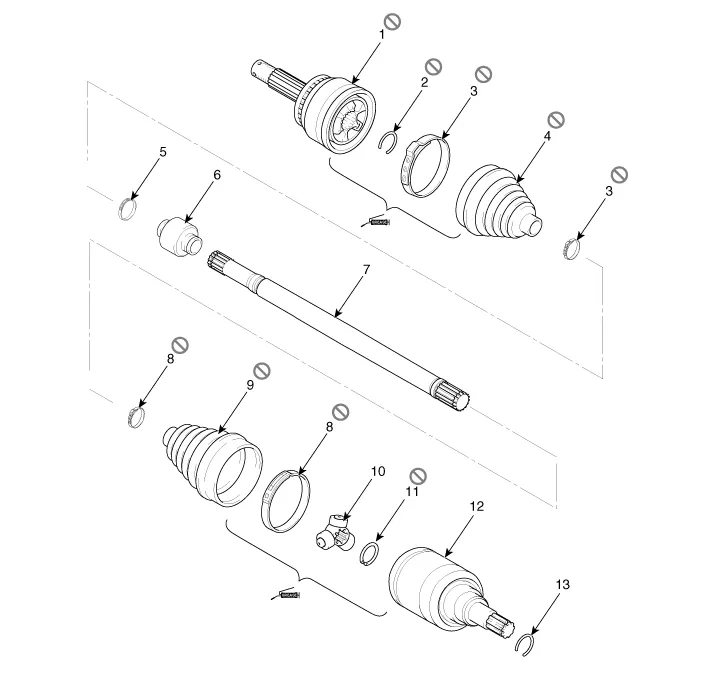
| 1. BJ assembly 2. Clip 3. BJ boot band 4. BJ boot |
5. Dynamic damper band
6. Dynamic damper 7. Shaft 8. TJ boot band |
9. TJ boot
10. Spider assembly 11. Circlip 12. TJ housing |
13. Circlip |
| [LH] |
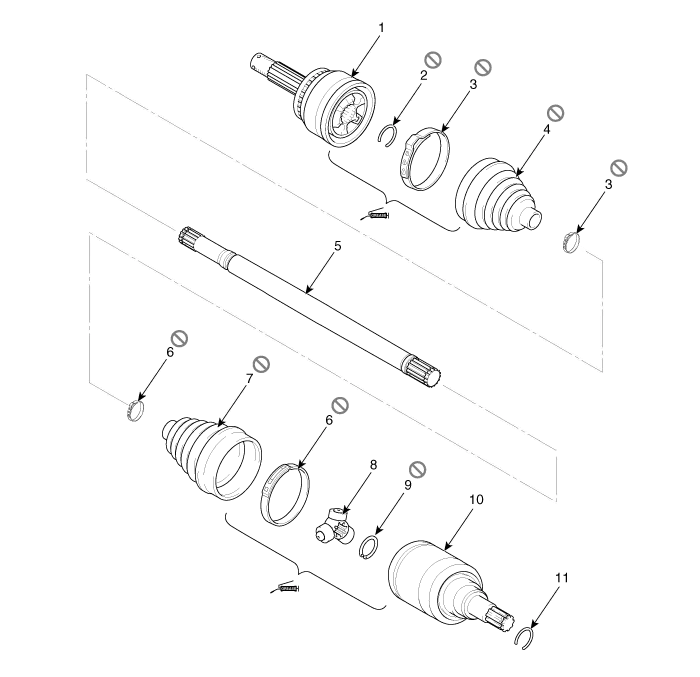
| 1. BJ assembly 2. BJ circlip 3. BJ boot band 4. BJ boot |
5. Shaft 6. TJ boot band 7. TJ boot 8. Spider assembly |
9. Snap
ring 10. TJ case 11. Circlip |
Repair procedures
| Removal |
|

| 1. |
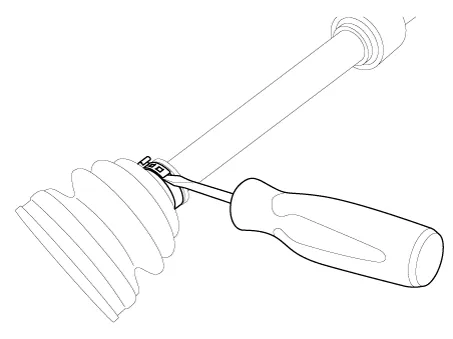
Remove the Front Driveshaft. (Refer to Driveshaft and axle - “Front Driveshaft”) |
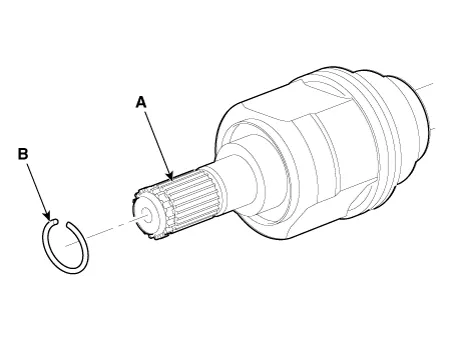
| 2. |
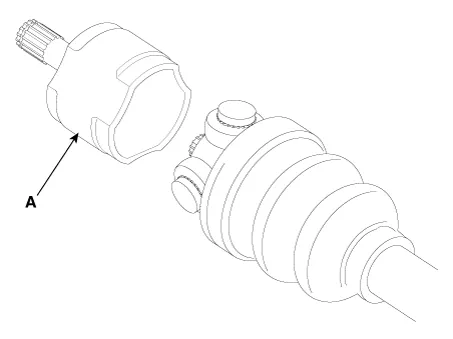
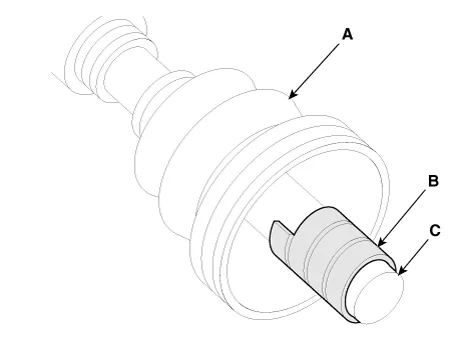
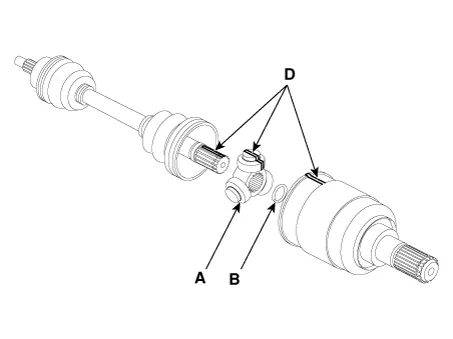
Remove the BJ circlip (B) from the TJ housing (A).
|
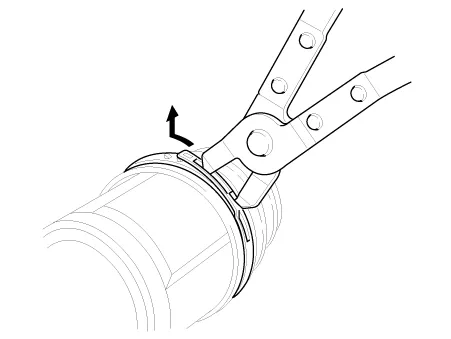
| 3. |
Remove both boot bands from the TJ housing.
|
| 4. |
Remove the TJ circlip (A).
|
| 5. |
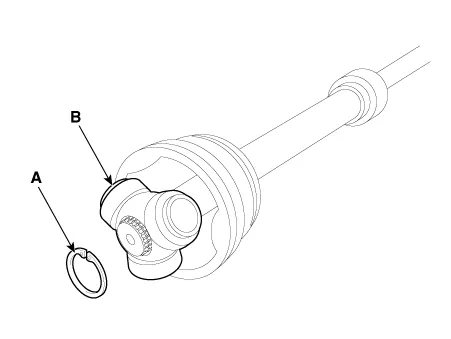
Remove the snap ring (A) and spider assembly (B).
|
| 6. |
Clean the spider assembly. |
| 7. |
Remove the TJ boot (A).
|
| Inspection |
| 1. |
Check the spider assembly for roller rotation, wear or corrosion. |
| 2. |
Check the groove inside the joint case for wear or corrosion. |
| 3. |
Check the TJ boots for damage and deterioration. |
| Installation |
| 1. |
Wrap tape around the driveshaft spline (TJ) to prevent damaging the boot. |
| 2. |
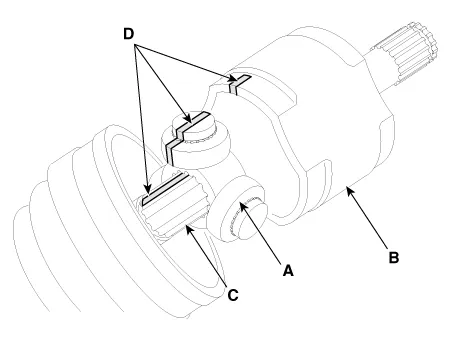
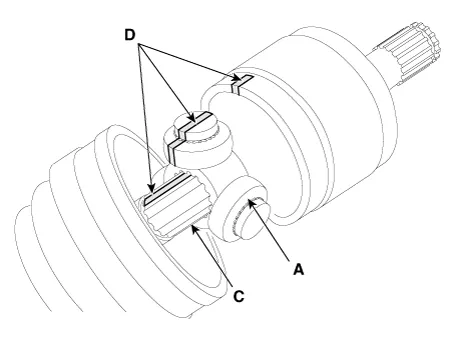
Using the alignment marks (D) made during disassembly as a guide, install the spider assembly (A) and snap ring (B) on the driveshaft splines (C).
|
| 3. |
Add specified grease to the joint boot as much as it was wiped away at inspection. |
| 4. |
Install both boot bands. |
| 5. |
To control the air in the TJ boot, keep the specified distance between the boot bands when they are tightened.
|
|||||||||||||||||||||||
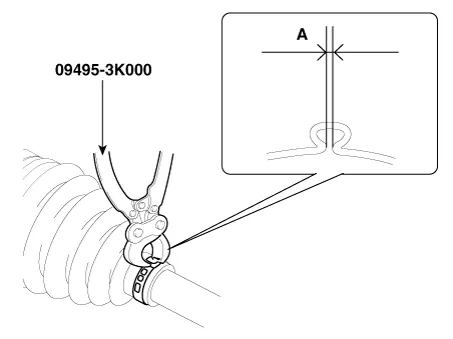
| 6. |
Using the SST (09495-3K000), secure the TJ boot bands.
|
| 7. |
Install the Front Driveshaft. (Refer to Driveshaft and axle - “Front Driveshaft”) |
| 8. |
Check the front alignment. (Refer to Suspension System - "Alignment") |
Components and components location Components Location 1. Drive shasft (LH) 2. Drive shaft (RH) [RH] 1.
Components and components location Components [RH] 1. BJ assembly 2. Clip 3. BJ boot band 4. BJ boot 5.
Other information:
Kia Rio 2017-2023 YB Service Manual: Photo Sensor (FATC only)
Description and operation Description The photo sensor is located at the center of defrost nozzles. The photo sensor contains a photovoltaic (sensitive to sunlight) diode. The solar radiation received by its light receiving portion, generates an electromotive force in proportion to the amount of radiation received which is tran
Kia Rio 2017-2023 YB Service Manual: Blower Resistor (MANUAL)
Repair procedures Inspection 1. Measure the resistance between the terminals. 2. The measured resistance is not within specification, the blower resistor must be replaced. (After removing the resistor) Replacement 1.
Categories
- Manuals Home
- Kia Rio Owners Manual
- Kia Rio Service Manual
- Body Electrical System
- Engine Electrical System
- Cooling System
- New on site
- Most important about car
