Kia Rio: Timing System / Timing Chain Cover
Repair procedures
| Removal |
Engine removal is not required for this procedure.
|

Mark all wiring and hoses to avoid misconnection. |

| 1. |
Remove the engine cover. (Refer to Engine And Transaxle Assembly - "Engine Cover") |
| 2. |
Disconnect the battery negative terminal. |
| 3. |
Remove the RH side front wheel. (Refer to Suspension System - "Wheel") |
| 4. |
Remove the engine room under cover. (Refer to Engine and Transaxle Assembly - "Engine Room Under Cover") |
| 5. |
Drain the coolant. (Refer to Cooling System - "Coolant") |
| 6. |
Drain the engine oil. (Refer to Lubrication System - "Engine Oil") |
| 7. |
Remove the drive belt. (Refer to Drive Belt System - "Drive Belt") |
| 8. |
Remove the alternator. (Refer to Engine Electrical System - "Alternator") |
| 9. |
Remove the drive belt tensioner. (Refer to Drive Belt System - "Drive Belt Tensioner") |
| 10. |
Remove the water pump. (Refer to Cooling System - "Water Pump") |
| 11. |
Remove the crankshaft damper pulley. (Refer to Drive Belt System - "Crankshaft Damper Pulley") |
| 12. |
Remove the cylinder head cover. (Refer to Cylinder Head Assembly - "Cylinder Head Cover") |
| 13. |
Remov ethe engine mounting support bracket.
|
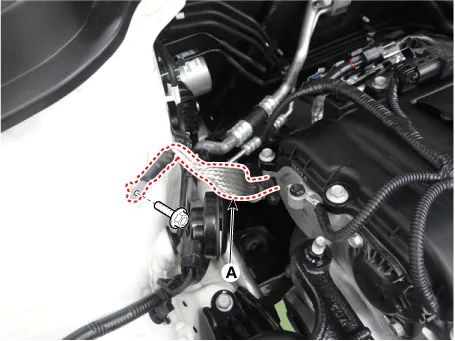
| 14. |
Remove the variable force solenoid (VFS) valve (A).
|
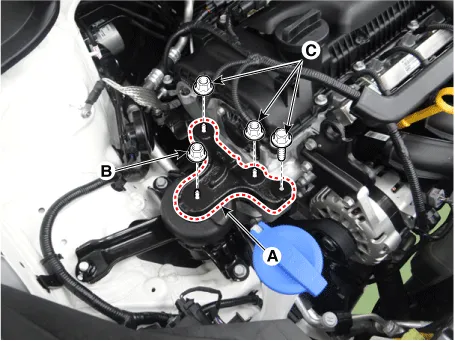
| 15. |
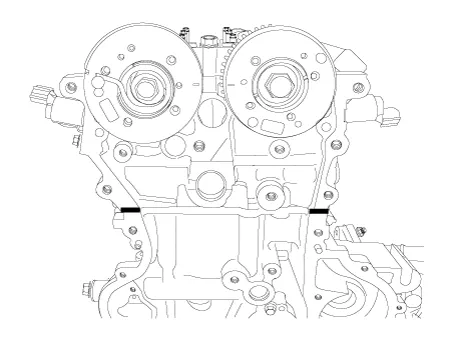
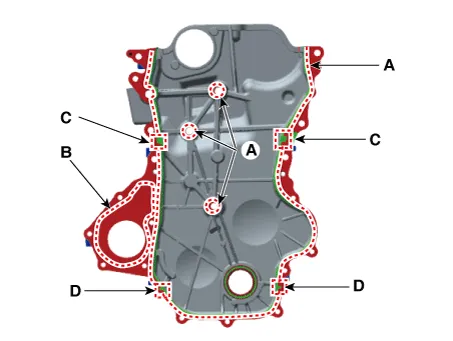
Remove the timing chain cover (A).
|
| Installation |
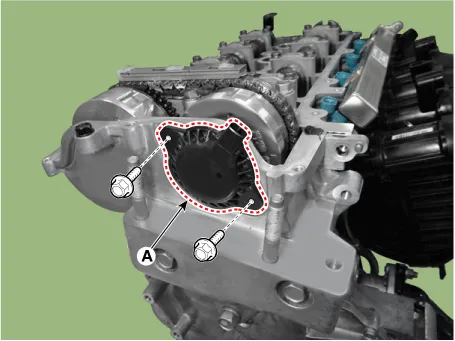
| 1. |
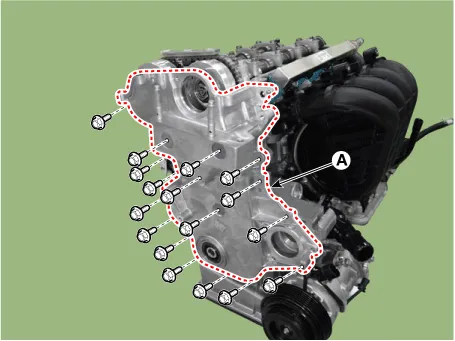
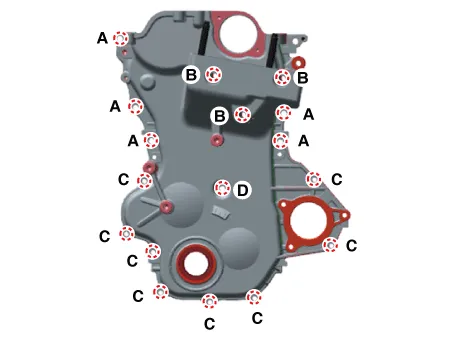
Install the timing chain cover.
|
| 2. |
Install the variable force solenoid (VFS) valve (A).
|
| 3. |
Install the other parts in the reverse order of removal. |
Repair procedures Replacement 1. Remove the crankshaft damper pulley. (Refer to Drive Belt System - "Crankshaft Damper Pulley") 2.
Components and components location Components 1. Timing chain 2. Timing chain cam guide 3. Timing chain guide 4.
Other information:
Kia Rio 2017-2023 YB Service Manual: Blower Resistor (MANUAL)
Repair procedures Inspection 1. Measure the resistance between the terminals. 2. The measured resistance is not within specification, the blower resistor must be replaced. (After removing the resistor) Replacement 1.
Kia Rio 2017-2023 YB Service Manual: Heater & A/C Control Unit (FATC)
Components and components location Components Connector Pin Function No. Connector A Connector B 1 Battery ⁻ 2 ISG battery (+) ⁻ 3 Illumination (+) ⁻
Categories
- Manuals Home
- Kia Rio Owners Manual
- Kia Rio Service Manual
- Coolant
- General Information
- Suspension System
- New on site
- Most important about car
