Kia Rio: Timing System / Timing Chain
Components and components location
| Components |
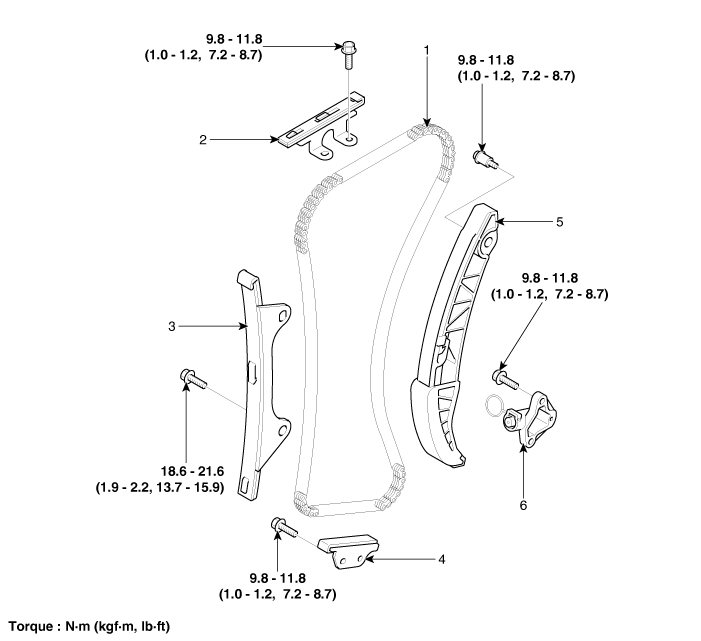
| 1. Timing chain 2. Timing chain cam guide 3. Timing chain guide |
4. Timing chain crank guide
5. Timing chain tensioner arm 6. Timing chain tensioner |
Repair procedures
| Removal |
| 1. |
Remove the cylinder head cover. (Refer to Cylinder Head Assembly - "Cylinder Head Cover") |
| 2. |
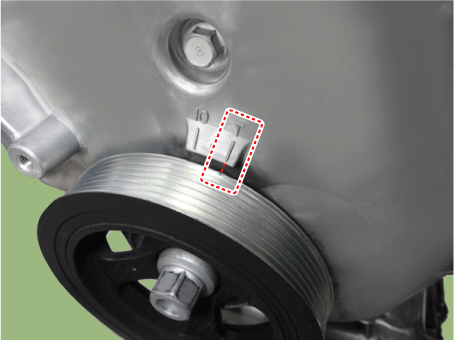
Turn the crankshaft pulley and align its groove with the timing mark of the timing chain cover to set the piston of No.1 cylinder to the top dead center on compression stroke.
|
| 3. |
Remove the timing chain cover. (Refer to Timing System - "Timing Chain Cover") |
| 4. |
Before removing the timing chain, mark the timing chain with an identification based on the location of the sprocket (CVVT) because the identification mark on the chain for TDC (Top Dead Center) can be erased.
|

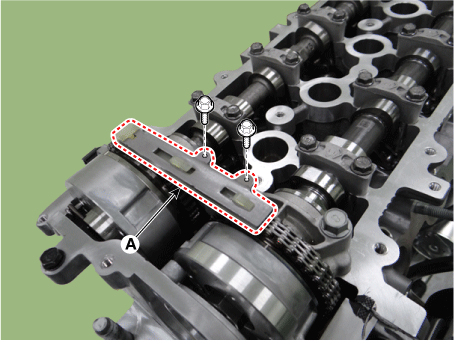
| 5. |
Remove the timing chain cam guide (A).
|
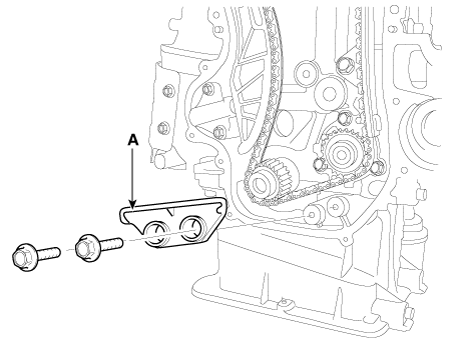
| 6. |
Remove the timing chain crank guide (A).
|
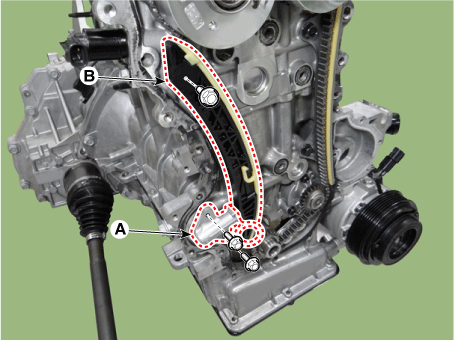
| 7. |
Remove the timing chain auto tensioner (A) and tensioner arm (B).
|

| 8. |
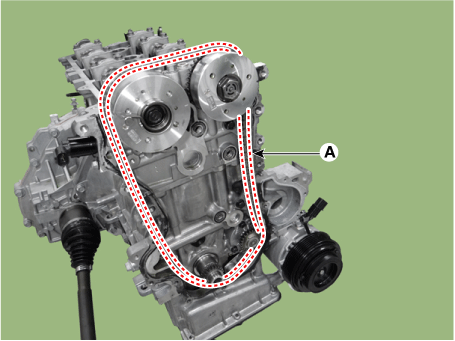
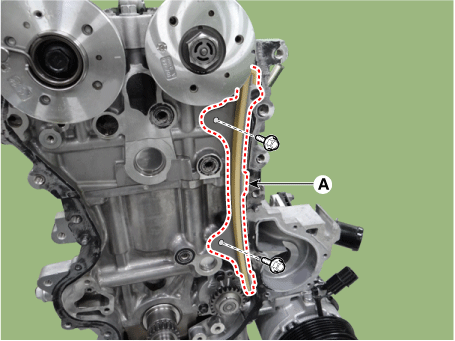
Remove the timing chain (A).
|
| 9. |
Remove the timing chain guide (A).
|
| 10. |
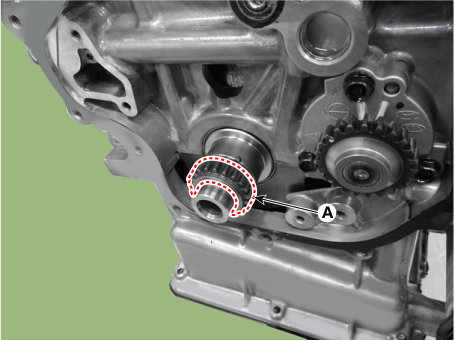
Remove the crankshaft sprocket (A).
|
| Inspection |
Sprockets, Chain Tensioner, Chain Guide, Chain Tensioner Arm
| 1. |
Check the camshaft sprocket and crankshaft sprocket for abnormal wear, cracks, or damage. Replace as necessary. |
| 2. |
Inspect the tensioner arm and chain guide for abnormal wear, cracks, or damage. Replace as necessary. |
| 3. |
Check that the tensioner piston moves smoothly. |
| Installation |
| 1. |
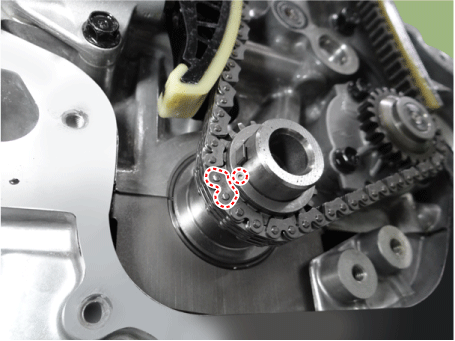
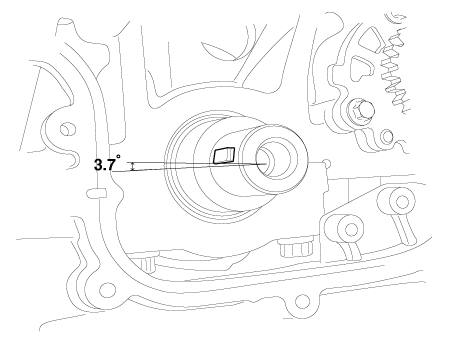
Set the key of crankshaft about 3.7° with horizontal center line. As a result of this, the piston of No.1 cylinder is placed at the top dead center on compression stroke.
|
| 2. |
Install the crankshaft sprocket (A).
|
| 3. |
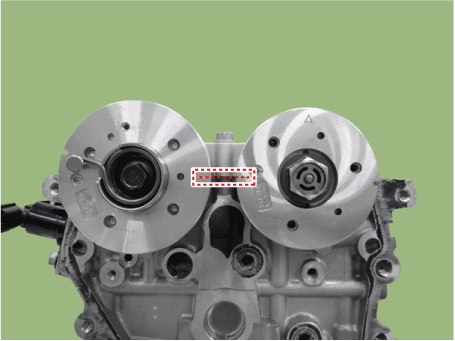
Align the mark of cam shaft sprocket (CVVT) on the top surface of cylinder head. As a result of this, the piston of No.1 cylinder is placed at the top dead center on compression stroke.
|
| 4. |
Install the timing chain guide (A).
|
| 5. |
Install the timing chain (A).
|
| 6. |
Install the timing chain auto tensioner (A) and tensioner arm (B).
|
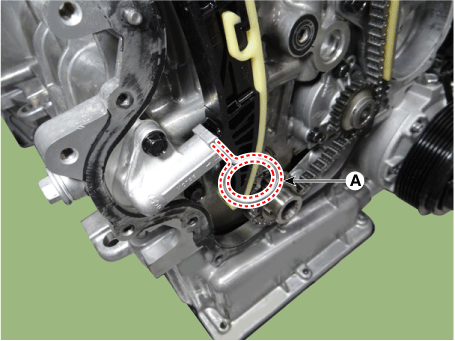
| 7. |
Remove the timing chain auto tensioner stoper pin (A).
|
| 8. |
Install the timing chain crank guide (A).
|
| 9. |
Install the timing chain cam guide (A).
|
| 10. |
After rotating the crankshaft 2 revolutions in regular direction (clockwise viewed from front), confirm the timing
|
| 11. |
Install the other parts in the reverse order of removal.A |
 Timing Chain Cover
Repair procedures
Removal
Engine removal is not required for this procedure.
•
Use fender ...
 Engine Electrical System
Specifications
Specification
Ignition System
Ignition Coil
Item
Specification
Rated Voltage (V)
12
...
Other information:
Kia Rio 2017-2025 YB Owners Manual: Seat
Driver’s seat (1) Forward and backward (2) Seatback angle (3) Seat height adjustment* (4) Headrest Front passenger’s seat (5) Forward and backward (6) Seatback angle (7) Headrest Rear seat (8) Headrest (9) Seatback folding* WARNING - Loose objects Do not place anything in the driv ...
Kia Rio 2017-2025 YB Owners Manual: Outside rearview mirror
Be sure to adjust mirror angles before driving. Your vehicle is equipped with both left-hand and right-hand outside rearview mirrors. The mirrors can be adjusted remotely with the remote switch (if equipped). The mirror heads can be folded to prevent damage during an automatic car wash or whe ...
