Symptoms
|
Possible Causes
|
Remedy
|
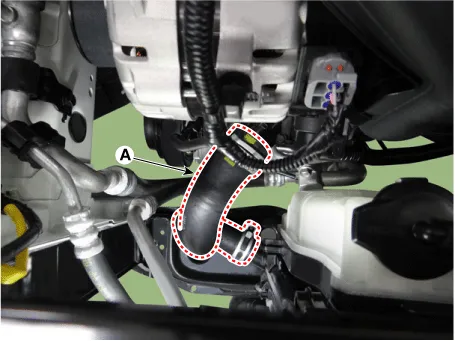
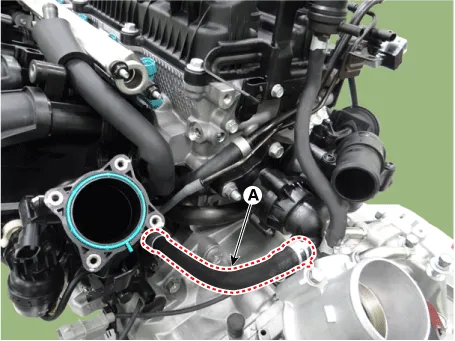
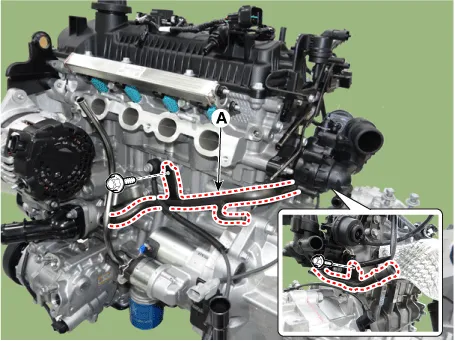
Coolant leakage
|
| • |
From the thermostat gasket
|
|
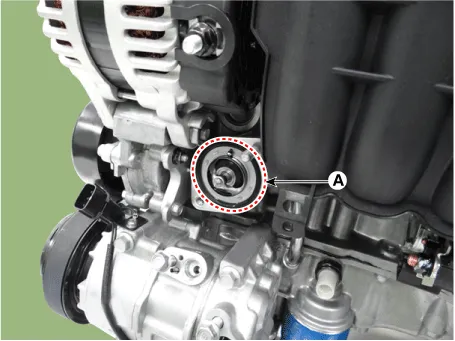
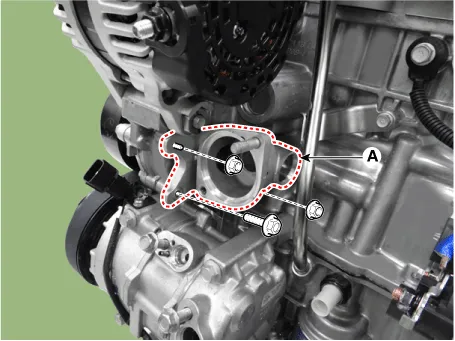
Check the mounting bolts
|
| • |
Check the torque of the mounting bolts
|
|
| • |
Retighten the bolts and check leakage again.
|
|
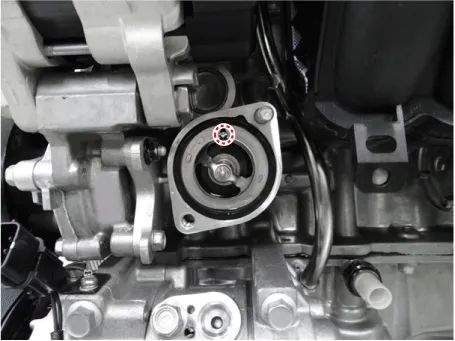
Check the gasket for damage
|
| • |
Check gasket or seal for damage
|
|
| • |
Replace gaskets and reuse the thermostat.
|
|
Cooled excessively
|
| • |
Low heater performance (cool air blowed-out)
|
| • |
Thermogauge indicates 'LOW'
|
|
Visually check after removing the radiator cap.
|
| • |
Insufficient coolant or leakage.
|
|
| • |
After refilling coolant, recheck.
|
|
GDS check&Starting engine
|
| • |
Check connection of the fan clutch or the fan motor.
|
※ If the fan clutch is always connected, there will be a noise at idle.
|
| • |
Check the engine coolant sensor, wiring and connectors.
|
| • |
Replace the componants.
|
|
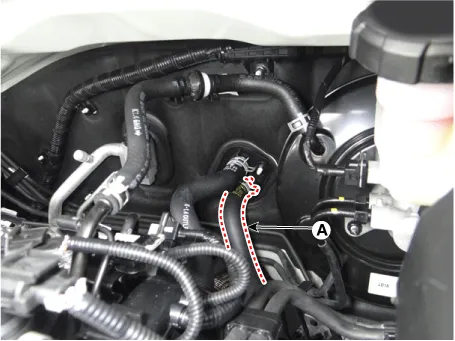
Remove the thermostat and inspect
|
| • |
Check if there are dusts or chips in the thermostat valve.
|
| • |
Check adherence of the thermostat.
|
|
| • |
Clean the thermostat valve and reuse the thermostat.
|
| • |
Replace the thermostat, if it doesn't work properly.
|
|
Heated excessively
|
| • |
Thermogauge indicates 'HI'
|
|
Visually check after removing the radiator cap.
|
| • |
Insufficient coolant or leakage.
※ Be careful when removing a radiator cap of the overheated vehicle.
|
| • |
Check air in cooling system.
|
|
| • |
After refilling coolant, recheck.
|
| • |
Check the cylinder head gaskets for damage and the tightening
torque of the mounting bolts.
|
|
GDS check&Starting engine
|
| • |
Check the fan motor performance as temperature varies.
|
| • |
Check if the fan clutch slips.
|
| • |
Check the water pump adherence or impeller damaged.
|
|
| • |
Check the engine coolant sensor, wiring and connectors.
|
| • |
Check the fan motor, the relay and the connector.
|
| • |
Replace the fan clutch, if it doesn't work properly.
|
| • |
Replace the water pump, if it doesn't work properly.
|
|
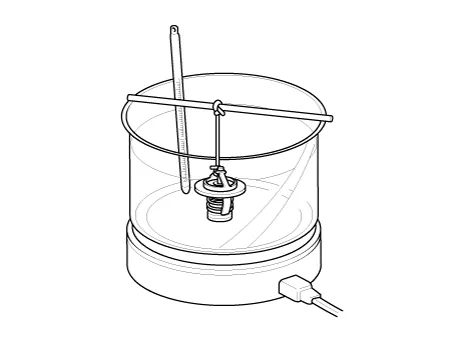
Immerse the thermostat in boiling water and inspection.
|
| • |
After removing the thermostat, check it works properly.
|
※ Check the thermostat opens at the valve opening temperature.
|
| • |
Replace the thermostat, if it doesn't work properly.
|
|
Other information:
Repair procedures
Inspection
Self Diagnosis With
Scan Tool
It will be able to diagnose defects of SMART KEY system with KDS/GDS quickly.
KDS/GDS can operates actuator forcefully, input/output value monitoring and self
diagnosis.
The following three features will be major problem in SMART KEY system.
Repair procedures
Inspection
1.
Check the condenser fins for clogging and damage. If clogged, clean them
with water, and blow them with compressed air. If bent, gently bend them
using a screwdriver or pliers.
2.