Kia Rio: Body (Interior and Exterior) / Trunk Trim
Components and components location
| Components |

| 1. Rear transverse trim 2. Luggage covering mat 3. Luggage floor net 4. Luggage side trim [RH] 5. Rear wheel house trim [RH] |
6. Luggage partition side trim
[RH] 7. Rear wheel house trim [LH] 8. Rear package tray trim 9. Rear wheel house trim [LH] |
Repair procedures
| Replacement |
Put on gloves to protect your hands. |

|

| 1. |
Remove the rear seat assembly. (Refer to Rear Seat - "Rear Seat Assembly") |
| 2. |
Remove the rear pillar trim (A) by using a remover.
|
| 3. |
Remove the rear door scuff trim.
|

| 4. |
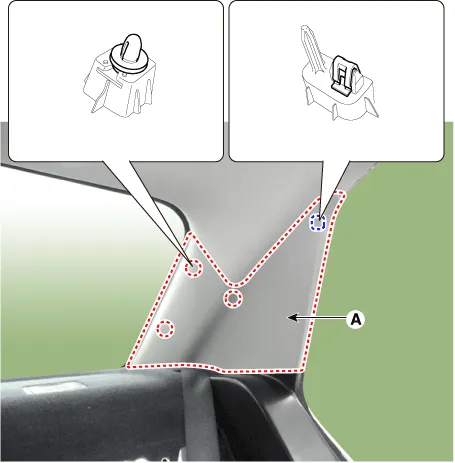
Remove the rear partition trim (A) after looseing the mountin screw.
|

| 5. |
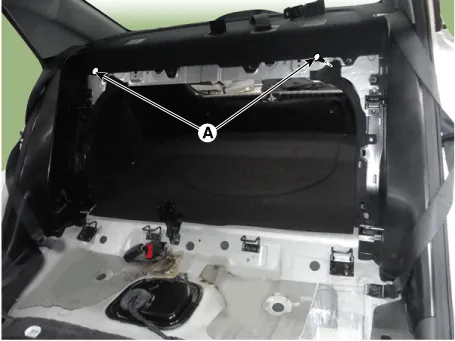
Remove the luggage side trims mounting clips (A).
|
| 6. |
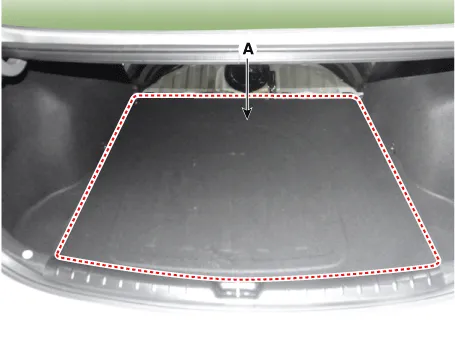
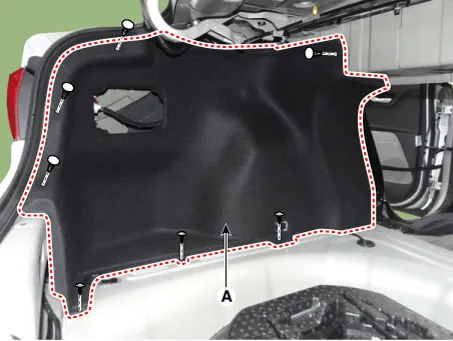
Remove the luggage covering (A).
|
| 7. |
Separate the tailgate weatherstrip. |
| 8. |
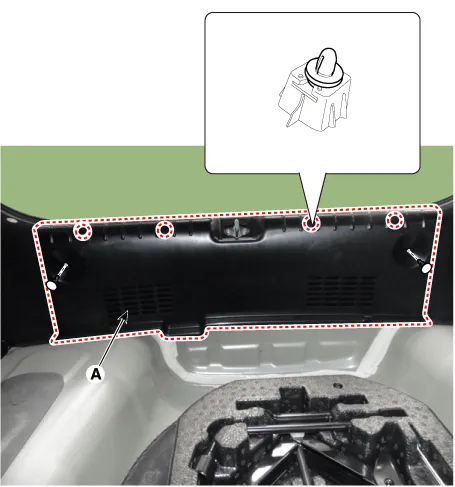
Remove the rear transverse trim (A).
|
| 9. |
Remove the luggage side trim (A) after loosening the screws and clips.
|
| 10. |
Install in the reverse order of removal.
|
Repair procedures Replacement (5Door) Be careful as the tailgate may fall down on people when the lifts are removed.
Components and components location Components 1. Windshield glass 2. Windshield glass molding Repair procedures Removal Put on gloves to protect your hands.
Other information:
Kia Rio 2017-2023 YB Service Manual: Multifunction Switch
Specifications Specifications Items Specifications Rated voltage DC 12 V Operating temperature range -22 - 176°F (-30 - 80°C) Rated load Washer Washer : 6A (Motor load) Components and components
Kia Rio 2017-2023 YB Service Manual: Photo Sensor (FATC only)
Description and operation Description The photo sensor is located at the center of defrost nozzles. The photo sensor contains a photovoltaic (sensitive to sunlight) diode. The solar radiation received by its light receiving portion, generates an electromotive force in proportion to the amount of radiation received which is tran
Categories
- Manuals Home
- Kia Rio Owners Manual
- Kia Rio Service Manual
- Maintenance
- Clutch System
- Engine Mechanical System
- New on site
- Most important about car
