Kia Rio: Hood / Hood Assembly
Components and components location
| Component Location |

| 1. Hood assembly |
Repair procedures
| Replacement |
Be careful not to damage the hood and body. |

|

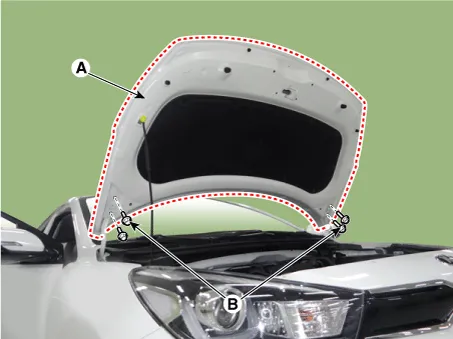
| 1. |
Remove the hood assembly (A) after loosening the hood hinge (B) mounting bolts.
|
| 2. |
Install in the reverse order of removal.
|
Repair procedures Adjustment 1. After loosening the hinge (A) mounting bolts, adjust the hood (B) by moving it up and down, or right and left.
Repair procedures Replacement 1. Using a clip remover, detach the clips, and remove the hood insulator pad (A). Be careful not to damage the hood and body.
Other information:
Kia Rio 2017-2023 YB Service Manual: Indicators And Gauges
Troubleshooting Troubleshooting Error Item Failure symptom Inspection items Detailed inspections Relevant Parts/ Components Screen display LCD screen does not turn on 1) Connector attachments
Kia Rio 2017-2023 YB Service Manual: Rear Parking Assist System
Specifications Specification Item Specification Ultrasonic sensor Voltage rating DC 12V Detecting range 11.8 - 47.2 in (30 - 120 cm) Operation voltage DC 9 - 16 V Operation current
Categories
- Manuals Home
- Kia Rio Owners Manual
- Kia Rio Service Manual
- Emission Control System
- Maintenance
- Body (Interior and Exterior)
- New on site
- Most important about car
