Kia Rio: Engine And Transaxle Assembly / Engine And Transaxle Assembly
Repair procedures
| Removal |
|

|

| 1. |
Remove the engine cover. (Refer to Engine And Transaxle Assembly - "Engine Cover") |
| 2. |
Remove the air cleaner assembly. (Refer to Intake and Exhaust System - "Air Cleaner") |
| 3. |
Remove the battery and battery tray. (Refer to Engine Electrical System - "Battery") |
| 4. |
Remove the engine room under cover. (Refer to Engine and Transaxle Assembly - "Engine Room Under Cover") |
| 5. |
Drain the engine coolant. (Refer to Cooling System - "Coolant") |
| 6. |
Recover the refrigerant and then disconnect the suction line and discharge line from the compressor. (Refer to Heating, Ventilation Air conditioning - "Compressor") |
| 7. |
Remove the transaxle wire harness connectors and control cable from the transaxle. (Refer to Manual Transaxle System - "Manual transaxle") |
| 8. |
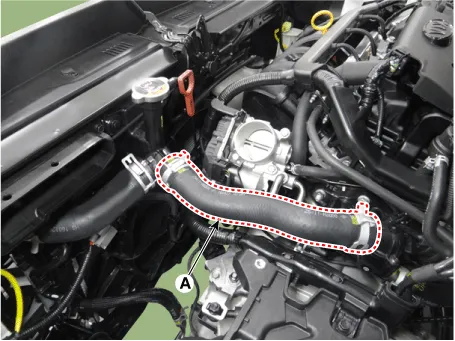
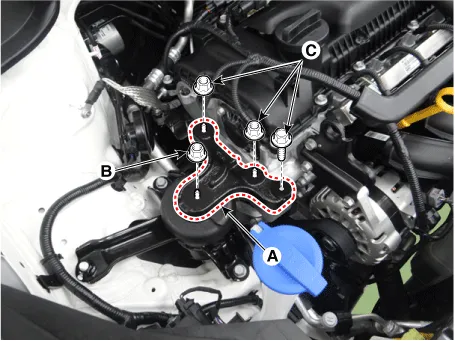
Disconnect the fuel hose (A), purge control solenoid valve (PCSV) hose (B).
|

| 9. |
Disconnect the radiator upper hose (A).
|
| 10. |
Disconnect the radiator lower hose (A).
|

| 11. |
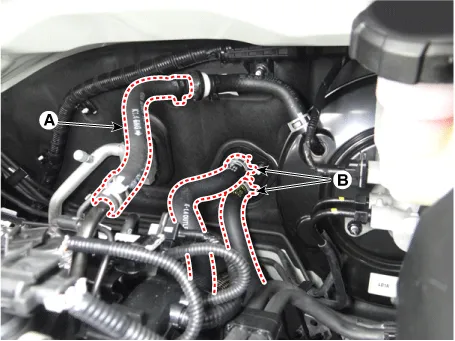
Disconnect the brake booster vacuum hose (A) and heater hoses (B).
|
| 12. |
Disconnect the automatic transaxle fluid (ATF) cooler hoses. (A/T only)
|
| 13. |
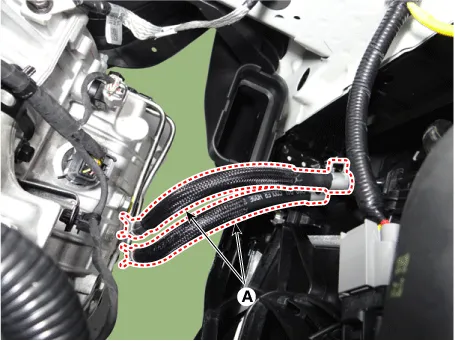
Disconnect the control wiring harness connectors and fasteners and remove the wiring harness protectors from the engine and transaxle.
|

| 14. |
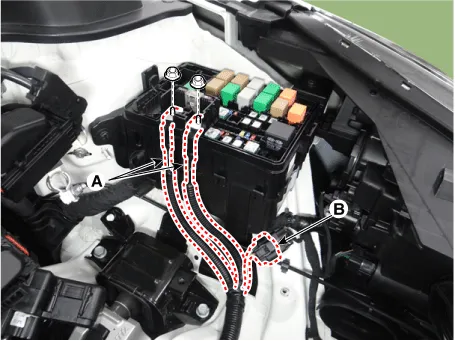
Disconnect the fuse box wiring cable (A) and front connector (B).
|
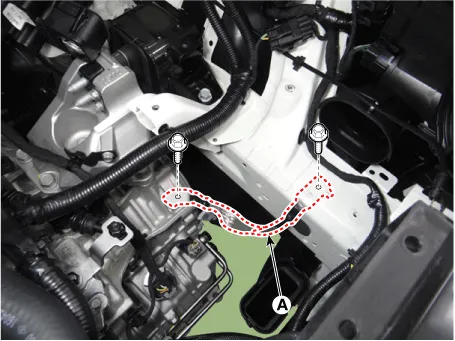
| 15. |
Disconnect the transaxle ground cable (A).
|
| 16. |
Remove the front muffler. (Refer to Intake And Exhaust System - "Muffler") |
| 17. |
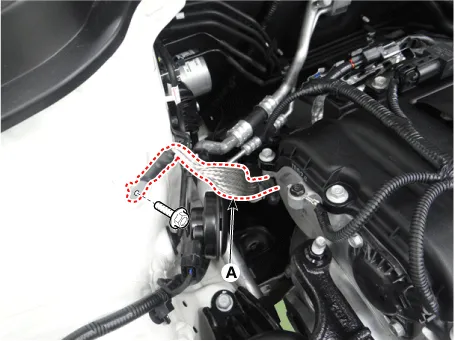
Remove the roll rod bracket (A).
|
| 18. |
Remove the roll rod mounting support bracket (A).
|
| 19. |
Remove the sub frame. (Refer to Suspension system - "Sub frame") |
| 20. |
Support the engine and transaxle assembly with a lift table. |
| 21. |
Disconnect the engine ground cable (A).
|
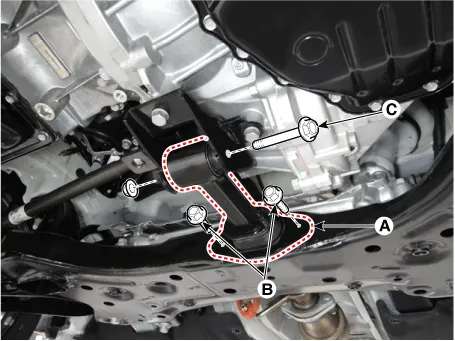
| 22. |
Remove the engine mounting support bracket (A).
|
| 23. |
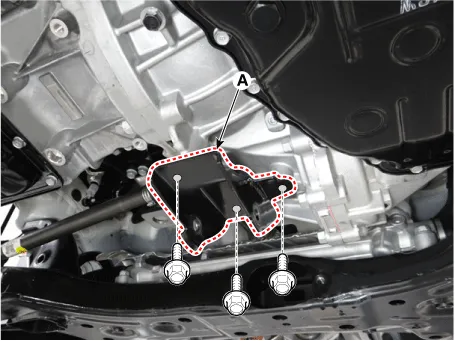
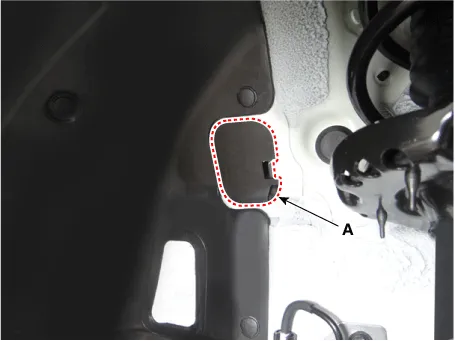
Remove the service cover (A).
|
| 24. |
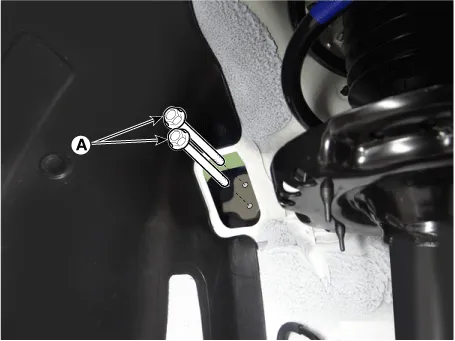
Remove the transaxle mounting bolts (A).
|
| 25. |
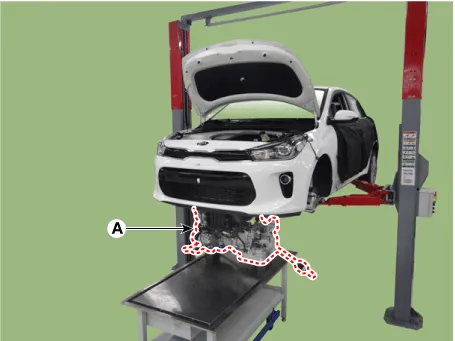
Remove the engine and transaxle assembly (A) by lifting vehicle.
|
| Installation |
Install the other parts in reverse order of removal.
Perform the following :
| • |
Adjust a shift cable. |
| • |
Refill engine with engine oil. |
| • |
Refill a transaxle with fluid. |
| • |
Refill a radiator and a reservoir tank with engine coolant. |
| • |
Place a heater control knob on "HOT" position. |
| • |
Clean battery posts and cable terminals and assemble. |
| • |
Inspect for fuel leakage. |
| – |
After assemble the fuel line, turn on the ignition switch (do not operate the starter) so that the fuel pump runs for approximately two seconds and fuel line pressurizes. |
| – |
Repeat this operation two or three times, then check for fuel leakage at any point in the fuel line. |
| • |
Bleed air from the cooling system. |
| – |
Start engine and let it run until it warms up. (until the radiator fan operates 3 or 4 times.) |
| – |
Turn Off the engine. Check the level in the radiator, add coolant if needed. This will allow trapped air to be removed from the cooling system. |
Components and components location Components 1. Engine mounting bracket 2. Engine mounting support bracket 3.
Other information:
Kia Rio 2017-2023 YB Service Manual: Vanity Lamp
Repair procedures Removal 1. Disconnect the negative (-) battery terminal. 2. Detach the vanity lamp (A) using a flat-tip screwdriver. 3. Disconnect the vanity lamp connector (A).
Kia Rio 2017-2023 YB Service Manual: Compressor
Description and operation Description The compressor is the power unit of the A/C system. It is located on the side of engine block and driven by a V-belt of engine. The compressor changes the low pressure and low temperature refrigerant gas into the high pressure and high temperature refrigerant gas.
Categories
- Manuals Home
- Kia Rio Owners Manual
- Kia Rio Service Manual
- Engine Electrical System
- Suspension System
- Motor Driven Power Steering
- New on site
- Most important about car
