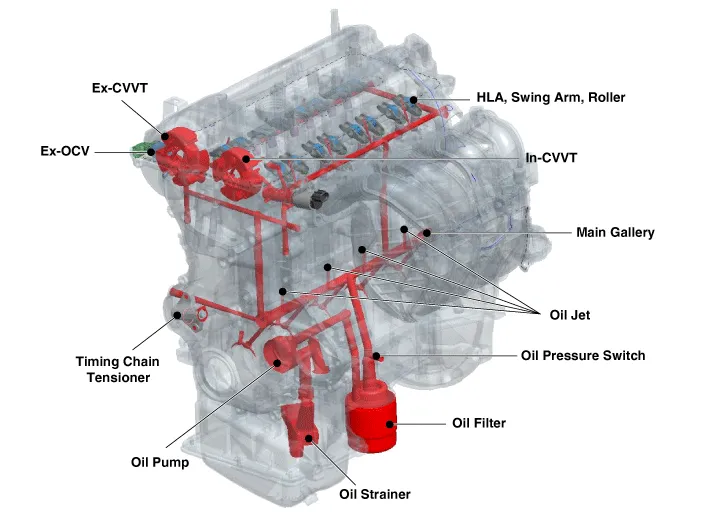
Kia Rio: Lubrication System / Engine Oil
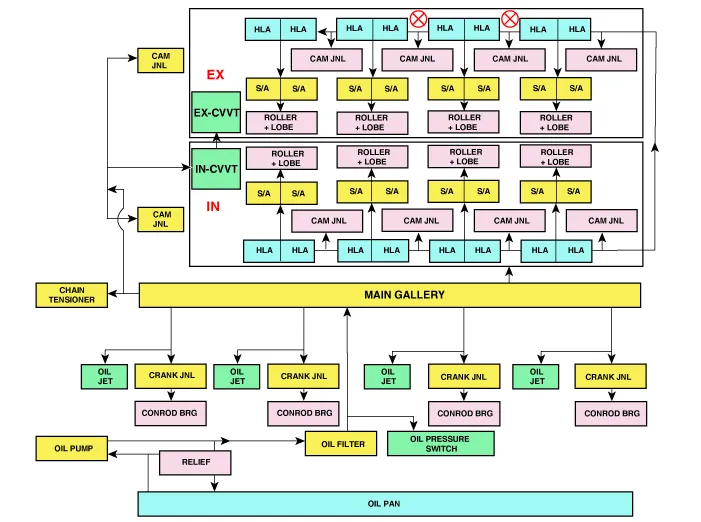
Flow diagram
| Flow Diagram |
Repair procedures
| Engine Oil And Filter Replacement |
|

| 1. |
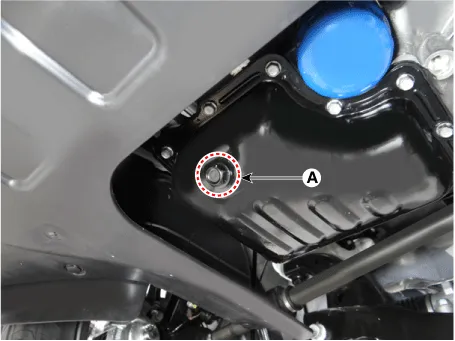
Drain the engine oil.
|
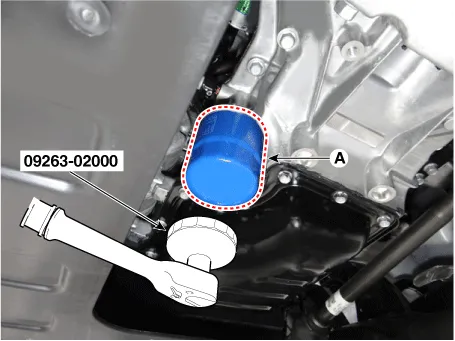
| 2. |
Replace the oil filter.
|
| 3. |
Install the oil drain plug with a new gasket.
|
| 4. |
Fill with new engine oil, after removing the engine oil level gauge.
|
| 5. |
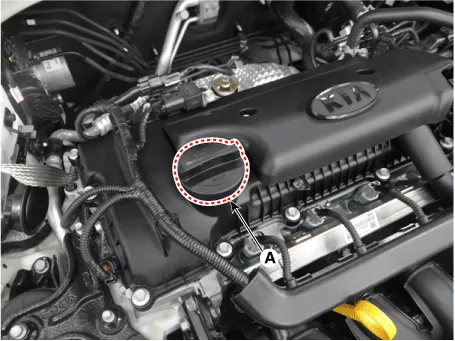
Install the oil filler cap. |
| 6. |
Start engine and check for oil leaks. |
| 7. |
Recheck the engine oil level. |
| 8. |
To reset the service interval to the recommended mileage, refer to the service mode section in the owner's manual for procedure (if applicable). |
| Inspection |
Engine Oil Inspection
| 1. |
Check the engine oil quality. Check for oil deterioration, entry of water, discoloring of thinning. If the quality is visibly poor, replace the oil. |
| 2. |
Check the engine oil level. After warming up the engine for five minutes, stop the engine and check the oil level. The level should be between the "L" and "F" marks on the dipstick. If low, check for oil leakage and add oil up to the "F" mark on the dipstick. |
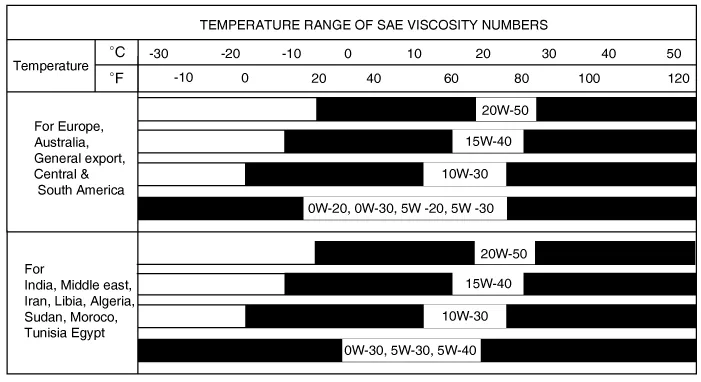
Selection Of Engine Oil
Recommendation
For Europe, Australia, General export, Central & South America
- API SN & ACEA C2 / 0W-20
For India, Middle east, Iran, Libia, Algeria, Sudan, Moroco, Tunisia Egypt
- API SM & ILSAC GF-4 / 5W-30
- ACEA A5/B5 / 5W-30
Allowed Oil Grade
- API SL or above
- ILSAC GF-3 or above
- ACEA A3/B3 or A3/B4
Allowed oil SAE viscosity
Repair procedures Removal and Installation 1. Disconnect the oil pressure switch connector (A) and then remove the oil pressure switch (B).
Other information:
Kia Rio 2017-2023 YB Service Manual: Lane Departure Warning System (LDWS) Unit
Components and components location Components Repair procedures Removal When replacing the LDWS switch, check that the symbol mark in the cluster operates normally by pressing the ON/OFF switch.
Kia Rio 2017-2023 YB Service Manual: Rear Glass Defogger Printed Heater
Repair procedures Inspection • Wrap tin foil around the end of the voltmeter test lead to prevent damaging the heater line. Apply pressure on the tin foil with hand and move the tin foil along the grid line to check for open circ
Categories
- Manuals Home
- Kia Rio Owners Manual
- Kia Rio Service Manual
- Body Electrical System
- Coolant
- Motor Driven Power Steering
- New on site
- Most important about car
