Kia Rio: SRSCM / PAB ON/OFF Switch
Description and operation
| Description |
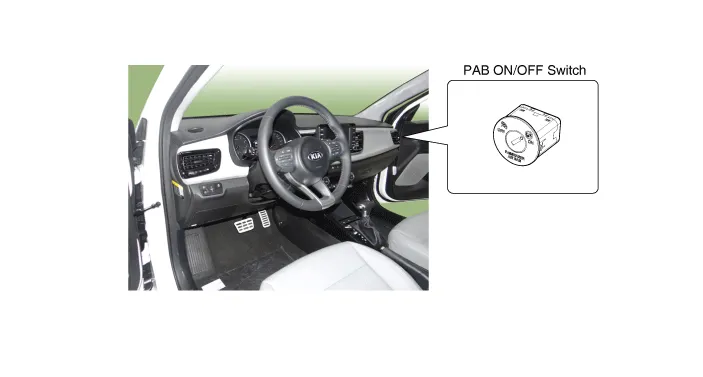
Driver can control the passenger airbag operating Condition (Enable or Disable) by using this PAB ON/OFF switch.
Passenger Airbag (PAB) ON/OFF Switch is installed in the crash pad side cover.
Components and components location
| Components |

Repair procedures
| Removal |
| 1. |
Remove the ignition key from the vehicle. |
| 2. |
Disconnect the battery negative cable and wait for at least three minutes before beginning to work. |
| 3. |
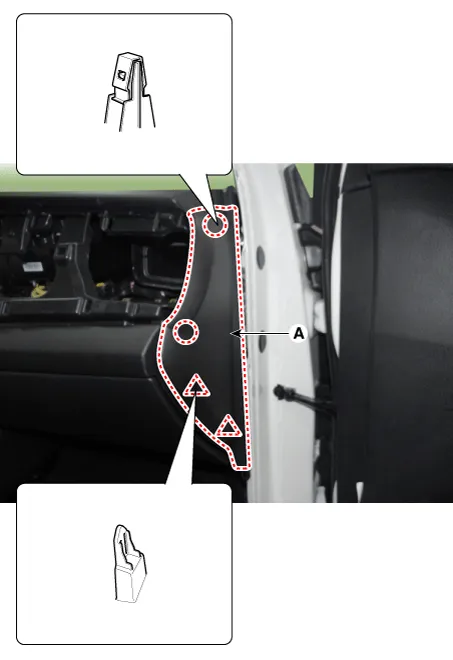
Remove the crash pad side cover (A).
|
| 4. |
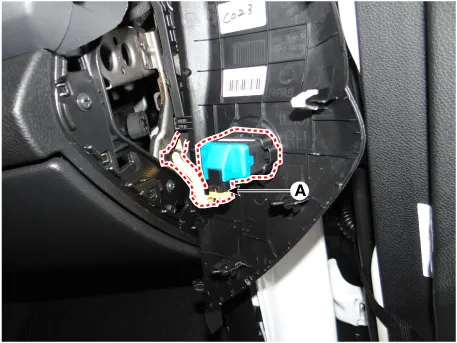
Disconnect the PAB ON/OFF switch connector (A).
|
| 5. |
Remove the PAB ON/OFF switch. |
| Installation |
| 1. |
Remove th e ignition key from the vehicle. |
| 2. |
Disconnect the battery negative cable and wait for at least three minutes before beginning to work. |
| 3. |
Install the PAB ON/OFF switch to the crash pad side cover. |
| 4. |
Connect the PAB ON/OFF switch connector. |
| 5. |
Install the crash pad side cover. (Refer to Body - "Crash pad side cover") |
| 6. |
After installing the SRSCM, confirm proper system operation:
|
Description and operation Description The SRSCM shall monitor the status of the driver and front passenger seat belt buckle. The SRSCM provides one pin each for the driver and front passenger seat belt buckle status input.
Specifications Specifications Item Specification Master cylinder Type Single Cylinder I.
Other information:
Kia Rio 2017-2023 YB Service Manual: Lane Departure Warning System (LDWS) Unit
Components and components location Components Repair procedures Removal When replacing the LDWS switch, check that the symbol mark in the cluster operates normally by pressing the ON/OFF switch.
Kia Rio 2017-2023 YB Service Manual: Blower Motor
Repair procedures Inspection 1. Connect the battery voltage and check the blower motor rotation. 2. If the blower motor does not operate well, substitute with a known-good blower motor and check for proper operation.
Categories
- Manuals Home
- Kia Rio Owners Manual
- Kia Rio Service Manual
- Radiator
- Body Electrical System
- Body Control Module (BCM)
- New on site
- Most important about car


