Kia Rio: Air Conditioning System / Evaporator Temperature Sensor
Description and operation
| Description |
The evaporator temperature sensor will detect the evaporator core temperature and interrupt compressor relay power in order to prevent evaporator freezing by excessive cooling.
Repair procedures
| Inspection |
| 1. |
Turn the ignition switch OFF. |
| 2. |
Disconnect the evaporator temperature sensor connector. |
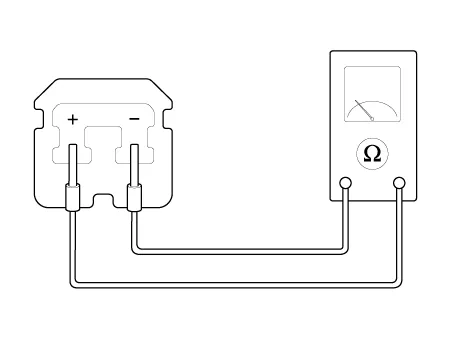
| 3. |
Measure resistance between terminal “+” and “-” of evaporator temperature sensor.
|
| 4. |
Connect the evaporator temperature sensor connector. |
| 5. |
Run the engine and turn the A/C switch ON, then measure the voltage between the terminals of harness connector. Specification
|
| Replacement |
| 1. |
Disconnect the negative (-) battery terminal. |
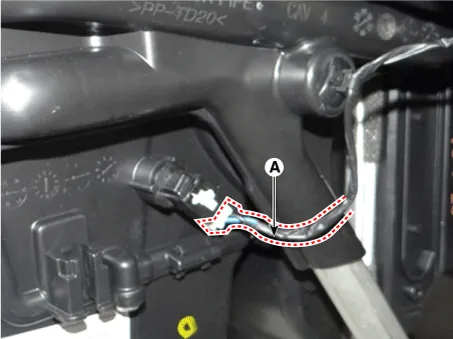
| 2. |
Disconnect the evaporator temperature sensor connector (A).
|
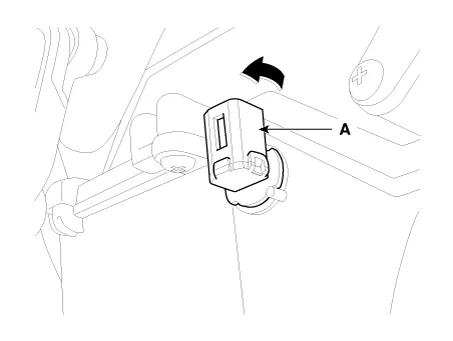
| 3. |
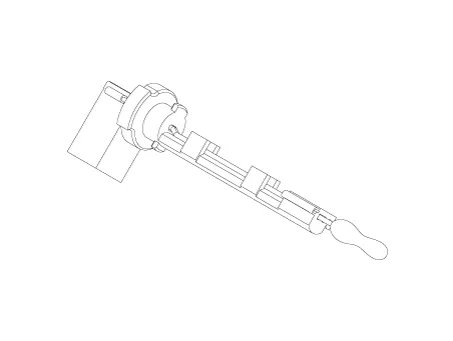
Remove the evaporator temperature sensor (A) by pulling it out after rotating 90° in a counterclockwise direction.
|
| 4. |
Installation is the reverse order of removal. |
Description and operation Description The A/C Pressure Transducer (APT) convert the pressure value of high pressure line into voltage value after measure it.
Description and operation Description The photo sensor is located at the center of defrost nozzles. The photo sensor contains a photovoltaic (sensitive to sunlight) diode.
Other information:
Kia Rio 2017-2023 YB Service Manual: Power Door Mirrors
C
Kia Rio 2017-2023 YB Service Manual: Rear Washer Switch
Repair procedures Inspection Multifunction Switch Inspection [BCM Type] 1. Check for continuity between the terminals in each switch position as shown below. [Left Handle Drive] Switch Switch position Switch terminal
Categories
- Manuals Home
- Kia Rio Owners Manual
- Kia Rio Service Manual
- Engine Mechanical System
- Suspension System
- Maintenance
- New on site
- Most important about car
