Kia Rio: Front Door / Front Door Trim
Components and components location
| Component Location |
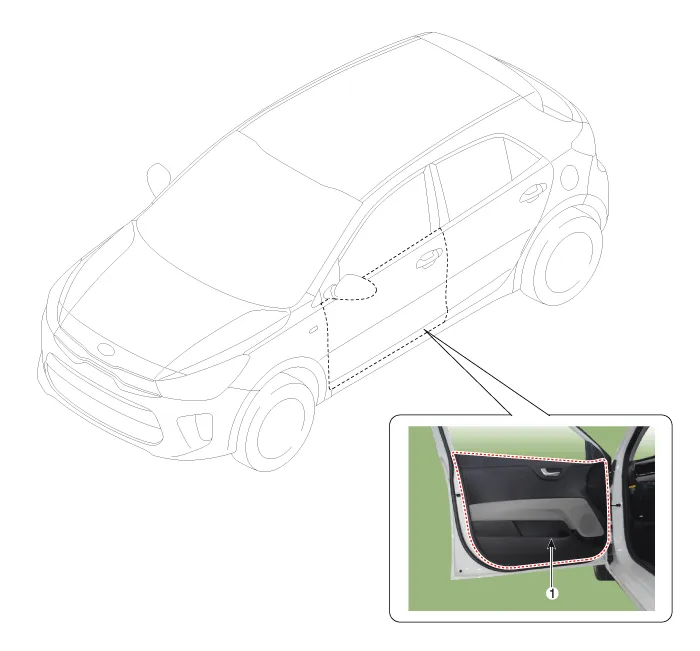
| 1. Front door trim |
Repair procedures
| Replacement |
Put on gloves to protect your hands. |

|

| 1. |
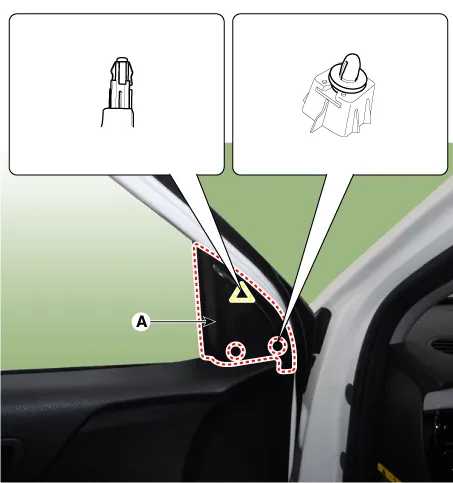
Separate the front door quadreant inner cover (A) by using the remover.
|
| 2. |
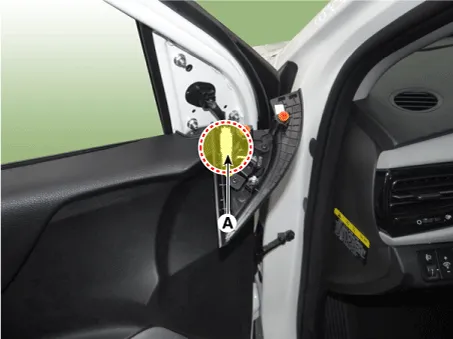
Disconnect the front door tweeter speaker connector (A).
|
| 3. |
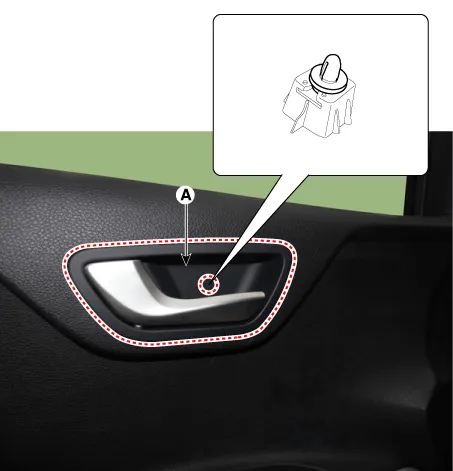
Remove the front door inside handle cap (A) by using the remover.
|
| 4. |
Loosen the screw (B) after opening the cap (A).
|
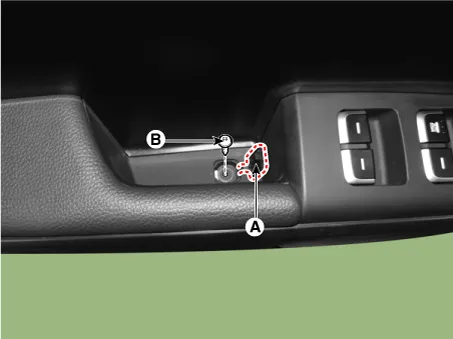
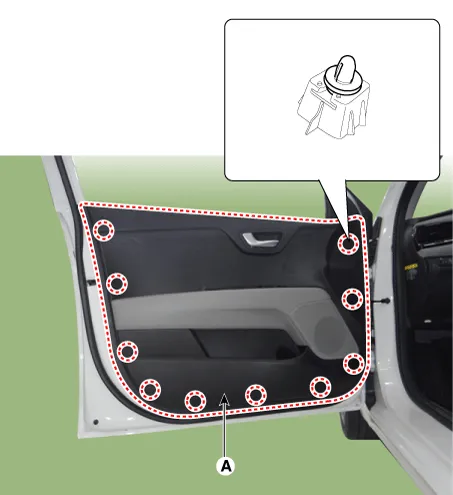
| 5. |
Remove the door trim (A).
|
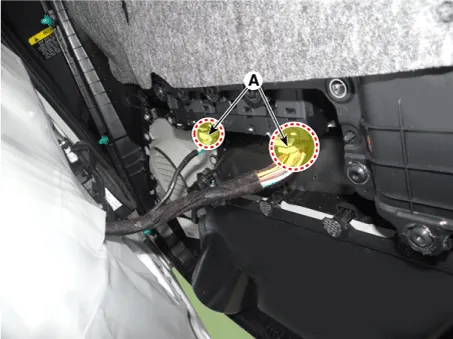
| 6. |
Disconnect the power window switch connector (A).
|
| 7. |
Install in the reverse order of removal.
|
Components and components location Components 1. Front door trim 2. Front door panel 3. Front door rear channel & run 4.
Repair procedures Replacement Put on gloves to protect your hands. • Use a plastic panel removal tool to remove interior trim pieces without marring the surface.
Other information:
Kia Rio 2017-2023 YB Service Manual: Front Fog Lamps
Repair procedures Removal 1. Disconnect the negative (-) battery terminal. 2. Remove the front bumper assembly. (Refer to Body - "Front Bumper Assembly") 3. Remove the front fog lamp assembly (A) after loosening the mounting screws.
Kia Rio 2017-2023 YB Service Manual: Rear Glass Defogger Switch
Repair procedures Inspection 1. In the body electrical system, failure can be quickly diagnosed by using the vehicle diagnostic system (KDS/GDS). The diagnostic system (KDS/GDS) provides the following information. (1) Self diagnosis : Checking failure and code number (DTC)
Categories
- Manuals Home
- Kia Rio Owners Manual
- Kia Rio Service Manual
- Maintenance
- Engine Oil and Filter
- Maintenance
- New on site
- Most important about car
