
Kia Rio: ear Bumper / Rear Bumper beam Assembly
Components and components location
| Component Location |
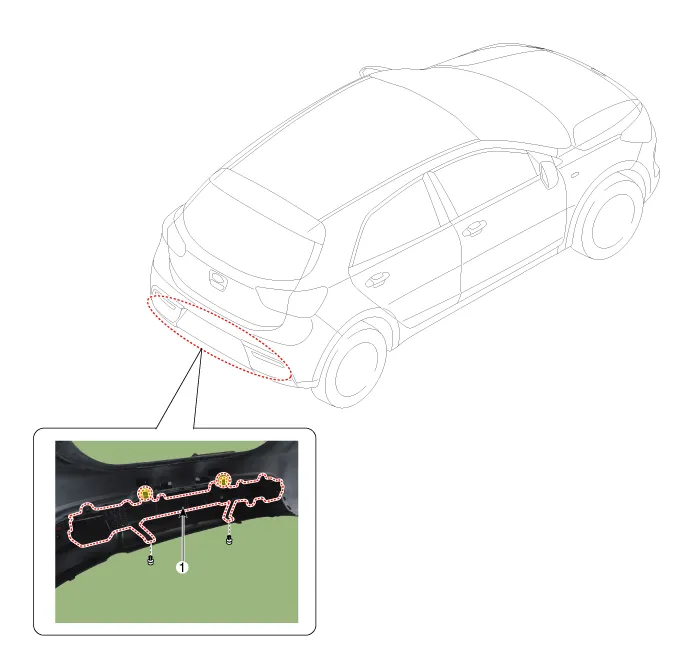
| 1. Rear bumper beam assembly
|
Repair procedures
| Replacement |
Put on gloves to protect your hands. |

|

| 1. |
Remove the rear bumper cover. (Refer to Rear Bumper - "Rear Bumper Assembly") |
| 2. |
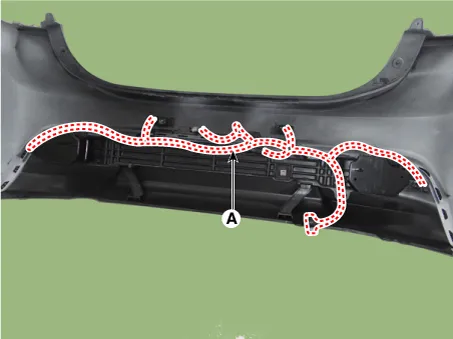
Disconnect the rear bumper beam mounting wiring harness (A).
|
| 3. |
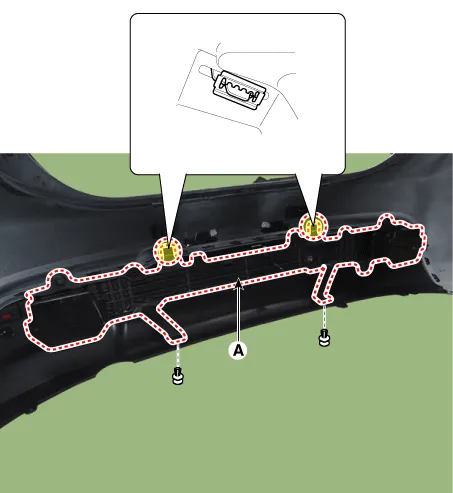
Remove the rear bumper beam assembly (A) after loosening the mounting clips.
|
| 4. |
Remove the smart key antenna (A) after loosening the screw.
|

| 5. |
Install in the reverse order of removal.
|
Components and components location Component Location 1. Rear bumper cover Repair procedures Replacement Put on gloves to protect your hands.
Components and components location Components 1. Rear door trim complete 2. Rear door complete 3. Rear door belt inside weatherstrip 4.
Other information:
Kia Rio 2017-2023 YB Service Manual: Lane Departure Warning System (LDWS) Unit
Components and components location Components Repair procedures Removal When replacing the LDWS switch, check that the symbol mark in the cluster operates normally by pressing the ON/OFF switch.
Kia Rio 2017-2023 YB Service Manual: Condenser
Repair procedures Inspection 1. Check the condenser fins for clogging and damage. If clogged, clean them with water, and blow them with compressed air. If bent, gently bend them using a screwdriver or pliers. 2.
Categories
- Manuals Home
- Kia Rio Owners Manual
- Kia Rio Service Manual
- Body Electrical System
- Motor Driven Power Steering
- Restraint
- New on site
- Most important about car
