Kia Rio: Manual Transaxle System / Manual Transaxle Oil
Repair procedures
| Inspection |
Manual Transaxle Oil Level Check
| 1. |
Stop the engine and then raise the vehicle using the lift. |
| 2. |
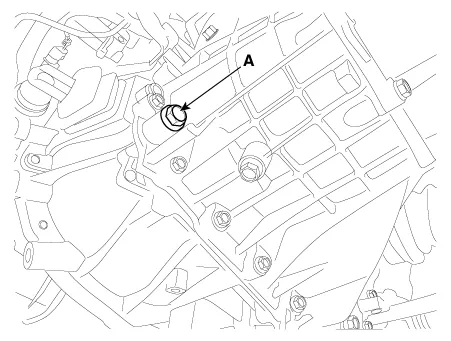
Remove the oil filler plug (A).
|
| 3. |
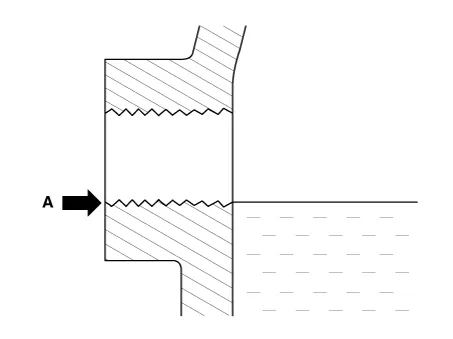
Check the condition of the oil and make sure that it is at the proper level (A).
|
| 4. |
Install the oil filler plug (A).
|

| Replacement |
| 1. |
Stop the engine and then raise the vehicle using the lift. |
| 2. |
Remove the drain plug (A), allow the oil to drain out and then reinstall the drain plug.
|

| 3. |
Remove the oil filler plug (A).
|
| 4. |
Fill the manual transaxle with manual transaxle oil through the filler hole.
|
| 5. |
Install the oil filler plug (A).
|
Components and components location Components 1. Control shaft complete 2. Control cable bracket 3. Transaxle support bracket 4.
Other information:
Kia Rio 2017-2023 YB Service Manual: Room Lamp
Repair procedures Removal • Put on gloves to prevent hand injuries. • When removing with a flat-tip screwdriver or remover, wrap protective tape around the tools to prevent damage to componen
Kia Rio 2017-2023 YB Service Manual: Power Mosfet (FATC)
Repair procedures Inspection 1. Turn the ignition switch ON. 2. Manually operate the control switch and measure the voltage of blower motor. 3. Select the control switch to raise voltage until high speed.
Categories
- Manuals Home
- Kia Rio Owners Manual
- Kia Rio Service Manual
- Maintenance
- Body Electrical System
- Maintenance
- New on site
- Most important about car
