Kia Rio: Power Windows / Power Window Motor
Components and components location
| Components |
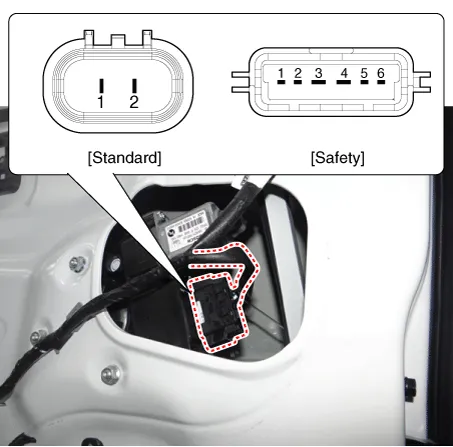
| [Standard window motor] |

| [Safety window motor] |
Repair procedures
| Inspection |
|

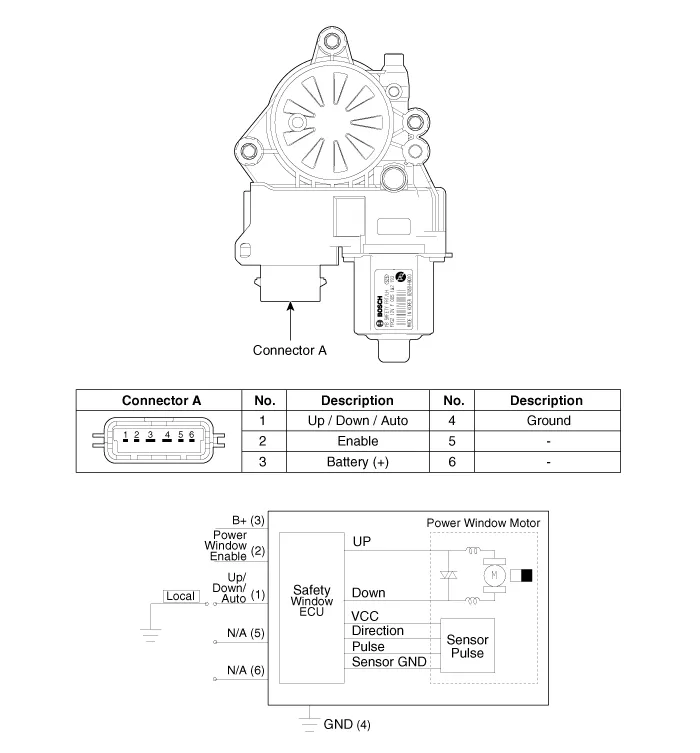
Front Power Window Motor
| 1. |
Remove the front door trim. (Refer to Body - "Front Door Trim") |
| 2. |
Remove the front door trim seal. (Refer to Body - "Front Door Window Glass") |
| 3. |
Disconnect the connector (A) from the motor.
|
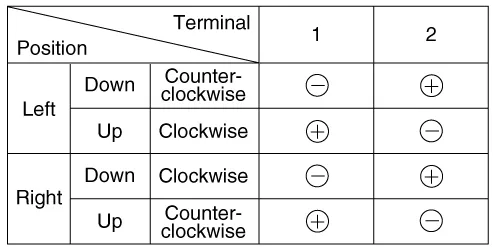
| 4. |
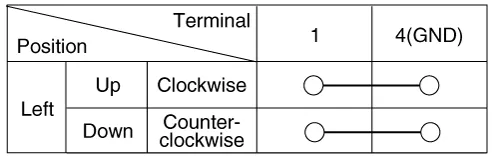
Connect the motor terminals directly to battery voltage (12V) and check that the motor operates smoothly. Next, reverse the polarity and check that the motor operates smoothly in the reverse direction. If the operation is abnormal, replace the motor. [Standard window motor]
[Safety window motor]
|

Rear Power Window Motor
| 1. |
Remove the rear door trim. (Refer to Body - "Rear Door Trim") |
| 2. |
Remove the rear door trim seal. (Refer to Body - "Rear Door Window Glass") |
| 3. |
Disconnect the connector (A) from the motor.
|
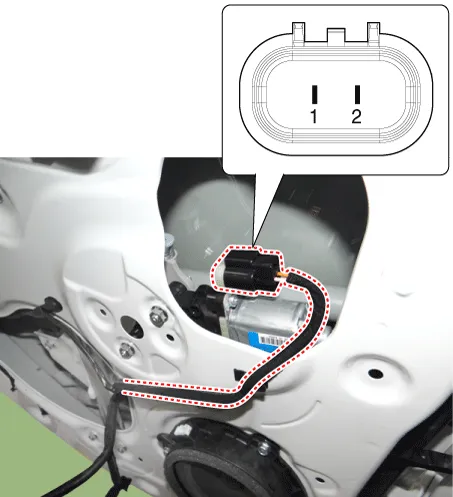
| 4. |
Connect the motor terminals directly to battery voltage (12V) and check that the motor operates smoothly. Next, reverse the polarity and check that the motor operates smoothly in the reverse direction. If the operation is abnormal, replace the motor.
|
Components and components location Component Location 1. Driver power window switch 2. Assist power window switch 3.
Components and components location Components Driver Power Window Switch Connector Pin Information [Front / Rear Driver Safety - Auto Up/Down] [LHD] No.
Other information:
Kia Rio 2017-2023 YB Service Manual: Power Window Switch
Components and components location Components Driver Power Window Switch Connector Pin Information [Front / Rear Driver Safety - Auto Up/Down] [LHD] No. Description No. Description 1 Front right power window (Up) 10
Kia Rio 2017-2023 YB Service Manual: Rear Wiper/Washer
C
Categories
- Manuals Home
- Kia Rio Owners Manual
- Kia Rio Service Manual
- Cooling System
- Heating,Ventilation, Air Conditioning
- Engine Oil and Filter
- New on site
- Most important about car
