
Kia Rio: Front Suspension System / Front Stabilizer Bar
Repair procedures
| Removal |
| 1. |
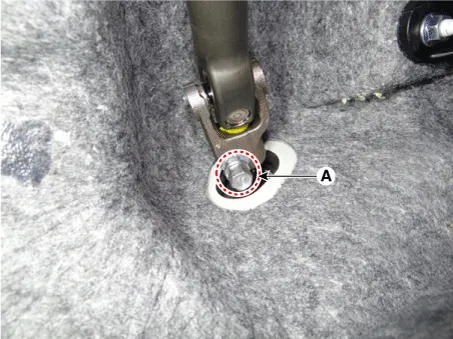
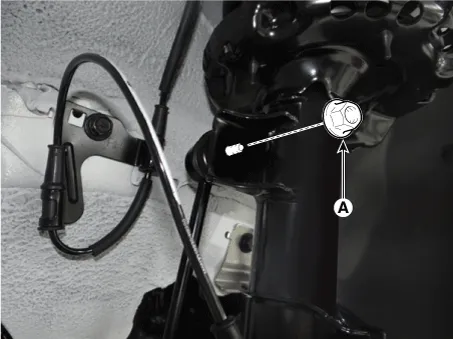
Remove the universal joint bolt (A).
|

| 2. |
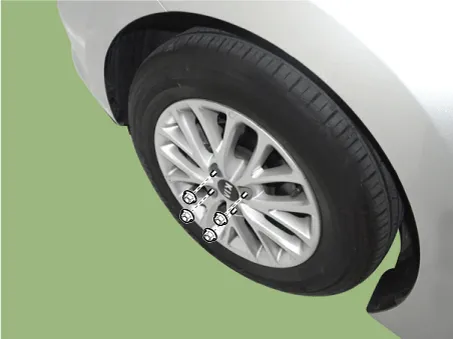
Remove wheel nuts, front wheel and tire from front hub.
|
| 3. |
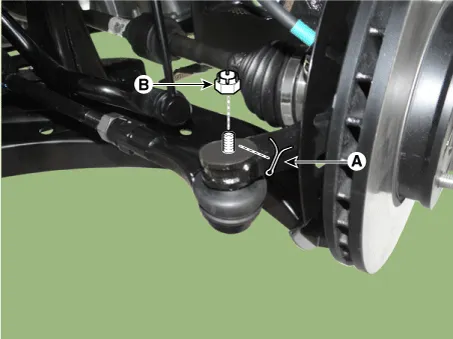
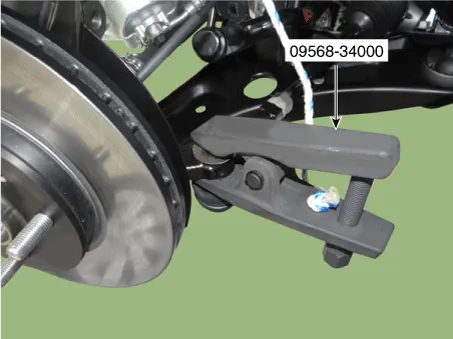
Remove the tie rod end ball joint from the knuckle by using the SST (09568-34000).
|
| 4. |
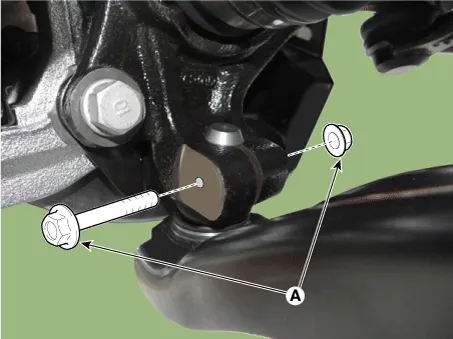
Remove the lower arm bolt and nut (A).
|
| 5. |
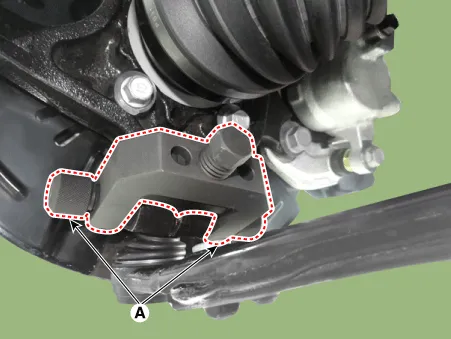
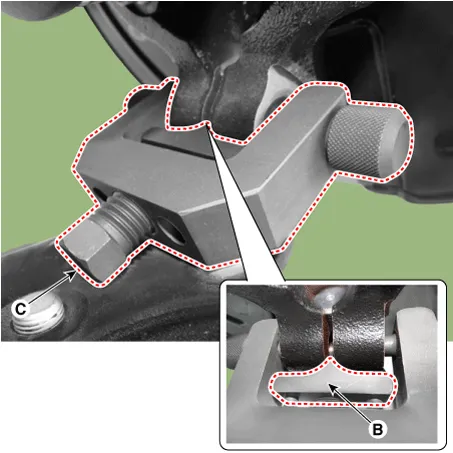
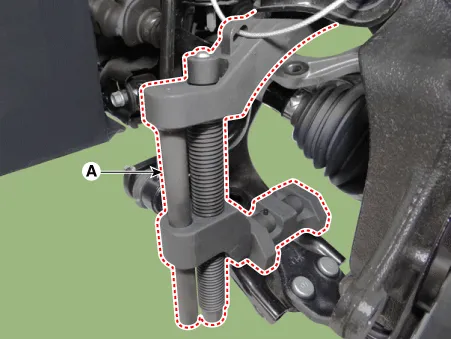
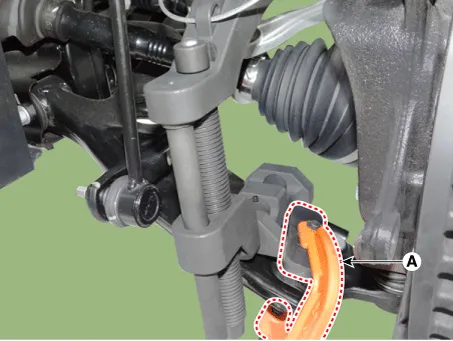
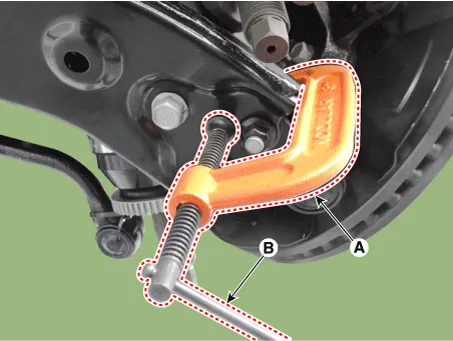
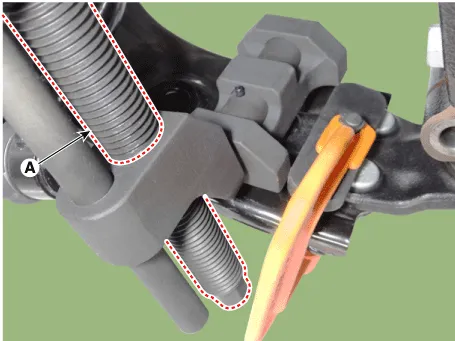
Remove the front lower arm from the front knuckle using the SST (0K545-A9100).
|
| 6. |
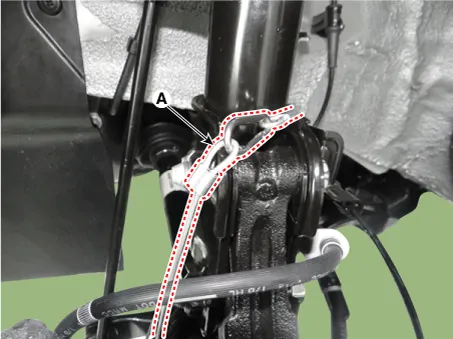
Remove the stabilizer link nut (A).
|

| 7. |
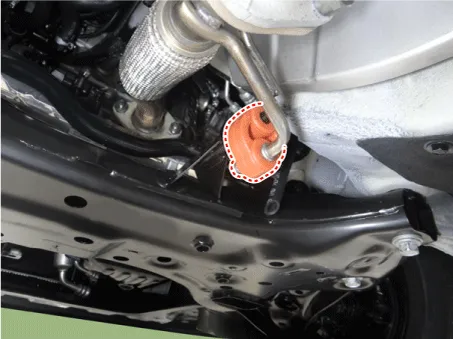
Remove the hanger.
|
| 8. |
Remove the roll rod bracket. D 1.4 U2 TCI (Refer to Engine Mechanical System - "Engine Mounting") G 1.0 T-GDI (Refer to Engine Mechanical System - "Engine Mounting") G 1.2 MPI (Refer to Engine Mechanical System - "Engine Mounting") G 1.4 MPI (Refer to Engine Mechanical System - "Engine Mounting") |
| 9. |
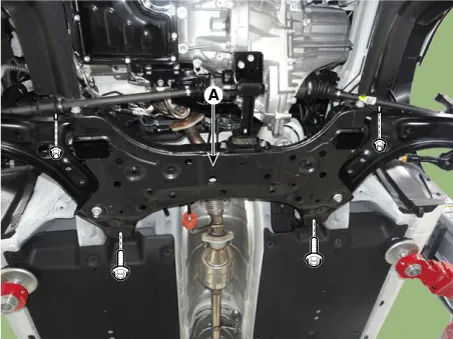
Loosen the bolts & nuts and then remove the sub frame (A).
|
| 10. |
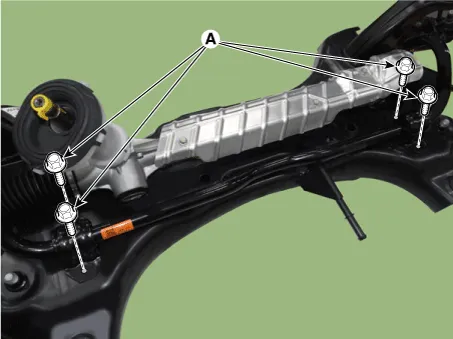
Loosen the bolts (A) and then remove the stabilizer bar assembly.
|
| 11. |
Loosen the nut (A) and then remove the stabilizer link.
|
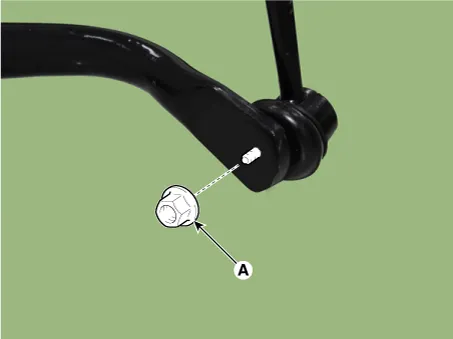
| 12. |
Install in the reverse order of removal. |
| 13. |
Check the wheel alignment. (Refer to Tires/Wheels - "Alignment") |
| Inspection |
| 1. |
Check the bushing for wear and deterioration. |
| 2. |
Check the front stabilizer bar for deformation. |
| 3. |
Check the front stabilizer link ball joint for damage. |
Repair procedures Removal 1. Remove wheel nuts, front wheel and tire from front hub. Tightening torque: 107.
Repair procedures Removal 1. Remove the universal joint bolt (A). Tightening torque : 32.4 - 37.3 N·m (3.
Other information:
Kia Rio 2017-2023 YB Service Manual: Auto Defogging Sensor (FATC only)
Description and operation Description The Auto Defogging Sensor is installed on front windshild glass. The Auto Defogging Sensor senses moisture on the windshild. The air conditioner control module receives the signal from the sensor and eliminate the fog by controlling the intake actuator, A/C, auto defogging actuator, blower m
Kia Rio 2017-2023 YB Service Manual: Blower Resistor (MANUAL)
Repair procedures Inspection 1. Measure the resistance between the terminals. 2. The measured resistance is not within specification, the blower resistor must be replaced. (After removing the resistor) Replacement 1.
Categories
- Manuals Home
- Kia Rio Owners Manual
- Kia Rio Service Manual
- Steering System
- Engine Control / Fuel System
- Motor Driven Power Steering
- New on site
- Most important about car
