Kia Rio: Body (Interior and Exterior) / Fender
Components and components location
| Component Location |
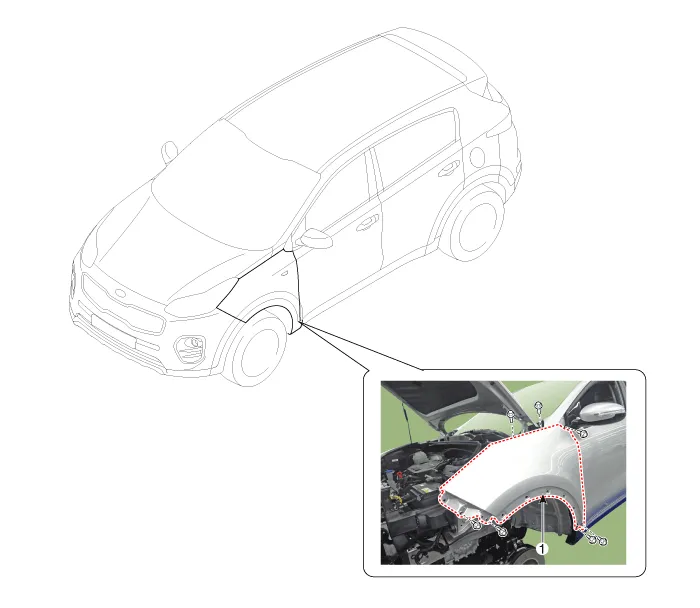
| 1. Fender assembly |
Repair procedures
| Replacement |
|

| 1. |
Remove the head lamps. (Refer to Body Electrical System - "Headlamps") |
| 2. |
Remove the front wheel guard. (Refer to Body Side Molding - "Front Wheel Guard") |
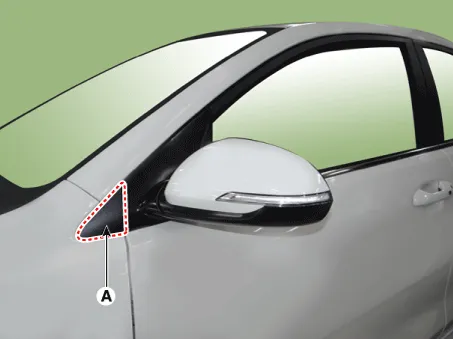
| 3. |
Using a remover, remove the delta garnish (A).
|
| 4. |
After loosening the mounting screws, bolts, and nut, remove the fender assembly (A).
|
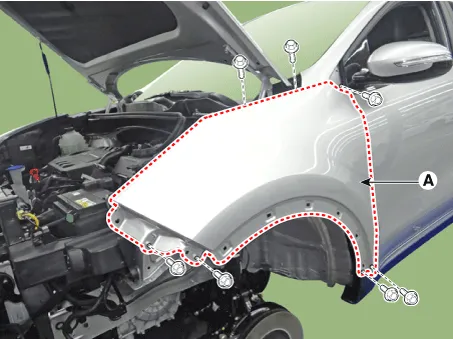
| 5. |
Install in the reverse order of removal.
|
Components and components location Component Location 1. Main crash pad assembly Repair procedures Replacement Put on gloves to protect your hands.
Repair procedures Replacement Put on gloves to protect your hands. • Use a plastic panel removal tool to remove interior trim pieces without marring the surface.
Other information:
Kia Rio 2017-2023 YB Service Manual: Windshield Wiper/Washer
Components and components location Component Location 1. Windshield wiper arm & blade 2. Wiper & washer switch 3. Windshield washer hose & nozzle 4. Wiper motor & linkage assembly 5. Washer motor 6.
Kia Rio 2017-2023 YB Service Manual: Heating,Ventilation, Air Conditioning
Specifications Specification Air Conditioner Item Specification Compressor Type DVE12 Oil type & Capacity PAG 30, 120 ± 10 g Displacement 122 cc/rev Expansion valve Type
Categories
- Manuals Home
- Kia Rio Owners Manual
- Kia Rio Service Manual
- Heating,Ventilation, Air Conditioning
- Motor Driven Power Steering
- Body Electrical System
- New on site
- Most important about car
